- Hard
- Difficulty
- 12 min
- Read time
- 5
- Steps
- 1.0
- Checked on
30-Second Quick-Start (TL;DR)
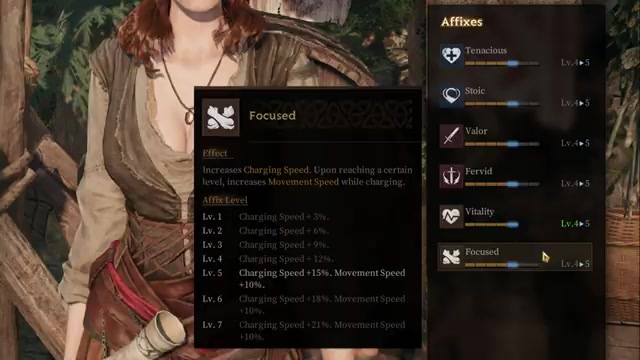
- Equip Tenacious, Stoic, Valor, Frvid, and Vitality as your five core talents
- Add Focused last to gain 15% faster charging speed and movement boost—roughly half a second quicker on charged attacks
- Use Hook, Parry, and Breakthrough Charge as your main skills with Javelin Thrust on spear and shield
- Apply Wither Mark via Javelin Thrust, then swap weapons and grab the enemy immediately after their dodge
- Follow up with Breakthrough Charge, charged heavy attacks, or Parry depending on the situation
- Detonate Wither Mark repeatedly with Bad Karma talent to stack burning and debuffs
- Use Sacred Body or Momentum talent to survive mage burst damage
- Expect to spend significant time tuning this build—it’s expensive but rewards skilled play in both PvE and PvP
What This Guide Helps You Do
This guide teaches you how to build and pilot the Withered Knight Purple gear loadout in Mistfall Hunter, a high-investment setup that maximizes healing, damage output, and survivability through careful talent synergy and weapon-swap timing. It’s best for players who want to feel strong in both PvE and PvP, have access to purple-tier gear, and are willing to learn a timing-dependent combo rotation that rewards precision.
Requirements & Prep
You’ll need access to purple-rarity gear pieces for the Withered Knight. This loadout took a solid 2 hours to perfect, so expect some iteration if you’re adapting it to your own gear rolls. When you copy the exact talent and skill arrangement, do it slowly to avoid mistakes.
This build is stamina-hungry due to Withered Knight’s kit, so Vitality is non-negotiable. If you don’t have purple gear yet, this guide will still teach you the combo logic, but you may need to substitute talents or skills based on what’s available.
Route Overview
The Withered Knight Purple gear build isn’t a dungeon route—it’s a combat loadout you equip before entering PvE encounters or PvP matches. Here’s the flow: initiate with Javelin Thrust to apply Wither Mark, bait the enemy’s dodge by attacking a few times, swap weapons as fast as possible, grab them on their dodge recovery, then chain either Breakthrough Charge, a charged heavy attack, or Parry depending on what they do next. Your goal is to keep Wither Mark active so you can detonate it repeatedly with Bad Karma, stacking burning and debuffs while healing from Stoic and Tenacious whenever you drop below 30% HP.
Step-by-Step Walkthrough
Equip Your Core Five Talents
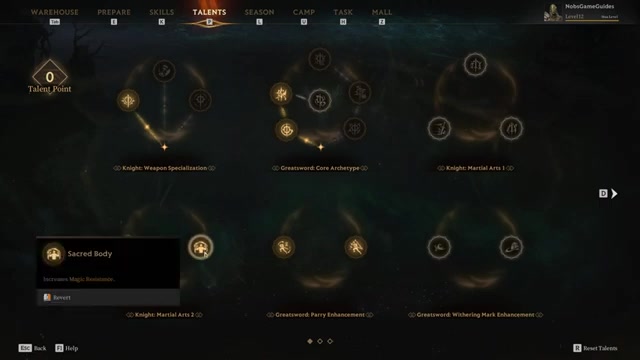
Start by locking in Tenacious for extra max HP and bonus healing—you’ll heal more from both potions and the Stoic talent. This is your foundation for survivability.
Next, add Stoic, which grants resistances and a passive that triggers around 150 HP recovery whenever you fall below 30% health. It’s your emergency heal and pairs perfectly with Tenacious.
Slot in Valor for extra damage. It keeps PvE smooth and helps you feel strong in PvP encounters.
Add Frvid as your fourth talent. Nothing else fits that can reach level 5, and Frvid delivers a solid 9% bonus damage plus reduced energy cost when you’re at full HP, both valuable in PvE and PvP.
Finally, add Vitality because Withered Knight is extremely stamina-hungry. Without it, you’ll run out of stamina mid-combo.
Add Focused as Your Sixth Talent
Focused goes last in the loadout. It grants 15% charging speed and significant movement speed. This makes your charged attacks roughly half a second faster, a difference that can be gamechanging in both PvE and PvP. You can swap it out for survivability if needed, but the speed gain is worth testing first.
Select Your Skills: Hook, Parry, and Breakthrough Charge
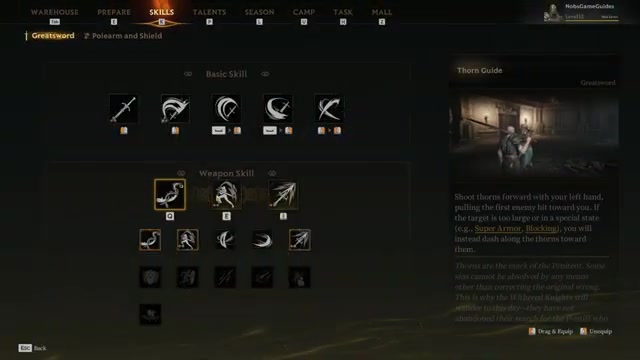
Equip Hook as one of your three main abilities. It’s your utility grab tool.
Add Parry as your defensive skill. You’ll use this to block incoming damage and set up counterattacks.
Use Breakthrough Charge as your third ability. It’ll be a key part of your combo chain.
On your spear and shield weapon, set Javelin Thrust as your special attack. This applies Wither Mark to the target—the cornerstone of your damage rotation.
Layer On Your Talents: Bad Karma and Sacred Body
Equip Bad Karma as a core talent. This talent applies many useful debuffs whenever you detonate Wither Mark. The burning effect alone is worth taking this talent.
Add Sacred Body because mages are dealing very high damage in current Mistfall Hunter meta. If you’d rather not use Sacred Body, take Momentum instead: it gives you Judgment energy on your sword after Breakthrough Charge, enabling a follow-up attack.
Optimize Your Parry and Breakthrough Charge Talents
Equip both Parry talents for better cooldown reduction and super armor on the riposte attack. Super armor means you won’t be interrupted during your parry counter.
Add both Breakthrough Charge talents. The first gives super armor on the second hit, and the second makes the second hit also detonate Wither Mark. This is crucial for your combo chain.
Builds & Loadouts
The Complete Withered Knight Purple Gear Build
The full loadout is:
- Talents: Tenacious, Stoic, Valor, Frvid, Vitality, Focused
- Skills: Hook, Parry, Breakthrough Charge (main abilities)
- Weapon Special (Spear & Shield): Javelin Thrust
- Greatsword Talent: Greatsword Expert (to unlock 3 abilities instead of 2)
- Additional Talents: Bad Karma, Sacred Body (or Momentum), both Parry talents, both Breakthrough Charge talents
This is an expensive loadout because it requires purple-rarity gear pieces and careful talent alignment. It took 2 hours to perfect, so don’t expect to nail the exact configuration on your first try.
Alternative Talent Swaps
If mages aren’t a threat in your current content, swap Sacred Body for Momentum to gain Judgment energy after Breakthrough Charge, enabling a second attack in quick succession.
If you’re running low on talent slots, Focused can be dropped in favor of another survivability or damage talent. The half-second charging speed boost is powerful but not mandatory.
The Core Combo Rotation
Initiate: Javelin Thrust + Basic Attacks
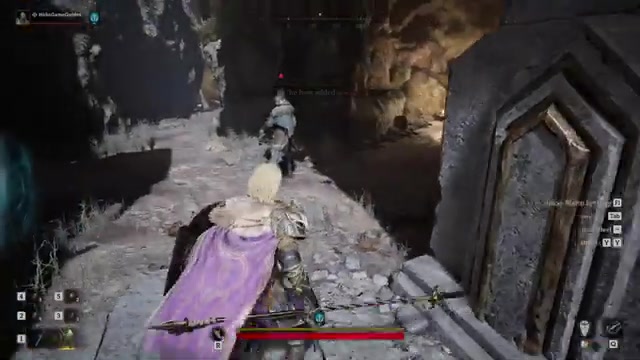
Open every engagement with Javelin Thrust on your spear and shield. This applies Wither Mark to the target. After landing Javelin Thrust, throw in a few basic attacks if you want. About 90% of the time the enemy will dodge away in response.
The Weapon Swap and Grab
The moment the enemy dodges, swap weapons as fast as possible and grab them immediately after their dodge recovery ends. This is the timing-critical moment. Your Hook skill will pull them toward you, setting up your next action.
Follow-Up: Chase, Charge, or Parry
After the grab, you’ve got three main options depending on the situation:
- Chase with Breakthrough Charge: Use Breakthrough Charge to close distance and land the second hit, which detonates Wither Mark and triggers Bad Karma debuffs.
- Charged Heavy Attack: If the enemy is far away or low on health, a charged heavy attack can finish them or reapply pressure.
- Parry: If the enemy is about to attack, use Parry to block and riposte with super armor, resetting the exchange in your favor.
This is something you’ll have to decide on the fly depending on the situation. There’s no single correct answer: it depends on enemy position, your stamina, and their defensive posture.
Repeat: Wither Mark Detonation
Your goal is to keep Wither Mark active and detonate it repeatedly using Bad Karma. Each detonation applies burning and debuffs, ramping your damage. If Wither Mark falls off, reapply it with Javelin Thrust and restart the combo.
Troubleshooting & Common Mistakes
- Running out of stamina mid-combo: You’re not using Vitality or you’re spamming abilities too fast. Slow down, land basic attacks between abilities, and make sure Vitality is equipped.
- Missing the weapon-swap grab timing: Practice the swap-to-grab window on training dummies. It’s tight—aim to grab within 0.5 seconds of their dodge ending.
- Wither Mark not applying: Make sure Javelin Thrust is equipped on your spear and shield, and that you’re actually hitting the target with it. Dodges and blocks will prevent the mark.
- Bad Karma debuffs not stacking: You’re not detonating Wither Mark frequently enough. Use Breakthrough Charge’s second hit or other Wither detonation sources more often.
- Taking burst damage from mages: Sacred Body is your answer. If you’re still dying, prioritize Tenacious and Stoic healing—they trigger at 30% HP, so play around that threshold.
- Feeling weak in PvE: Make sure Valor and Frvid are equipped. Valor adds raw damage, and Frvid’s 9% bonus at full HP stacks with everything else.
- Charged attacks feel slow: You’re missing Focused or it’s not equipped. Focused cuts roughly half a second off charge time—it’s noticeable.
- Loadout link doesn’t work: Copy the exact talent and skill arrangement by hand. Do it slowly to avoid typos or mistakes.
Advanced Tips & Time Saves
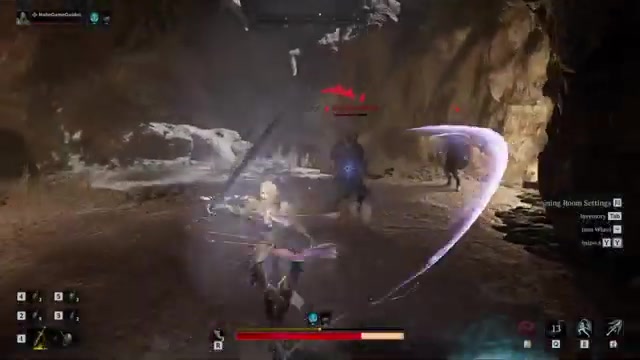
Weapon-swap buffering: Start your weapon swap slightly before the enemy’s dodge ends. If timed right, you’ll grab them the instant they’re vulnerable, leaving them no time to react. This is a high-skill play that separates good Withered Knight pilots from great ones.
Frvid uptime: Frvid’s 9% damage bonus triggers at full HP. After a successful combo, back off briefly to let your HP stabilize at full, then re-engage. This keeps Frvid active and your damage scaling high.
Stoic threshold play: Stoic triggers around 150 HP when you fall below 30%. Use this as a free heal window—intentionally let damage bring you near 30%, then back off to proc Stoic and reset. It’s risky but effective in extended fights.
Parry cancels: If you’re in a bad position after a combo, Parry can interrupt your recovery animation and set up a counter. This isn’t officially confirmed, but it’s a natural extension of the Parry talent system.
FAQ
What is the Withered Knight Purple gear build in Mistfall Hunter?
It’s a high-investment combat loadout using purple-rarity gear that combines Tenacious, Stoic, Valor, Frvid, Vitality, and Focused talents to maximize healing, damage, and survivability. The build revolves around applying Wither Mark with Javelin Thrust, then detonating it repeatedly with Bad Karma to stack debuffs and burning while healing from Stoic and Tenacious triggers.
Why is Vitality so important for this build?
Withered Knight is extremely stamina-hungry, and Vitality provides the stamina pool you need to execute your full combo rotation without running dry mid-fight. Without it, you’ll stall out and lose momentum.
How much faster are charged attacks with Focused?
Focused grants 15% charging speed, which translates to roughly half a second faster on your charged attack animations. A side-by-side comparison makes the difference obvious, and it’s gamechanging for both PvE and PvP.
What do I do if the enemy doesn’t dodge after Javelin Thrust?
About 90% of the time the enemy will dodge away, which means some enemies may not. If they don’t dodge, continue with basic attacks or chain directly into Breakthrough Charge or a charged heavy attack without the weapon swap. Adapt based on what they do.
Can I use this build if I don’t have purple gear yet?
Yes, the combo logic works with any rarity gear. Prioritize Tenacious, Stoic, Vitality, and Javelin Thrust first, then add Valor, Frvid, and Bad Karma as you upgrade. Focused is a luxury talent—skip it early if you need survivability instead.
Should I use Sacred Body or Momentum?
Use Sacred Body if mages are dealing high damage in your current content. Use Momentum if you want to chain attacks after Breakthrough Charge without worrying about burst damage. Sacred Body is the default recommendation, but both are viable.
Checklist
0 of 18
Source & credit
This guide draws on the excellent video walkthrough by NoBS Game Guides — watch it for the full visual run-through, and give the creator your view: