30-Second Quick-Start (TL;DR)#
- Create a character and pick one of six classes (Sorcerer, Shadow Strikes, Wii Knight, Mercenary, Black Arrow, or Seer).
- Queue into either Hollow Grove or Brandergard as a solo player or trio; toggle off fill if you want to play duos with one friend.
- Drop in, loot containers and special zones marked by golden circles, and complete blue-marked quest objectives for rare materials.
- Hunt or avoid bosses and the mist lord depending on your team’s gear and confidence.
- When the Gilden Mist timer (or collapse phases on Brandergard) activates, find and kill a returner woodling to extract.
- Bring your loot back to Wind Rest Camp to upgrade buildings, craft gear, and level up your characters.
- Rinse and repeat, building your roster and equipment across multiple runs.
What This Guide Helps You Do#
This guide teaches you how to survive, cooperate, and thrive in Mistfall Hunter’s extraction-based world alongside your friends. Whether you’re learning the maps, understanding how the extraction mechanic works, building your character, or optimizing your camp upgrades, you’ll find the practical steps needed to make the most of every run. It’s best for players new to Mistfall Hunter or those unfamiliar with how the co-op squad system works, especially if you want to play with a friend or two rather than matchmake with randoms.
Requirements & Prep#
Before your first run, you need a character. The game launches with six unique classes, and you’ll start with one character slot. No special unlocks are required to begin—just pick a class that appeals to you and jump in. If you’re playing with friends, make sure you all understand the squad structure: the game officially supports solo play or trios of three players. If you want to play as a duo with one friend, you can toggle off the “fill squad” option to go in with just the two of you, though you’ll be at a disadvantage against full teams.
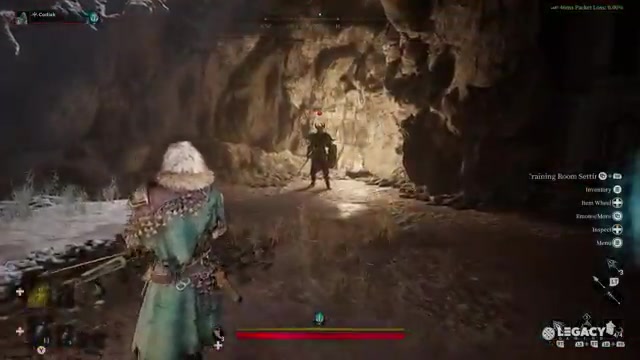
Optional but Helpful: Before your first real run, visit the Training Grounds at Wind Rest Camp. It’s one of the most robust training arenas available and lets you test your skills, talents, and equipment against various enemies—including simulated player characters. Spend 10 minutes here to get comfortable with your class’s move set before risking real loot.
Gear-wise, you don’t need to worry about optimization on day one. Combat bags (free loadouts of gear in white, green, blue, or purple quality depending on the map and difficulty) are provided, and the scavenger squad will generate new ones over time. You can always repair or craft better gear later at the workshop.
Route Overview#
A typical Mistfall Hunter run unfolds like this: you and your squad spawn into one of two maps—Hollow Grove or Brandergard—and immediately decide where to head based on proximity to quests, loot zones, and your team’s confidence level. You’ll explore interconnected areas, looting containers and special chests, completing optional quests marked by blue exclamation points to earn rare materials. As you roam, you’ll encounter PvE enemies and potentially enemy teams. If your group feels strong, you can hunt bosses or the map’s mist lord for high-value loot; if not, you farm safer zones. Once the Gilden Mist timer (on Hollow Grove) or collapse phases (on Brandergard) begin, you must locate and kill a returner woodling, grab the bell or extraction item it drops, and channel your escape. Once extracted, you return to Wind Rest Camp, store your loot in the warehouse, and spend resources upgrading buildings to get stronger for the next run.
Step-by-Step Walkthrough#
Choose Your Map and Difficulty#
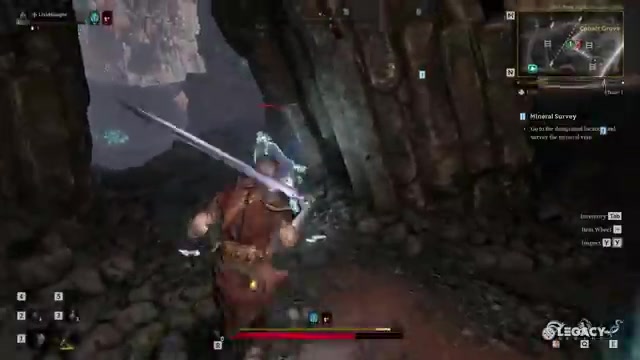
At launch, Mistfall Hunter features two maps: Hollow Grove and Brandergard. Hollow Grove is the more traditional extraction experience with a corrupt valley running through the center, Norse structures in the northwest, rural woodland in the northeast, craggy mountains with lizard enemies in the southeast, and undead-infested castle ramparts in the southwest. Brandergard feels part of the same universe but plays very differently—it’s much more vertical with tighter corridors and constant elevation changes, making combat a more precise dance.
Each map has difficulty tiers. Hollow Grove offers normal and chaos difficulties. Normal requires gear at or below excellent (blue) quality and allows only novice, advanced, or pro combat bags (white, green, blue). Chaos requires equipment value of at least 800 Gilden Blood and allows advanced, pro, or elite bags (blue, green, purple). Brandergard’s normal difficulty requires gear valued at 300 Gilden Blood or higher, with equipment at or below epic (purple) quality, and you can use all four combat bag tiers. Cataclysm, the hardest difficulty on Brandergard, demands equipment valued at 2,500 Gilden Blood or more and only allows elite (purple) combat bags. Start on normal difficulties if you’re new; chaos and Cataclysm are for geared teams.
Land and Scout with Your Squad#
Once you drop into the world, your first task is to orient yourself and decide where your team is heading. This decision should be driven by a few factors: proximity to quest markers (the blue exclamation points on your map), the location of golden-circled loot zones where better gear and materials spawn, and your team’s current gear level. If you’re all wearing novice or advanced gear, avoid hotly contested areas early. If you’re well-equipped, you can afford to contest high-value zones immediately.
Talk with your squad about the route. Mistfall Hunter rewards teams that move with purpose, so decide together: are you farming quests first for rare materials, heading straight to a loot zone, or hunting a boss? Indecision wastes time and splits focus, which can be fatal when enemy teams appear.
Complete Quests for Rare Materials#
Quests are one of Mistfall Hunter’s most unique features compared to other extraction games. As you explore, you’ll find blue exclamation points marking quest start locations. Interact with these to pick up a quest objective. Quests don’t change from run to run, so you’ll quickly memorize them—they typically ask you to kill a certain number of enemies in an area, collect items spread across multiple locations, or pay respects at a vista. None of them are mechanically difficult, but they require you to travel to specific spots, which exposes you to enemy teams and PvE encounters.
The payoff is significant: completing a quest rewards you with a loot box. If you’re playing solo, you get one box; if you’re in a trio, you get three boxes even if only two players are present (this is part of the duo handicap). These boxes contain rare materials that you can’t easily get elsewhere, making quests a priority for most runs. Flag the materials you need back at camp using the favorites system—this puts a small flag on the icon so you can visually identify them while looting, helping you stay focused on what matters.
Loot Containers and Designated Zones#
Beyond quests, you’ll find loot scattered throughout the map. Containers (chests, barrels, boxes) pull from a shared pool of loot per zone, so you’ll quickly learn which areas tend to have the materials you need. The most valuable loot spawns in golden-circled loot zones. These zones have no visual indicator of what loot type they contain, so you’ll need to explore and learn through repetition. Keep in mind that these zones attract enemy teams and have higher enemy density, so never rush into one unprepared. Send one player in to scout while the others cover a flank, or wait and listen for enemy activity before committing.
Use your favorites system to mark materials you’re hunting. When you’re in a zone and looting, the flagged items will have a small visual indicator, making it easier to prioritize what you pick up and what you leave behind.
Decide Whether to Hunt Bosses#
Each map features two regular bosses and one mist lord—the ultimate PvE encounter. These fights are serious tests of your team’s damage output and ability to handle intense mechanics. They’re not for the faint of heart, but they guard some of the best loot in a round. As a squad, discuss whether you’ve got the gear and skill to take them on. If you’re all wearing blue-quality gear and it’s your first run, skip them. If you’re in purple gear and your team has practiced together, hunt them down. Bosses are hotly contested at launch, so expect other teams to be hunting them too—you might find yourself in a three-way fight.
Manage the Extraction Mechanic (Hollow Grove)#
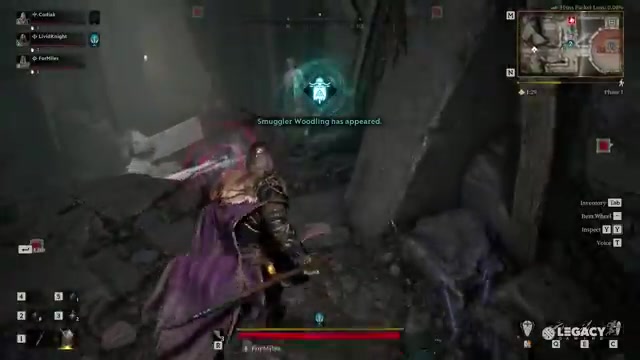
On Hollow Grove, you’ll see a timer in the top right corner of your UI. Until that bar fills, you’re safe to explore freely. Once it expires, the Gilden Mist collapses almost instantly—this isn’t a gradual circle like a battle royale; it’s sudden. Your only escape is to find a returner chime (one of several will sprout around the map after a short delay) and interact with it. This sends out a burst of butterflies that travel to a nearby location and start a short timer. When that timer expires, a returner woodling spawns and begins attacking you. Kill it, interact with its corpse, and you’ll channel a spell while ringing a bell. You can extract using the returner chime as soon as it sprouts, giving you a large window to escape before the mist consumes you.
The key is knowing where returner chimes typically spawn so you’re not scrambling at the last second. As you run Hollow Grove repeatedly, you’ll memorize these locations. Plan your route so you’re never too far from a chime when the timer is about to expire.
Manage the Extraction Mechanic (Brandergard)#
Brandergard works more like a traditional battle royale. As the match progresses, the Gilden Mist collapses to a safe zone in multiple phases, getting smaller and smaller until it consumes the entire map. To extract, you need to find returner woodlings—they spawn randomly throughout the map at various times. You can’t see them directly, but they emit a pulsing blue aura visible through terrain and a distinctive bell sound effect. Hunt them down, kill them, and they’ll drop a bell that you pick up and carry in a dedicated inventory slot. You can extract at any time once you’ve got a bell, giving your squad flexibility. Killing a returner woodling guarantees one bell, but there’s a chance it might drop more than one, which adds an interesting dynamic to squad decision-making: once someone has a bell, they can leave whenever they want, potentially splitting the group.
Keep your ears open for that bell sound and your eyes scanning for the blue aura. On Brandergard’s tighter corridors, returner woodlings are easier to hear but harder to reach—plan your extraction route accordingly.
Return to Camp and Store Loot#
Once you extract, head straight to the warehouse at Wind Rest Camp and dump your loot. The game features excellent quality-of-life tools: you can quickly transfer all materials from your bags into the warehouse with one button, and then organize everything with another. Don’t hoard loot in your bags—get it into the warehouse immediately so you’re not carrying dead weight on your next run.
Understanding Your Class and Loadout#
The Six Classes and Their Playstyles#
Mistfall Hunter launches with six unique classes, each with customizable move sets and talent trees. Both skills and talents can be changed at any time between rounds at no cost, so don’t feel locked into a build—experiment freely.
Sorcerer: The mage archetype. Uses a simple button combo system to access up to six spells without weapon swapping. You work with an energy system: basic attacks replenish energy, while charged attacks and skills consume it. You have access to three schools of magic but can only have two active at once. The general magic pool (right side of your skills menu) is always active and offers eight utility spells like windcraft (knockback) or cryptic ward (perfect block). The left side lets you choose between elemental magic (fast cast, lower damage, strong stacking effects) or stardust magic (slow cast, high raw damage). Pick the magic school that matches your playstyle.
Shadow Strikes: The rogue archetype. Uses energy to power its moves. You switch between a dagger and dual blades, each with its own core skill set. The dagger gives you sneak (stealth) as a baseline move. Dual blades are built around pure offense with four basic skills. You can augment each weapon with up to two additional weapon skills from a shared pool, including short-ranged attacks, smoke bomb, and finishing melee combos. This class rewards weapon-swapping and dynamic positioning.
Wii Knight: A versatile melee class built around durable positioning and tactical counterplay. Choose between greatsword (high damage counter slashes, sweeping momentum dashes, aggressive pulls that yank ranged enemies into melee range) or polearm and shield (tanky frontline anchor with directional shield blocks, gap-closing abilities, and sustained thrusting pokes for crowd control). The greatsword is aggressive; the polearm is protective.
Mercenary: Your frontline tank. Wield a sword and shield for active blocking, increased armor, and crowd control via shield bash and gap-closing charge, or swap to a warhammer for pure staggering potential with devastating charged heavy attacks. The mercenary has multiple forms of super armor that prevent mid-attack interruptions, making it an exceptionally forgiving and beginner-friendly class for engaging enemies and peeling allies off danger.
Black Arrow: The archer archetype. Unique in that weapon skills are broken into two subsystems: arrow types (up to three) that imbue your next ranged shot with special effects like increased damage, AoE, or immobilization, and traditional weapon skills like sky piercer (a devastating single attack after a long windup). Combine three arrows and three weapon skills for six abilities total, mixing damage, crowd control, and utility.
Seer: The support archetype with two forms. In take oath form, you support your team by constructing turrets that deal burst damage, heal allies, shield them, or increase their movement speed while slowing enemies. You also have built-in healing and crowd control. Your primary resource is energy, which increases when you land attacks. You can renounce your oath and transform into a crazed melee berserker (blasphemer form) with life steal and runes that sap enemy HP and attack stats. In blasphemer form, you use cursed mana and can enter zeal state to boost your attack and defense. The seer is fantastic for trios because it can adapt between support and damage depending on what your team needs.
The Breakaway System#
Every class can use a system called breakaway, which is essential to your survival. After taking two instances of impact damage in quick succession, a gold icon will flash on your screen. Dodge at this moment to perform a breakaway, which breaks you out of a stagger, lets you ignore collision with other units, and gives you a brief window to reposition. Breakaway has an internal cooldown, but taking damage and dealing damage both reduce it. Get comfortable with this mechanic early—it’s the difference between a clean escape and a death spiral.
Building Your Camp and Upgrading Systems#
The Gilden Blood Pool#
At the center of Wind Rest Camp sits the Gilden Blood pool. As you upgrade it, the amount of Gilden Blood you can collect during a run increases via your Gilden jar (a special container that caps how much you can carry). Gilden Blood is the game’s primary currency. Starting at level three, each upgrade to the pool unlocks a new character slot, allowing you to create and level additional characters. At level four with a maxed character, you can spend Gilden Blood to quickly level up other characters (though the cap is only level 12, so this isn’t a massive time-saver). Prioritize upgrading the pool early to expand your roster and increase your currency earnings per run.
The Goddess Statue#
This simple workstation increases your spring horn’s healing with each upgrade. Regardless of what healing items you carry, you always have three charges of your spring horn, which instantly heals you—unlike healing items that heal over time. Upgrading the statue makes these instant heals more potent, which is valuable for surviving burst damage from bosses or enemy teams.
Kazaro’s Shop#
Your traditional vendor, selling items for runs. At level one, you access the main shop (basic equipment, potions, combat items) and the tactical shop (tactical items that equip in two dedicated slots, separate from your supply bag). At level two, unlock the premium store, which sells a rotating assortment of materials that refresh on a timer. As you upgrade, the quality of items increases, giving you access to better materials and consumables. This is where you’ll buy potions and tactical items before runs.
Pip’s Auction House#
A player-driven economy hub. You can buy and sell any equipment or materials you’ve collected. As you upgrade the auction house, you can list more items for sale simultaneously. Pip also grants a unique item each day as a welcoming gift. This system will be central to Mistfall Hunter’s long-term economy, so don’t ignore it—you can flip gear for profit or buy specific items you need.
The Scavenger Squad#
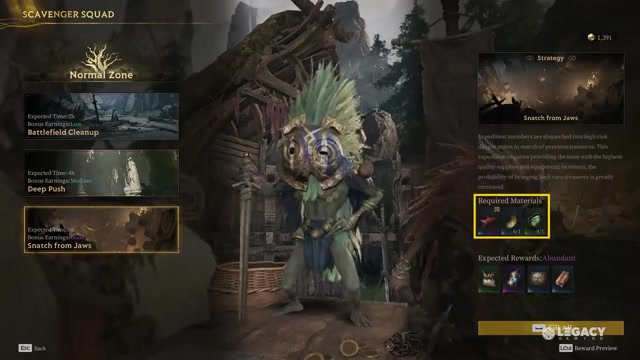
Send out a squad of unique creatures to bring back materials without you doing anything. As you level up the scavenger squad, you unlock multiple zones with different loot pools of varying rarity. So long as you’ve the necessary materials, you can send scavengers on missions, and they’ll return after a set number of hours with rewards. While you can’t control exactly what they bring back, you can target specific items based on which mission you send them on. This is the most consistent way to get new combat bags and is crucial for farming elusive items like the dragon slayer banner. Higher upgrades unlock new arenas and reduce mission time.
The Workshop#
The most resource-intensive station, but also one of the best ways to keep a steady stream of high-quality gear flowing. At level one, you access the forge. Select the class you want to craft gear for, and if you’ve the materials, start the craft (initially takes hours, but upgrades reduce the time). You can also craft gems here. Gems come in four shapes and socket into matching slots on gear; when you socket a gem, you gain an aix (a stack of a specific buff). The prepare tab shows all your gear’s attributes and how they synergize, giving you an at-a-glance view of your equipment’s potential. You can also repair gear here (not taxing during preview, but likely to be tweaked post-launch). As you upgrade the workshop, craft time decreases and the quality of craftable gear increases all the way to legendary weapons and accessories at level seven. This is where you’ll outfit your multiple characters with top-tier gear.
The Warehouse#
Simple but critical. Store all your hard-earned loot here. The game provides excellent quality-of-life tools: transfer all materials from your bags with one button, then organize everything with another. As you upgrade the warehouse, you gain more storage slots. This is also where you equip gear from your combat bags. There’s a limit to how many bags you can possess at once, so use your gear freely—don’t let gear fear prevent you from running good equipment.
The Tavern#
Before each run, talk to Sigrid to create a tonic customized with two to eight aixes depending on your upgrade level. For each aix used, you gain one stack of that buff during your next run. You want to synergize these buffs with your loadout and class—stack the right defensive buffs if you’re running into a chaos difficulty, or offensive buffs if you’re hunting bosses. You have access to attack, defense, and functional buffs, giving you plenty of flexibility to adapt to your team’s needs and the run ahead.
Squad Coordination and PvP Awareness#
Playing as a Duo in a Trio Game#
Mistfall Hunter officially supports solo or trio play. If you want to play as a duo with one friend, toggle off the “fill squad” option before queueing. You’ll drop in with just two players, which is a significant handicap against full teams—you have less damage output, fewer bodies to soak damage, and fewer perspectives on the map. However, this is a valid playstyle if you want to avoid unpredictable randoms. Coordinate heavily: stick together, focus fire on single targets, and avoid prolonged fights with full teams. Your best bet is to farm quests and loot zones quietly, avoiding confrontation until you’re well-geared.
Reading the Map and Enemy Teams#
As you explore, listen for audio cues—footsteps, spell casts, weapon impacts. If you hear combat nearby, your team has a choice: investigate and third-party the fight, or avoid it. If you see fresh loot being looted (containers that were full moments ago are now empty), an enemy team just passed through. Plan your route to avoid or intercept them depending on your confidence. Communicate constantly with your squad: “Enemy team looting the zone to our east” or “Heard a spell cast from the north, moving west to avoid.” This level of communication is what separates coordinated squads from disorganized groups.
Boss Fights with Your Squad#
If your team decides to hunt a boss, assign roles before the fight starts. One player kites while others damage, or two players focus DPS while one handles mechanics. Learn the boss’s attack patterns so you can predict when it’s safe to commit to damage versus when you need to dodge or heal. If you wipe to a boss, you lose all your gear—so be honest about your team’s readiness. It’s better to farm safely and come back with better gear than to die and reset.
Troubleshooting & Common Mistakes#
- Dying with full bags of loot: You lose everything, including your gear. Don’t get greedy. If you’ve a full inventory and see enemy activity, prioritize extraction over one more loot container.
- Ignoring the timer/mist collapse: The Gilden Mist doesn’t give you a long warning. On Hollow Grove, watch that timer. On Brandergard, track the collapse phases. Being caught in the mist is instant death.
- Not finding returner woodlings in time: On Hollow Grove, learn where chimes spawn. On Brandergard, listen for the bell sound and watch for the blue aura. If you’re struggling to find them, squad up with your friends and have one player hunt while others farm nearby.
- Forgetting to favorite materials: You’ll waste time looting irrelevant items. Before a run, flag the materials you’re hunting. This takes 30 seconds and saves you minutes during the run.
- Skipping the training grounds: You’ll waste time learning your class’s move set during your first real run. Spend 10 minutes in training to get comfortable with your skills, cooldowns, and rotation.
- Hoarding gear in your bags: You can only carry so much. Dump loot into the warehouse immediately after extraction. There’s no penalty for using combat bags—gear fear will cost you more loot than it saves.
- Not upgrading the scavenger squad: This is the most consistent way to get new combat bags and rare materials. Prioritize it early so you’re not stuck grinding the same gear.
- Spreading your squad too thin: If you split up to loot different zones, you’re vulnerable to being picked off one by one. Stay together, move as a unit, and only split when you’re confident in the area’s safety.
Advanced Tips & Time Saves#
Farming Quests Efficiently: Once you’ve run the same quests a few times, you’ll memorize the objectives and optimal routes. Plan your opening move to hit 2-3 quests in a logical path, then pivot to loot zones. This maximizes your rare material gain per run.
Gem Socketing and Synergy: Don’t socket gems randomly. Before a run, check your gear’s aixes in the prepare tab and plan which buffs you want. If you’re running a fire-focused sorcerer, socket gems that boost elemental damage. This level of optimization compounds over time.
Tonic Customization: Before each run, visit Sigrid and tailor your tonic to your squad’s needs and the difficulty you’re entering. If you’re hunting a boss, load up on damage and defense buffs. If you’re farming quests on normal difficulty, you can afford to take riskier buffs.
Duo Farming Strategy (Risky): If you’re confident in your duo’s skill, you can farm high-value zones faster than full teams because you’re more mobile and can reposition quickly. However, you’ll lose any direct fight with a full team, so know when to retreat. This is a high-risk, high-reward playstyle.
Gear Crafting Timeline: Don’t craft gear right before a run—crafting takes hours. Start a craft at the end of a run, let it cook while you play other games or sleep, and equip it before your next session. The workshop is a long-term investment, not a quick gear fix.
FAQ#
Can I play Mistfall Hunter with just one friend?#
Yes. The game officially supports solo or trio play, but you can toggle off “fill squad” to queue with just two players. You’ll be at a numerical disadvantage against full teams, but you can still farm quests, loot zones, and extract successfully if you play carefully and coordinate well.
What happens to my gear when I die?#
You lose everything, including your equipped gear and all loot in your inventory. This is the core risk-reward of extraction games. If you want to keep gear safe, don’t bring it into a run—use combat bags instead. If you do bring premium gear, be extra cautious about fights you can’t win.
How do I get better gear if I’m stuck with basic combat bags?#
The scavenger squad generates new combat bags over time—this is the most consistent source. You can also craft gear at the workshop (requires materials but produces high-quality gear), buy gear from Kazaro’s shop (requires Gilden Blood), or purchase items from the auction house (requires currency from selling loot). Don’t rely on a single source; use all of them.
What’s the fastest way to level up my second character?#
If your main character is maxed (level 12) and your Gilden Blood pool is at level four, you can spend Gilden Blood to quickly level up other characters. Otherwise, just run with your second character like normal—they’ll level up with each run. The level cap is only 12, so it doesn’t take long.
Should I hunt bosses on my first run?#
No. Bosses are serious encounters that require coordination, knowledge of their mechanics, and good gear. On your first run, focus on learning the map, completing quests, and looting safe zones. Once you’ve done 5-10 runs and understand the map layout and your class’s abilities, you can attempt a boss with your squad.
How do I know where returner woodlings spawn on Brandergard?#
They spawn randomly throughout the map at various times. You can’t predict their location, but you can find them by listening for their distinctive bell sound effect and watching for their pulsing blue aura visible through terrain. If you’re struggling, have one squad member hunt for them while the others farm nearby and stay ready to rotate in if combat breaks out.
Checklist#
- Create a character and pick a class that matches your playstyle (mage, rogue, tank, support, archer, or versatile melee).
- Visit the training grounds and spend 10 minutes learning your class’s move set, cooldowns, and energy/resource management.
- Before your first run, decide which map (Hollow Grove or Brandergard) and difficulty (normal or chaos/cataclysm) you’re entering based on your gear level.
- If playing with a friend, toggle off “fill squad” to queue as a duo in a trio game.
- Drop in, orient yourself, and discuss with your squad whether you’re prioritizing quests, loot zones, or bosses.
- Complete blue-marked quests first for rare materials, then pivot to golden-circled loot zones for high-value gear.
- Use the favorites system to flag materials you need, so you can identify them quickly while looting.
- Listen for audio cues and watch for enemy activity; communicate constantly with your squad about threats.
- When the Gilden Mist timer (Hollow Grove) or collapse phases (Brandergard) activate, locate and kill a returner woodling to extract.
- Return to Wind Rest Camp and dump all loot into the warehouse immediately.
- Upgrade the Gilden Blood pool first to expand your character slots and increase currency earnings, then prioritize the scavenger squad for consistent gear and materials.
- Before your next run, create a custom tonic at the tavern tailored to your squad’s needs and the difficulty you’re entering.
Source & credit#
This guide draws on the excellent video walkthrough by Legacy Gaming — watch it for the full visual run-through, and give the creator your view:
Following Mistfall Hunter? Get an email when we publish a new guide — or update one after a patch.