30-Second Quick-Start (TL;DR)#
- Load the Erdale and Wharfdale route (the TSW7 British release route) and select Keighley station.
- Spawn in on foot and walk past the station platform, beyond the fence, and up the track toward the red signal in the bushes.
- Use the controller D-pad (left) or PC equivalent to spawn a train in free roam mode.
- Choose any train you own—pacers work well and fit the heritage railway setting.
- Open the carriage doors using the carriage key, set the master key to on, select forward gear, and turn on lights and destination display.
- Open the mini map, zoom in, click on your train, and set a path to clear the red signals blocking your route.
- Remove the stationary coaches at the platform so you don’t collide with them.
- Drive forward; the playable track extends over half a mile from Keighley station, with more unplayable track visible beyond.
What This Guide Helps You Do#
This guide shows you how to access and drive the Keighley & Worth Valley Railway—a hidden heritage railway segment within the Erdale and Wharfdale route in Train Sim World 7—and how to set up your train, navigate the track, and explore the full extent of the modeled route. It’s best for players who own TSW7 and want to discover this unexpected feature or learn the exact steps to drive it from start to finish.
Requirements & Prep#
What you need:
- Train Sim World 7 installed.
- The Erdale and Wharfdale route (included as the British release route with TSW7).
- A train you own that fits the track. The guide demonstrates a Class 143 Pacer (orange livery, 1985–1991), but any compatible train works.
- If you want to use the Pacer specifically, you must own the Pacer and Blackpool Branches DLC.
Controller vs. PC: The guide uses a controller (D-pad left to spawn trains, Y to rotate, etc.). On PC, the spawning and rotation controls differ; check your keybinds or the in-game help menu for equivalents.
Optional but Helpful: If you’ve never spawned a train in free roam before, try it in a less restrictive area first. The process is the same, but it’ll remove any surprise when you’re standing in the middle of the Keighley track.
Route Overview#
The Keighley & Worth Valley Railway is a real heritage railway in Yorkshire, England, and Train Sim World 7 includes a playable section of it as a hidden feature within the Erdale and Wharfdale route. You’ll start at Keighley main railway station on foot, walk around the blocked station entrances to reach the heritage railway platform, spawn a train in free roam mode, set up the train’s systems (doors, lights, master key, destination display), clear the path using the mini map, remove any blocking coaches, and then drive the train along the heritage railway track. The playable section extends roughly three-quarters of a mile beyond Keighley station, with additional modeled but undrivable track visible via the free camera, suggesting future expansion possibilities.
Step-by-Step Walkthrough#
Load the Route and Spawn at Keighley Station#
From the Train Sim World 7 main menu, navigate to Routes and select Erdale and Wharfdale. This is the British release route that came with TSW7. Choose Timetable and then Spawn on foot. In the station list, find and select Keighley. You can leave weather and other settings as default or adjust them to your preference. Confirm and spawn in.
Walk to the Heritage Railway Platform#
You’ll spawn at Keighley main railway station. The main entrances to the heritage railway platform are blocked off by gates and fences. Walk down the platform and try to cross via the footbridge—you’ll find the gates are shut. Instead, walk up the platform past the coaches parked on the main line and continue along the fence. The fence will eventually end, and you’ll be able to step over or around it onto the heritage railway track. Keep walking up the track past the red signal visible in the bushes. Eventually, you’ll hit an invisible wall that marks the boundary of the playable area. This is where you’ll spawn your train.
Spawn a Train Using Free Roam Mode#
Once you’re positioned on the heritage railway track past the red signal, open the free roam spawn menu. On a controller, press left on the D-pad. (On PC, check your keybinds or in-game help for the equivalent.) Select Spawn a new train. You’ll see a list of available trains. Choose any train you own that fits the heritage railway setting. The guide uses a Class 143 Pacer in orange livery (1985–1991 livery), but you can pick any compatible train—a Class 31, Class 37, or anything else in your roster will work. After selecting the train type and livery, choose the consist length (the guide uses a 30-meter, two-car consist). Confirm the selection.
Orient and Position the Train#
The train will spawn on the track, but it might be facing the wrong direction. If needed, press Y on the controller to rotate the train 180 degrees so it faces toward Keighley station and the direction you want to travel. Once it’s oriented correctly, you’re ready to set it up for driving.
Open the Carriage Doors and Access the Cab#
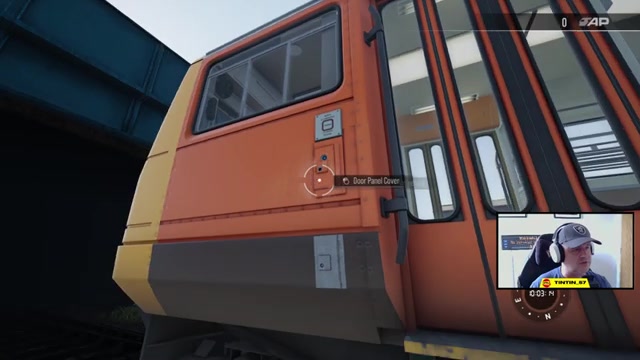
On the Pacer (and most trains in TSW7), the carriage doors are locked. You’ll need to unlock them before entering the cab. Walk to the side of the train and interact with the carriage key panel. Use it to unlock the doors. Open the local door nearest to you. Once inside, close the door behind you and use the carriage key panel again to lock the doors. Climb the steps leading up to the cab. If you’re using a different train, the door sequence may vary—some trains have different locking mechanisms—but the principle is the same: unlock, open, close, lock, then climb to the cab.
Set Up the Train’s Systems#
Once in the cab, you’ll need to configure several systems before moving:
- Master key: Turn the master key to on.
- Gear: Select forward and acknowledge the selection.
- Lights: Turn on the headlights and any other lighting systems relevant to your train.
- Destination display: Change the destination blind or display to show “Special” or your chosen destination. This is visible to other players and adds immersion.
- Instrument panels: Turn on instrument panels if available.
Take a moment to check the exterior of the train by switching to an external camera view to confirm the lights are on and the destination display is correct.
Set a Path Using the Mini Map#
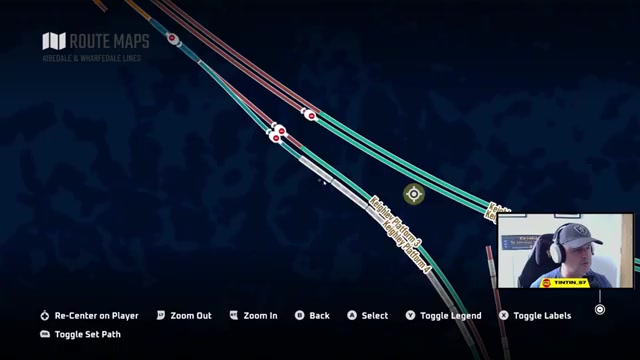
This is a critical step. Open the mini map (usually accessible via a menu or dedicated button). Zoom in on the mini map to see your train and the surrounding track clearly. You’ll notice red signals blocking the track ahead—these represent signals set to stop. To clear them and move forward, you need to set a destination. Click on your train in the mini map, then select Set the path. Now zoom out on the mini map to see the available route. Select a destination point on the track ahead. The game will calculate a path and automatically clear the red signals along that route, turning them green. The mini map shows the first destination marker roughly half a mile up the track, but you can actually drive further than that marker suggests.
Remove Blocking Coaches#
At Keighley station, there are stationary coaches parked on the main line near the heritage railway platform. If you drive forward without removing them, your train will collide with them. To remove them, click on the coaches in the mini map or in the 3D world. Select Remove the train and confirm. The coaches will disappear, clearing your path.
Drive the Heritage Railway#
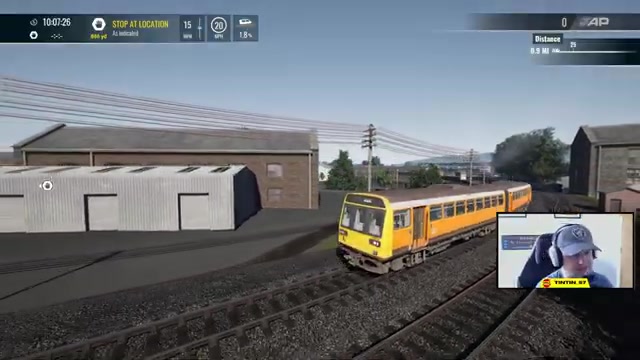
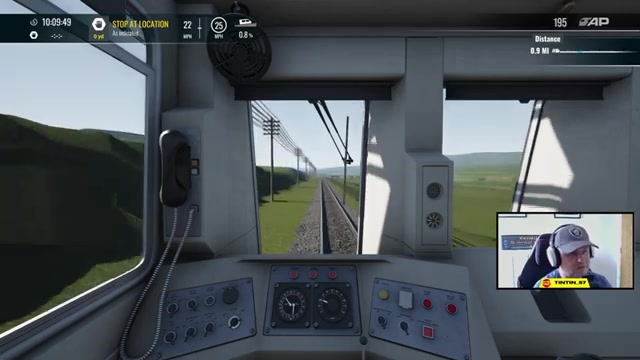
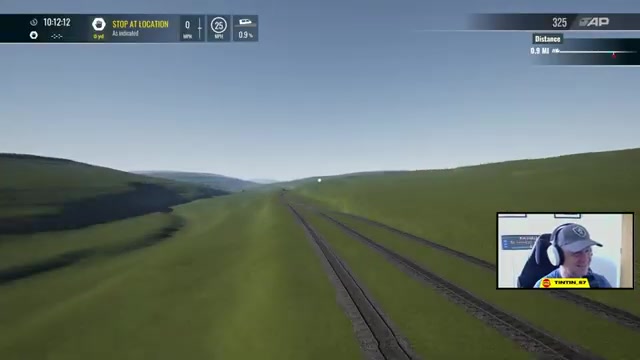
You’re now ready to drive. Release the brakes, apply throttle, and begin moving forward from Keighley station. The track is modeled with gradients (uphill and downhill sections), so you’ll feel the train respond to terrain changes. A comfortable speed of around 20 mph works well for this heritage railway. As you travel, you’ll pass signal boxes, sidings, telegraph poles, and modeled buildings. The playable track extends roughly three-quarters of a mile beyond Keighley station, at which point you’ll hit an invisible barrier. From there, you can use the free camera (usually an external view mode) to explore the modeled but undrivable track beyond, which extends much further up the line with more signals, sidings, and even tunnels visible in the distance.
Exploring Beyond the Playable Limit#
Using the Free Camera to See Hidden Track#
Once you reach the end of the drivable track (roughly three-quarters of a mile from Keighley), you’ll hit an invisible barrier. Switch to the free camera mode (often accessed via a dedicated button or menu option) to explore the modeled but undrivable sections beyond. You can pan the camera up and over the rocky outcrop ahead and see that the track continues for a considerable distance. The camera will reveal multiple signal boxes, sidings, a tunnel entrance, double-track sections, and more signals stretching into the distance. The track appears to continue well beyond what you can drive, suggesting that the full Keighley & Worth Valley Railway may be modeled in preparation for a future full route release.
What You’ll See Beyond the Barrier#
Using the free camera, you can observe:
- A tunnel entrance that the track appears to pass through.
- Multiple signal boxes and semaphore signals spaced along the route.
- Double-track sections indicating more complex rail infrastructure.
- Numerous sidings branching off the main line.
- Telegraph poles lining the route.
- A buffer stop or end-of-line marker visible in the distance where the sidings terminate.
The extent of the modeled track is substantial, and the detail suggests this is a complete route in development or a planned future DLC.
Troubleshooting & Common Mistakes#
- Can’t find the heritage railway entrance: The main station gates are locked. Walk up the platform, past the fence, and around it. Don’t try to force your way through the blocked footbridge.
- Train is facing the wrong direction: Use the rotate command (Y on controller) to turn the train 180 degrees before setting it up.
- Red signals are blocking my path: You haven’t set a destination in the mini map. Open the mini map, click on your train, select “Set the path,” zoom out, and click a destination point on the track ahead.
- Train collides with coaches at the platform: Remove the stationary coaches by clicking on them in the mini map or 3D world and selecting “Remove the train.”
- Can’t open the carriage doors: Make sure you’re using the carriage key panel correctly. The sequence is: unlock, open, close, lock. If the panel isn’t responding, you may be in the wrong location on the train—check that you’re at a passenger door, not a cab door.
- Train won’t move after setting up systems: Confirm that the master key is on, the gear is in forward, and the brakes are released. Also check that you’ve set a path in the mini map to clear the signals.
- Lights won’t turn on: Make sure the master key is on first. Then access the lighting controls—they’re usually in a dedicated panel or menu in the cab.
- Can’t see the destination display: Exit the cab and view the train from outside using an external camera to confirm the destination blind is showing. Some trains have destination displays that are only visible from certain angles.
Advanced Tips & Time Saves#
Choosing your train: While the guide demonstrates a Pacer, you can run any compatible train. If you want authenticity, research what trains actually operate on the Keighley & Worth Valley Railway in real life. Class 37 locomotives and various heritage stock are common. The choice doesn’t affect gameplay but adds to immersion.
Skipping the door sequence: If you find the door unlock/lock sequence tedious (especially on trains with many doors), some trains have simpler access systems. A locomotive-hauled consist may be faster to board than a multiple-unit train like the Pacer.
Reversing back to Keighley: Once you reach the end of the playable track, you’ll need to reverse the train to return to Keighley. Plan your stopping point so you’ve got room to reverse without hitting the invisible barrier. Alternatively, you can spawn a new train at Keighley and drive it again instead of reversing.
Screenshot opportunities: The route offers excellent photo opportunities. The modeled buildings, signal boxes, and landscape are detailed. Consider switching to external camera modes and adjusting the field of view to capture compelling shots for sharing or your own collection.
FAQ#
Can I drive the full Keighley & Worth Valley Railway route?#
No, only a section of it’s drivable—roughly three-quarters of a mile from Keighley station. However, using the free camera, you can see that much more track is modeled beyond the playable limit, extending well into the distance with multiple signal boxes, sidings, and even tunnels. This suggests the full route may be available in a future update or DLC.
Do I need to own DLC to drive the Keighley & Worth Valley Railway?#
The Keighley & Worth Valley Railway track itself is included in the base Erdale and Wharfdale route (TSW7 British release route). However, if you want to drive a specific train like the Pacer, you must own the DLC for that train. You can drive any other train you own on the heritage railway track without additional DLC.
What trains can I drive on the Keighley & Worth Valley Railway?#
Any train you own in Train Sim World 7 that fits the track gauge and length can be driven on the Keighley & Worth Valley Railway. The guide uses a Pacer, but Class 31s, Class 37s, and other stock are also viable. Check that the train you spawn is compatible with the route before confirming.
How do I spawn a train in free roam mode on the Keighley & Worth Valley Railway?#
Stand on the heritage railway track past the red signal (beyond the main Keighley station area), then press left on the D-pad (controller) or your equivalent spawn keybind (PC). Select “Spawn a new train,” choose your train and livery, confirm the consist length, and the train will appear on the track.
Why are the main station entrances to the heritage railway blocked?#
The gates and fences are locked to force players to approach the heritage railway from the track side rather than the main station platform. This is likely a design choice to keep the heritage railway visually and functionally separate from the main Keighley station operations. You’ll need to walk around the fence and up the track to access the heritage railway.
Is the modeled track beyond the playable limit going to be drivable in the future?#
The transcript doesn’t confirm this, but the extensive modeling of track, signals, sidings, and tunnels beyond the current playable limit suggests the full Keighley & Worth Valley Railway may be released as a complete route in a future update or DLC. The presence of these detailed assets would be unusual if they weren’t intended for future use.
Checklist#
- Launch Train Sim World 7 and navigate to Routes.
- Select the Erdale and Wharfdale route.
- Choose Timetable mode and Spawn on foot.
- Select Keighley station as your spawn location.
- Spawn in and walk down the platform toward the heritage railway area.
- Walk past the locked footbridge gates and around the fence to access the heritage railway track.
- Continue walking up the track past the red signal in the bushes until you hit the invisible wall.
- Open the free roam spawn menu (left D-pad on controller).
- Select “Spawn a new train” and choose a train you own (e.g., Class 143 Pacer).
- Select a livery and consist length, then confirm.
- Rotate the train if needed using Y on the controller so it faces toward Keighley.
- Walk to the carriage door, unlock it using the carriage key panel, open the door, and climb to the cab.
- Turn on the master key and set the gear to forward.
- Turn on the headlights and set the destination display to “Special” or your chosen destination.
- Open the mini map and zoom in on your train’s location.
- Click on your train and select “Set the path.”
- Zoom out on the mini map and click a destination point on the track ahead to clear the red signals.
- Click on the stationary coaches at Keighley platform and remove them.
- Release the brakes and apply throttle to begin driving.
- Drive up the heritage railway track at a comfortable speed (around 20 mph).
- Drive until you reach the invisible barrier roughly three-quarters of a mile from Keighley.
- Switch to free camera mode to explore the modeled but undrivable track beyond the barrier.
- Reverse the train back to Keighley or spawn a new train to drive again.
Source & credit#
This guide draws on the excellent video walkthrough by TinTin_57 — watch it for the full visual run-through, and give the creator your view:
https://www.youtube.com/watch?v=lPRAGazezXYFollowing Train Sim World 7? Get an email when we publish a new guide — or update one after a patch.