30-Second Quick-Start (TL;DR)#
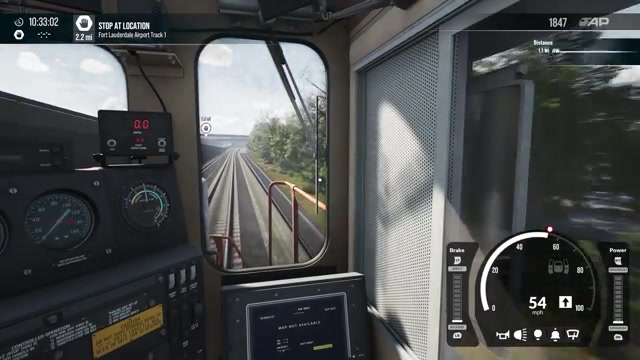
- Set the reverser handle to forward and the brake to release before moving.
- Apply throttle gradually (notches 1–8) to accelerate; watch the HUD speed indicator against posted limits.
- Release throttle to idle when approaching stops, then apply brakes smoothly in small increments.
- Use external camera views to monitor train length and platform alignment during station stops.
- Activate horn at crossings (auto-triggers bell); lock/unlock doors after passengers board.
- Watch for red/yellow signals ahead—slow down or stop as needed to avoid collision.
- In wet weather, turn on headlights and wiper valve for visibility.
- Complete your route by stopping at each designated station and delivering passengers on time.
What This Guide Helps You Do#
Master the core controls and workflow to safely operate a commuter train from startup through a full passenger route in Train Sim World 7, delivering passengers to multiple stations without overshooting platforms, colliding with other trains, or exceeding speed limits.
This guide works best if you’re picking up the game for the first time and want to understand both simplified and advanced control schemes. It’s also useful for returning players who want a structured approach to multi-stop operations in varied weather.
Requirements & Prep#
Train Sim World 7 launches September 15th on PS5, Xbox Series X|S, Steam, Epic Games Store, and Xbox Game Pass. Early access is available September 10th for Deluxe and Ultimate Edition owners. You’ll need access to one of the three new routes: West Yorkshire, Florida, or Bulvaria.
Controller vs. Keyboard: The game supports both Xbox controllers and traditional keyboard/mouse input. You can mix control methods—use an Xbox controller for throttle and brake, then switch to external cameras for visual reference. Alternatively, you can operate all controls from the cab interior using direct inputs (reverser handle, brake lever, throttle notches).
Optional but Helpful: Start with the simplified control scheme to learn how the train behaves—how it accelerates, how far it takes to brake, how it responds to throttle changes. This removes the need to manage individual switches and lets you focus on smooth throttle and brake application.
Route Overview#
A typical commuter train operation in Train Sim World 7 follows this flow: you board the locomotive (or take over from a disabled train), perform a full startup sequence, then move through a series of passenger stations. At each stop, you slow the train smoothly, align it with the platform, open doors, wait for passengers to board and exit, lock doors, then accelerate to the next station. The route may span 15–20 miles with multiple stops, and you’ll encounter speed limit changes, signal restrictions, grade changes, and potentially other trains ahead. Weather conditions like rain and reduced visibility add complexity by requiring headlights, wipers, and more cautious throttle management. The goal is to arrive at each station on time, within speed limits, without hitting other trains or overshooting platforms.
Step-by-Step Walkthrough#
Startup Sequence: Preparing the Locomotive#
Before you move an inch, you need to prepare the locomotive for operation. If you’re taking over a train that’s already powered down (or replacing a disabled locomotive), climb into the cab and begin the startup process.
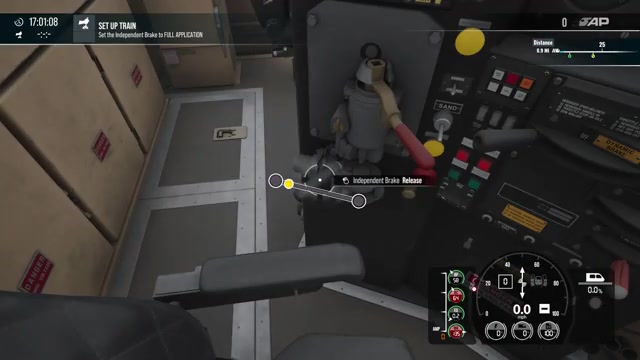
First, turn on the generator switch. This powers the electrical systems on the train. Next, insert the reverser handle—this is the lever that controls forward, neutral, and reverse. Set it to forward for normal operation. Then locate the cutout valve (or cut-off) and set it to passenger mode if available, or ensure it’s in the correct operating position. Set the automatic brake to release (fully back), which allows the train to move. Some locomotives have a brake application mode switch—set this to full application or the equivalent for passenger service.
Once these are set, you’re ready to apply throttle. If the train is stationary and you haven’t moved yet, you may also need to confirm that any hand brakes or parking brakes are released. The game will usually indicate if something is still preventing motion.
Coupling and Moving to the Station#
In some scenarios (like the Florida route), you may need to move the locomotive to couple with passenger cars or retrieve a replacement engine. With the reverser in forward and the brake released, apply throttle gradually—start at notch 1 (the lowest power setting). The train will begin to roll.
If you need to back up to couple with another train or reposition, set the reverser to reverse, release the brake, and apply throttle in the same gentle manner. Backing requires extra care because your view is limited and the train will travel a long distance before stopping. Use external camera views to monitor alignment and distance.
Once you’re aligned with the passenger cars or the next locomotive, ease to a stop by reducing throttle to idle and applying brake smoothly. The coupling will happen automatically when you make contact.
Accelerating and Managing Speed#
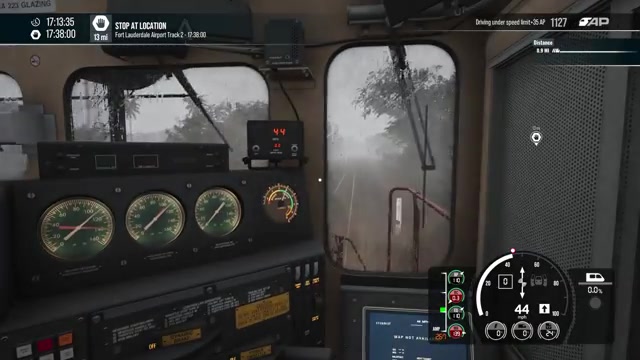
After leaving a station or beginning your route, you’ll need to build speed gradually. With the reverser in forward and brake released, increase throttle from notch 1 toward notch 8 (maximum power). The train accelerates slowly—this is realistic and intentional. Watch the HUD speed indicator in the bottom right of your screen, which shows your current speed against the posted speed limit.
Speed limits change frequently on commuter routes. You’ll see speed limit markers on trackside signs and in the HUD. If you’re approaching a 45 mph zone and you’re currently at 60 mph, you need to begin slowing down before you reach that zone. The key is anticipation: don’t wait until you’re at the marker to brake. Reduce throttle to idle first (this lets the train coast and lose speed naturally), then apply brake gently if needed.
The smooth approach demonstrated here is more realistic and prevents jerky deceleration that would upset passengers. Set throttle to idle when approaching a speed restriction, allow the train to decelerate gradually, then apply small brake increments only if necessary to hit the exact speed.
Approaching and Entering a Station#
As you approach a station (the HUD will display the distance: “3.8 miles out,” for example), begin reducing speed well in advance. With 3–5 miles to go, start dropping throttle to idle. If the speed limit through that zone is 45 mph and you’re at 50 mph, apply light brake pressure. The goal is to arrive at the station entrance at a slow, controlled speed—typically 5–10 mph.
Use external or chase camera views to see the platform and the train’s alignment. The platform is a specific zone where passengers wait; you must stop so that the train doors align with the platform. Overshooting by even a quarter mile means passengers have to walk forward to board, which wastes time and breaks immersion.
Apply brake smoothly and progressively as you enter the station. Avoid slamming the brakes at the last moment—this creates a harsh stop that’s unsafe for passengers. Instead, plan to reach the platform at a crawl (2–3 mph) and come to a complete stop with the doors aligned.
Opening Doors and Loading Passengers#
Once the train is stopped, the doors will unlock automatically. You’ll see passengers gathering on the platform and, in many cases, passengers exiting from the train. The HUD or on-screen prompts will indicate when passengers are boarding and when the station is ready for departure.
You can observe this process from the cab or switch to external cameras to watch passengers climb aboard. Using a pre-positioned camera to see passengers loading in real time is a nice immersive touch but isn’t required for operation.
Once all passengers have boarded and exited, you’ll lock the doors. This is usually done via a button or lever in the cab. The HUD will confirm when doors are locked and the train is ready to depart.
Using Horn and Bell at Crossings#
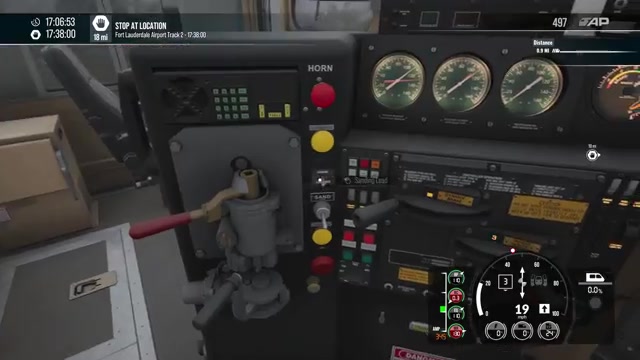
Before accelerating away from a station, and especially when approaching road crossings or other trains, activate the horn. In Train Sim World 7, pressing the horn button automatically triggers the bell as well—you don’t need to activate them separately. The horn alerts pedestrians and vehicles at crossings that the train is approaching.
You’ll want to use the horn multiple times as the train approaches grade crossings (where roads intersect the track). This is both a safety requirement and part of realistic train operation.
Accelerating to the Next Station#
With doors locked and horn sounded, set the reverser to forward (if it isn’t already), release the brake fully, and begin applying throttle. Start at notch 1 and gradually increase to notch 3–5, depending on how quickly you need to reach the next speed. The train is heavy and accelerates slowly, so be patient.
As you pick up speed, monitor the HUD for the next speed limit. If you’re in a 50 mph zone and accelerating toward 60 mph, you can increase throttle further. If a 45 mph zone is coming up, begin backing off throttle earlier to avoid overshooting.
Repeat this cycle for each station: approach at a safe speed, brake smoothly to a stop aligned with the platform, load passengers, lock doors, sound horn, accelerate to the next stop.
Handling Signals and Other Trains#
As you operate, you’ll encounter trackside signals that indicate whether the line ahead is clear. A green signal means proceed at your current speed or accelerate. A yellow signal means caution—a speed restriction or another train is ahead; slow down. A red signal means stop; apply brakes immediately and don’t proceed past the signal.
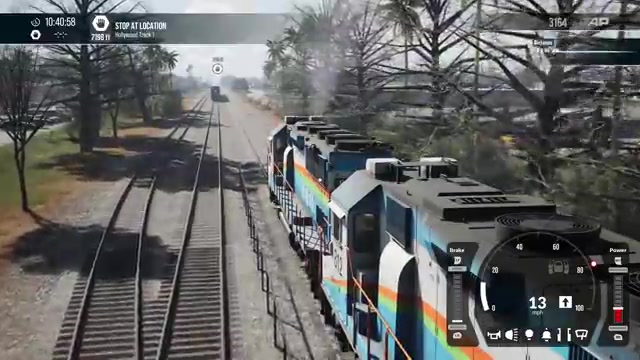
You may catch up to another commuter train on the same route. When the train ahead slows or stops at a station, you must also slow down to avoid a collision. The HUD will show the distance to the train ahead. If you’re closing in too quickly, reduce throttle and apply brake to maintain safe separation (typically 5 mph slower than the train ahead).
If you see a red signal and don’t slow in time, you risk a collision. It’s easy to get focused on other details and miss red signals, so always keep one eye on the top-right of the HUD where signals are displayed.
Weather Considerations: Rain and Reduced Visibility#
In weather scenarios like torrential rain, visibility drops significantly. Turn on headlights immediately. Look for the headlight switch in the cab—it’s typically a toggle or dial.
You’ll also want to activate the wiper valve to clear rain from the windscreen. Set it to 100% to get maximum wiper speed. With wipers running and headlights on, you’ll be able to see the track and signals much more clearly.
In rain, the track becomes slippery, and the locomotive may have reduced traction. You can apply sanding (a control that drops sand on the rails to improve grip) if you feel the wheels slipping. Accelerate more gradually in wet conditions and be extra cautious with braking—brake earlier and more gently to avoid locking wheels or sliding.
Managing Grades and Throttle Adjustments#
As the train climbs or descends grades (slopes), you’ll need to adjust throttle to maintain speed. When climbing a grade, the train loses speed naturally due to gravity. If you’re climbing a 4% grade and you want to maintain 45 mph, you may need to increase throttle from notch 3 to notch 5 to compensate. Conversely, when descending, you may need to reduce throttle or apply light brake to prevent the train from accelerating uncontrollably.
Pay attention to the speedometer and adjust throttle accordingly—smooth, anticipatory adjustments are better than reactive corrections. When you notice the train going up slightly, apply more throttle to prevent losing speed.
Troubleshooting & Common Mistakes#
- Overshooting the platform: You approached the station too fast or didn’t brake early enough. Next time, begin braking 2–3 miles out if the speed limit drops significantly, and use idle throttle to coast the last mile. Aim to enter the station at 5–10 mph.
- Red signal collision warning: You didn’t notice or didn’t react to a red signal in time. Keep your eyes on the top-right HUD where signals appear, and begin braking as soon as you see red—don’t wait until the last second.
- Catching the train ahead: You were accelerating too aggressively or not watching the distance to the train in front. Reduce throttle to idle and apply gentle brake to maintain a 5 mph speed buffer behind the other train.
- Doors won’t unlock or passengers won’t board: The train may not be fully stopped, or the brake may not be fully released. Ensure the train is at a complete stop (0 mph on the HUD) and aligned with the platform. Check that the brake is set to release and the train isn’t in motion.
- Losing speed on a grade: You didn’t increase throttle enough to compensate for the slope. When climbing, increase throttle by 1–2 notches to maintain current speed. When descending, reduce throttle or apply light brake to prevent runaway acceleration.
- Can’t see the track in rain: Headlights are off or the wiper valve isn’t activated. Turn on headlights immediately and set the wiper valve to a high setting (50–100%) to clear the windscreen.
- Train won’t move after startup: The reverser handle may be in neutral, the brake may not be fully released, or a hand brake is still engaged. Check all three: reverser forward, brake fully back (release), and any parking brakes disengaged.
- Speeding violation: You exceeded the posted speed limit for that zone. Reduce throttle to idle immediately and apply gentle brake until you’re 2–3 mph below the limit, then maintain that speed through the zone.
Advanced Tips & Time Saves#
Mixed Control Approach: Try using a controller for throttle and brake while switching to external cameras for visual feedback. This hybrid approach lets you keep your hands on the primary controls while using camera switches (via buttons or keyboard) to monitor alignment and other trains. If you’re struggling with precision, this often works better than staying in the cab view.
Anticipatory Throttle Management: Don’t wait until you’re at a speed limit marker to brake. Watch the trackside signs and HUD ahead of time. If you see a 45 mph zone coming in 2 miles, start reducing throttle now. This prevents jerky corrections and keeps passengers comfortable. You’ll notice the train coasts smoothly to the correct speed when you set throttle to idle well in advance.
Using Idle as a Braking Tool: You don’t always need to apply the brake lever. Setting throttle to idle causes the train to decelerate naturally due to rolling resistance. For gentle speed reductions (e.g., from 50 mph to 45 mph), idle alone may be enough. Reserve the brake for more aggressive stops, like emergency situations or final approaches to stations.
Signal Reading for Efficiency: If you see a yellow signal ahead, assume there’s a speed restriction or another train coming. Begin slowing immediately rather than waiting to see what the restriction is. This keeps you ahead of the curve and reduces the risk of emergency braking.
Passenger Alignment Precision: Use external or chase cameras to line up the train doors with the platform before you stop. If you’re slightly off, you can nudge the train forward or backward with minimal throttle to fine-tune alignment—don’t leave passengers waiting if a small adjustment will help them board faster.
FAQ#
How do I start the train in Train Sim World 7?#
Turn on the generator switch, insert the reverser handle and set it to forward, set the cutout valve to passenger mode, and set the automatic brake to release. Then apply throttle gradually starting at notch 1.
What’s the difference between simplified and advanced controls?#
Simplified controls handle many switches and settings automatically, letting you focus on throttle, brake, and basic operation. Advanced controls require you to manually manage the generator, reverser, cutout valve, brake application mode, and other systems, giving you more realistic and detailed operation.
How do I avoid overshooting the platform when stopping at a station?#
Begin braking 2–3 miles before the station if the speed limit drops significantly. Use idle throttle to coast, then apply light brake increments to arrive at 5–10 mph. Use external camera views to monitor your alignment with the platform and adjust as needed.
What do red, yellow, and green signals mean?#
Green signals mean the track ahead is clear—proceed at your current speed or accelerate. Yellow signals mean caution—a speed restriction or train is ahead; slow down. Red signals mean stop; apply brakes immediately and don’t proceed past the signal.
How do I operate the train in heavy rain or poor visibility?#
Turn on headlights immediately and activate the wiper valve (set to 50–100%) to clear the windscreen. Accelerate more gradually in wet conditions and brake earlier and more gently to avoid wheel slip. Watch signals carefully because they’re harder to see in rain.
Can I catch up to another train on the same route?#
Yes, if you accelerate faster than the train ahead, you’ll eventually close the gap. Reduce throttle and apply gentle brake to maintain a safe distance (typically 5 mph slower than the train ahead). If the train ahead stops at a station, you must also slow down or stop to avoid collision.
Checklist#
- Turn on the generator switch to power the locomotive.
- Insert the reverser handle and set it to forward.
- Set the cutout valve to passenger mode (or appropriate operating position).
- Set the automatic brake to release (fully back).
- Apply throttle gradually starting at notch 1 to begin moving.
- Monitor the HUD speed indicator and watch for speed limit markers ahead.
- Begin braking 2–3 miles before each station to slow to 5–10 mph.
- Use external camera views to align the train doors with the platform.
- Once stopped, lock the doors after passengers board and exit.
- Sound the horn (which auto-triggers the bell) before leaving the station and at road crossings.
- Watch the HUD signals (top right) for red, yellow, and green indications; brake for red and yellow signals.
- In rain, turn on headlights and activate the wiper valve to 50–100%.
- Repeat the approach-brake-stop-load-depart cycle for each station until you reach your final destination.
Source & credit#
This guide draws on the excellent video walkthrough by Camodo Gaming — watch it for the full visual run-through, and give the creator your view:
https://www.youtube.com/watch?v=PfEIfNBfEVQFollowing Train Sim World 7? Get an email when we publish a new guide — or update one after a patch.