- Easy
- Difficulty
- 22 min
- Read time
- 5
- Steps
- 1.0
- Checked on
30-Second Quick-Start (TL;DR)
- Follow Cohen through a plague-stricken valley as he discovers his family’s fate and his own transformation into a Vraki (vampire-like creature).
- Early game: gather herbs from Anchor, care for your mother, explore the village, and learn sword basics from your father.
- Mid-game: investigate a mysterious tomb, trigger a rebellion at the silver mines, and face Brenis the Vraki leader.
- Late game: survive the mines, discover you’ve been turned, and uncover the truth about your family’s disappearance.
- Key choice: decide whether to accept your new nature or resist it; your decisions shape which ending you receive.
- Explore every location thoroughly—missed dialogue and found items reveal critical lore and unlock story branches.
- Manage relationships with NPCs like Anchor and your father; their trust affects available options later.
- Prepare for combat encounters by practicing sword timing and understanding enemy patterns before major confrontations.
What This Guide Helps You Do
This guide walks you through The Blood of Dawnwalker from start to finish, helping you understand the story, make meaningful choices, survive key encounters, and uncover the game’s branching narrative paths. You’ll learn where to find NPCs, how to trigger story events, what dialogue options matter, and how to prepare for the game’s intense set-pieces. It’s essential for first-time players and anyone seeking to understand the game’s themes of plague, resistance, transformation, and moral compromise.
Requirements & Prep
The Blood of Dawnwalker is a narrative-driven action game with light combat and exploration. You won’t need any special items to start, but the game rewards careful observation and thorough exploration. Before beginning, know that this game features themes of body horror, plague, violence, and moral ambiguity—it’s a dark, intimate story set in a village consumed by plague and ruled by a vampire lord.
No specific gear or consumables are required to progress, though the game provides optional items that aid survival (herbs, weapons, protective clothing). Dialogue choices matter; the game doesn’t always telegraph which option leads to which outcome, so pay close attention to character motivations and relationships.
Route Overview
The Blood of Dawnwalker unfolds across several interconnected story phases. You begin as Cohen, a young man living in Lazlia, a valley plagued by disease and ruled by Brenis, a Vraki (an ancient vampire-like being) who feeds on the villagers’ blood in exchange for protection and occasional healing. Your mother, Esme, is mentally deteriorating; your father, Peter, grows increasingly bitter; and your siblings depend on you. The early game focuses on daily life, gathering supplies, and building relationships with key NPCs like Anchor, the village healer.
The middle phase escalates when you investigate a mysterious tomb, uncovering evidence of ancient warfare and Vraki history. At the same time, your father becomes entangled in a rebellion led by Vladimir, who plans to raid the silver mines and overthrow Brenis. You’re pressured to lead the assault. The late game erupts into violence when the rebellion fails catastrophically at the mines—Brenis turns you into a Vraki, kills or captures your family, and burns the village. The final phase forces you to choose between accepting your new nature, seeking revenge, or finding a path to redemption.
Step-by-Step Walkthrough
Act One: Daily Life and the Gathering Storm
You wake in your family’s home. Your mother, Esme, is unwell—she refuses to eat and rarely speaks. Your father, Peter, is tense and short-tempered. Your siblings, Lunka and Myrtto, are scared and confused. Your first task is to chop wood to keep the fire alive. After this chore, Peter sends you to visit Anchor, the village healer, to request stronger herbs for your mother.
On the way to Anchor’s cottage (located outside the village proper), you encounter your siblings playing near the stream. Peter has asked you to take them fishing so they feel safe and distracted. Agree to this—it builds your relationship with them and provides narrative context for their fear of wolves and soldiers. During the walk, Myrtto becomes hostile, blaming you for not preventing your mother’s decline. Respond with empathy; tell him you’re angry too, but anger won’t help. This softens him and opens dialogue about your own health concerns (you’ve been coughing from old mine dust).
At the stream, you teach Lunka and Myrtto how to fish. The lesson is interrupted by a Vraki soldier asking about your father’s whereabouts. Don’t lie—the soldier is testing you. Instead, answer honestly but carefully. The soldier’s commander, a more reasonable Vraki, steps in and de-escalates. He offers Anchor’s cough medicine as a gesture of goodwill, revealing that not all Vraki are mindlessly cruel. This encounter plants the seed that your enemy is more complex than you initially believed.
Return to Anchor’s cottage. She’s working in her garden. Ask for stronger herbs for your mother. Anchor explains that your mother’s illness is psychological, not physical—the Vraki blood can cure disease but not despair. She offers a double-strength herbal brew but warns that it works best paired with emotional comfort. She suggests telling your mother a story from your childhood to anchor her to hope. Anchor also reveals she’s preparing for something (likely the rebellion, though she doesn’t say so explicitly). Pay attention to her cautious manner; she’s hiding something but trusts you.
On the way home, stop at the village to run errands. You’ll encounter several NPCs: Mercia the blacksmith, Yorgu who raises pigs, and others. Yorgu mentions his pig has escaped and offers payment if you retrieve it. This is optional, but finding the pig teaches you the map and introduces you to Kuno, a mysterious figure living alone in the woods. Kuno is hostile and evasive about his past; Zlislav, the village elder, is the only one who knows his story. This mystery will resurface later.
Return home and prepare the herbal brew for your mother exactly as Anchor instructed: three scoops with hot (but not boiling) water. While she drinks, tell her the story of your own nightmares as a child—how she comforted you by humming a lullaby. Sing the song: “Little angel, up in the sky / Little angel, no need to cry.” This works. She drinks, and her condition stabilizes temporarily. Your father notices and approves, though he remains distant.
That evening, Peter takes you to a clearing and asks you to spar with him. He’s testing your combat readiness. Fight him seriously—he’s assessing whether you’re capable of what he’s about to ask. After the spar, he reveals the truth: Vladimir plans to raid the silver mines to steal ore and overthrow Brenis. He wants you to lead the village men. Peter is conflicted; he knows the plan is dangerous and likely to fail, but he also knows that living under Brenis is unsustainable. He asks for time to think it over. This is your first major choice point, though it’s framed as a request for consideration rather than an immediate decision.
Act Two: Secrets in the Ruins
The next day, Yorgu asks you to retrieve his escaped pig. Head toward the bridge and the old apple tree he mentioned. Use apples as lure. When you find the pig, Kuno appears and demands you return it to him. Refuse—it belongs to Yorgu. Kuno becomes hostile and attacks. You can fight him or back down; either way, you’ll learn he’s bitter and isolated. Return the pig to Yorgu and collect your payment.
Later, Yorgu’s brother Lazar goes to the bogs to gather peat and doesn’t return. Yorgu asks you to check on him. Head to the bogs and search for cart tracks (Lazar took a two-wheeled cart). Follow the tracks until you find evidence of a wolf attack. The cart is abandoned, and there are deep claw marks. Search the area thoroughly—you’ll discover a hidden pit or sinkhole. Investigate it carefully.
You fall into an ancient underground tomb. This is one of the game’s most important sequences. As you descend, you encounter Lazar’s body—he’s dead, killed by something far worse than wolves. Explore the tomb methodically. You’ll find:
- Murals depicting ancient Vraki warriors and battles against humans.
- A skeleton wearing ceremonial braces (Vraki armor).
- Evidence of a woman warrior who fought Vraki—paintings show her piercing a Vraki through the chest with a stake.
- Clay tablets covered in ancient symbols.
- A sarcophagus containing a centuries-old corpse, charred and burned.
- Scratch marks and bite marks on bones, suggesting the tomb has been disturbed recently.
As you explore, something alive stirs in the tomb—a shambling, long-dead creature. It chases you. Flee upward toward the light. You barely escape, emerging into daylight. The creature can’t follow; it retreats into shadow.
Report your findings to Capriel, the village’s spiritual authority. He’s deeply disturbed by your account. He mentions Father Adelbert’s prophecy that “the end must be nigh” and insists on speaking with Zlislav, the elder. Capriel gives you a reward for your bravery and sends you home. This discovery sets off alarm bells among the village leadership—they now suspect that ancient, pre-plague evils are stirring.
Act Three: The Rebellion and the Mines
Over the following days, tensions escalate. Mass (the weekly blood-drinking ceremony where Brenis feeds from the villagers) becomes increasingly brutal. During one mass, Brenis remarks that the herd is “thin-blooded” and needs culling. This threat hangs over everyone. Sister Gremla, a nun, fails Brenis in some way and is killed as punishment. Her death is used as a sermon example: obedience or death.
Your father finally makes his decision. He tells you that Vladimir’s rebellion is moving forward and he’s committed to it. He asks you to join him at the mines with your sword. This is a point of no return—once you agree, you’re locked into the rebellion path. If you refuse, the story branches differently (likely toward a passive ending), but the main narrative follows the rebellion path.
Prepare for the mines by gathering any supplies you can find. Visit Anchor one last time if possible; she may offer final advice or items. Head to the mines with your father and Vladimir’s men. The plan is to post a guard at the entrance, mine silver ore quickly, and escape before Brenis’s garrison responds.
The mines are vast and labyrinthine. As you work, a sentry reports that Brenis’s men are approaching. The garrison is mobilizing faster than expected. Retreat deeper into the mines and prepare for combat. Your father positions you and other fighters in a defensive formation. He and Costelios (another veteran) take the front line while you and Ludvig form a second line behind them.
The battle is chaotic and brutal. Vraki soldiers are fast, strong, and relentless. Your father fights valiantly but is overwhelmed. You see him fall but can’t reach him in time. You’re wounded severely—a Vraki’s blade pierces your chest. As you collapse, everything goes dark.
Act Four: Transformation and Darkness
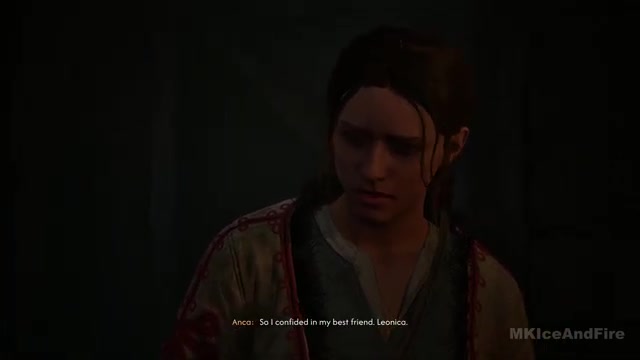
You wake in the mines, badly wounded. Vlad is tending to you. He explains that Brenis himself came to the mines, slaughtered most of the rebels, and left you alive deliberately. Brenis then forced you to drink his blood—a Vraki’s blood. You remember the hunger, the overwhelming craving, the sensation of being unmade and remade. You were turned into a Vraki.
Vlad explains that you’re now one of them—a leachch (a new-born Vraki). Your body is healing impossibly fast. Your eyes have changed. You’re experiencing an alien hunger and a strange connection to Brenis’s will. Vlad struggles to control his fear of you. Together, you attempt to escape the mines, but the path is treacherous and disorienting.
As you climb toward the surface, you encounter more of Brenis’s creations—other turned villagers, mindless and feral. Some attack you. You’re forced to fight them or flee. The moral weight of this becomes clear: these are people you knew, now corrupted. At one point, you hear Costelios, another rebel, trapped deeper in the mines. He begs for help, but Vlad warns that it’s too late—Costelios is too far gone. You can’t save him.
You finally emerge from the mines and see Lazlia burning. Brenis has sacked the village. Bodies lie in the streets. Crows feast on the dead. Your home is destroyed. Your family is gone.
Act Five: Aftermath and Revelation
You search the ruins of your home desperately. You find signs of struggle—Lunka’s torn dress, blood on the floor, overturned furniture. But no bodies. Anchor finds you in your despair. She explains that Brenis didn’t kill your family outright; he took them. They’re likely imprisoned in one of his strongholds—the Spart Dungeons, the Tantari Watchtower, or a guard post near Palita.
Anchor reveals that she has knowledge of dark magic—witchcraft, in the game’s terms. She offers to teach you how to use your new Vraki nature to extract information from a dead Vraki soldier’s corpse. This is a pivotal moment. She warns you that what she’s about to show you is “gruesome and horrid,” but she asks: “What would you do to save your family?” Your answer determines whether you accept her teaching.
If you accept, Anchor performs a ritual on the corpse. She removes a “veil” from your eyes, allowing you to perceive and manipulate the lingering life-force in the dead soldier’s body. You can interrogate it, force it to reveal secrets. This teaches you that your Vraki nature isn’t simply a curse—it’s a tool, and you can choose how to wield it.
The soldier’s corpse reveals that your family was transported to an unknown location. Brenis is keeping them alive—they’re too valuable to kill. But time is running out. Every moment you delay, they’re in danger.
Boss/Set-Piece Strategy: The Mine Rebellion
The Ambush Phase
Trigger: Brenis’s garrison arrives at the mines while you’re still inside. Your sentry warns you; you’ve moments to prepare.
Your father positions you in a second defensive line behind him and Costelios. The Vraki soldiers are faster and stronger than human soldiers; they move with predatory grace and strike with lethal precision. Your goal in this phase is to survive and protect your father’s flank.
Safe punish windows: After a Vraki soldier attacks your father and he parries or blocks, there’s a brief moment when the soldier is committed to their strike. This is when you can attack—aim for the side or back. Don’t try to outspeed them head-on; you’ll lose. Instead, wait for your father to engage them, then strike when they’re focused elsewhere.
If you get punished: You’ll be knocked back or wounded. Get distance, catch your breath, and wait for your father to re-engage the enemy. Don’t try to be a hero—your role is support, not the main fighter.
Phase transition: Your father realizes the Vraki are too numerous and too strong. He orders a retreat deeper into the mines. Follow his lead immediately. This isn’t a defeat—it’s a tactical withdrawal.
The Deeper Mines Phase
You retreat into the labyrinthine depths. The fighting becomes more desperate and fragmented. You’re separated from your father. You encounter smaller groups of Vraki and turned villagers. The environment is claustrophobic and disorienting. Torches flicker; shadows dance. You hear screams echoing from multiple directions.
Your goal here is survival and finding your father. Move methodically through the mines, avoiding large groups when possible. When you must fight, use the narrow passages to your advantage—enemies can’t surround you if there’s only room for one or two at a time.
You’ll find Costelios badly wounded and delirious. He’s been slashed repeatedly and is losing blood fast. Vlad is with you and suggests you might be able to save him. You attempt to tourniquet his leg and stabilize him, but as you work, Costelios becomes increasingly agitated. He looks at you and says “Monster”—he’s seen what you’re becoming, the hunger in your eyes. He begs you to let him go, to end it quickly rather than let him turn like you.
This is a critical moral moment. The game doesn’t force you to act; it presents the situation and lets your choice unfold naturally. If you try to save Costelios by giving him your blood (as a Vraki might), you’ll lose control of the hunger and drain him completely. If you refuse and try to keep him stable, he’ll die from his wounds. Either way, Costelios dies, and you’re forced to confront what you’re becoming.
Brenis Appears
As you continue deeper, Brenis himself descends into the mines. He’s ancient, powerful, and utterly indifferent to your rebellion. He moves through your ranks like a predator through prey. Your father fights him directly—a brave but ultimately futile gesture. Brenis toys with your father, then offers you a choice: drink your father’s blood and complete your transformation, or refuse and watch him die anyway.
If you refuse, Brenis kills your father in front of you and leaves you alive deliberately. This is worse than death—it’s the cruelest punishment he can imagine. If you drink, you complete your turning, but you’ve consumed your own father’s blood. Either way, you’re broken. Brenis leaves you in the mines, knowing you’ll eventually emerge as either a fully realized Vraki or a traumatized shell of a human. He’s already won.
Escape the mines by climbing toward the surface. You’ll encounter more horrors—bones, nests, the remains of previous victims. Move upward relentlessly. Eventually, you find a shaft or opening that leads to daylight. You emerge into a world that no longer recognizes you as human.
Builds & Loadouts
The Blood of Dawnwalker doesn’t feature traditional RPG builds or loadouts. You have one sword throughout the game, and combat is skill-based rather than stat-based. Your “build” is determined by your choices and relationships rather than gear.
However, the game does track your resources and state:
- Herbal supplies: Anchor provides herbs for your mother and potions that help you survive encounters. Gather and conserve these carefully.
- Weapons: Your sword is your only consistent weapon. Your father teaches you its use through sparring. There’s no upgrade system; proficiency comes from practice and understanding timing.
- Knowledge: Information is your most valuable resource. Learning NPC locations, dialogue trees, and story secrets gives you options unavailable to other players.
- Relationships: Your standing with Anchor, your father, Vlad, and others determines what help they offer and what they’re willing to teach you.
Troubleshooting & Common Mistakes
- Missed dialogue: The game doesn’t always make NPCs’ locations obvious. If you can’t find someone, retrace your steps through the village and nearby areas. Anchor lives outside the village; your father is often in the house or the clearing; Zlislav is at the elder’s lodge.
- Mother won’t drink the herbs: You must tell her a story first to anchor her emotionally. The herbs alone won’t work. Use the lullaby story from your childhood—it’s specifically designed to reach her.
- Combat feels unfair: You’re not meant to win through raw strength. Use your environment, wait for openings, and don’t be afraid to retreat and heal. The game rewards tactical thinking over aggression.
- Can’t find the pig: Look near the apple tree by the bridge. Use apples to lure it. If you still can’t find it, the quest is optional—you can skip it and return to Yorgu later.
- Lost in the tomb: Move slowly and deliberately. Explore every chamber before descending deeper. The murals and artifacts tell a story; pay attention to them. If you encounter the creature, run upward toward the light—it won’t follow you into daylight.
- Rebellion feels forced: It is, narratively. Your father is asking you to join, and refusing has consequences (a different ending path). The game respects your choice either way, but the main story follows the rebellion path.
- Can’t save Costelios: You can’t, fully. You can ease his death or hasten it, but he’s too far gone. This is intentional—the game wants you to feel the weight of impossible choices.
- Family disappeared after the mines: Brenis took them alive as leverage. They’re imprisoned somewhere, likely in a stronghold you’ll need to locate in a potential sequel or extended playthrough.
Advanced Tips & Time Saves
Dialogue Efficiency: If you’re replaying, you can skip some dialogue by pressing the interact button again after an NPC finishes speaking. However, the first playthrough is best experienced fully—the dialogue carries emotional weight and reveals character motivations.
Exploration Shortcuts: Once you’ve mapped the village, you can move between locations more quickly by hugging the edges of areas and avoiding central gathering points where NPCs tend to cluster. This saves time if you’re replaying for a different ending.
Herb Timing: Give your mother the herbal brew as soon as you return from Anchor’s cottage. The longer you wait, the more her condition deteriorates, and she may refuse to drink it entirely. Timing matters.
Relationship Building: Spend time with Anchor and your father when possible. These conversations unlock additional dialogue options later and make certain story beats hit harder. The game tracks your relationship depth.
Risky Strategy: The Rebellion Refusal: If you refuse to join the rebellion, you can potentially avoid the mines entirely and pursue a different ending. However, this path isn’t fully explored here, and it may lead to a passive or “bad” ending where Brenis continues to rule unchallenged. Proceed with caution if you want to experience this route.
FAQ
Why won’t my mother eat, and how do I fix it?
Your mother, Esme, is psychologically broken, not physically ill—the Vraki blood can cure disease but not despair. The herbal brew from Anchor helps, but it only works if you tell her a comforting story first. Use the childhood lullaby (“Little angel, up in the sky”) to anchor her emotionally, then give her the herbs. This temporarily stabilizes her but doesn’t cure her underlying trauma.
What happens if I refuse to join the rebellion?
This walkthrough follows the rebellion path, but refusing likely branches the story toward a different ending, possibly one where you remain passive and Brenis continues to rule. The game respects player agency, so both paths are valid, but the main narrative follows the rebellion and its catastrophic failure.
Can I save my family from being captured?
Not during the main story. Brenis captures your family after he burns Lazlia, and they’re taken to an unknown stronghold (likely the Spart Dungeons or Tantari Watchtower). Your goal in the late game is to locate them and attempt a rescue, which likely sets up a sequel or extended ending.
What are the Vraki, and why is Brenis so powerful?
The Vraki are ancient, vampire-like beings who feed on blood and possess superhuman strength and durability. Brenis is centuries old and has mastered his powers over millennia. The tomb you discover contains evidence of ancient Vraki wars and a warrior woman who fought them with stakes and sunlight. Brenis is powerful because he’s old, experienced, and fundamentally inhuman.
What does it mean that I’ve been turned into a Vraki?
You’ve been transformed into a leachch—a newly-turned Vraki. You retain your human mind but gain Vraki abilities: superhuman healing, enhanced strength, and an alien hunger for blood. You’re now bound to Brenis as your sire, meaning you’re partially subject to his will. However, Anchor reveals that you can learn to harness this power through dark magic, turning your curse into a tool.
How do I find my family after the village is burned?
Anchor suggests they’re imprisoned in one of three locations: the Spart Dungeons, the Tantari Watchtower, or a guard post near Palita. You can use Anchor’s witchcraft to interrogate a dead Vraki soldier’s corpse for information about their location. Finding them appears to be the goal of the game’s final act, but the full rescue mission isn’t covered here.
Checklist
0 of 16
Source & credit
This guide draws on the excellent video walkthrough by MKIceAndFire — watch it for the full visual run-through, and give the creator your view: