30-Second Quick-Start (TL;DR)#
- Start at the waterfront; explore the town square and surrounding buildings to collect items and map the area.
- Answer the phone calls when they ring to progress the story and unlock new dialogue with Zoe.
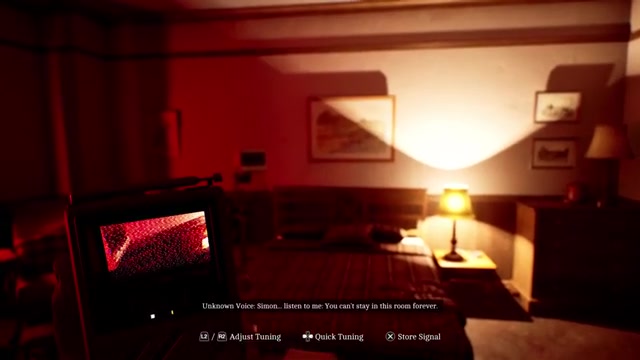
- Use the CRTV (signal-detecting device) to navigate around dangerous creatures and locate safe paths.
- Solve environmental puzzles by finding codes from signs, posters, and visual clues in bathrooms and streets.
- Avoid direct combat when possible; hide when creatures approach and wait for them to move away.
- Collect health items (IV fluid, first aid kits) and combine them when needed to survive encounters.
- Save frequently at phone stations by dialing the correct number and following the prompts.
- Progress through the Shorefront Family Clinic and pharmacy to uncover the town’s dark history.

What This Guide Helps You Do#
This walkthrough gets you through the opening section of Silent Hill: Townfall—from waking up at the waterfront through solving early puzzles and navigating around hostile creatures—so you’ll understand the core mechanics and story setup without getting stuck on environmental codes or creature patterns. It’s best for first-time players unfamiliar with the game’s puzzle logic, signal-detection system, and survival mechanics.
Requirements & Prep#
You’ll need a controller or keyboard/mouse setup (the game supports both, though the creator played on PC with a PS5 controller). No special items are required to start, but as you progress, you’ll collect:
- Flashlight (found early; requires double-A batteries to function)
- IV fluid bags and first aid kits (consumable healing items)
- A melee weapon (crowbar or similar, found during exploration)
- Key cards and codes for locked doors
- The CRTV device (a signal detector that becomes essential for navigating past creatures)
Optional but Helpful: Save your game frequently at phone stations. There’s no penalty for saving multiple times, and the game’s tension and puzzle complexity make frequent checkpoints a comfort measure rather than a crutch.

Route Overview#
You begin at the waterfront after waking from what seems like an escape from a hospital. Your first task is to explore the town square and surrounding streets to gather items, read clues, and get a feel for the layout. The town is foggy and mostly empty, which creates an eerie atmosphere but also gives you time to search without immediate danger. Once you’ve explored the main area, you’ll receive phone calls that advance the story and introduce you to Zoe, a woman who seems to know you. These calls unlock new dialogue and story details. Next, you’ll venture into Zoe’s house, where you’ll find a flashlight and batteries, as well as a mysterious picture of yourself. From there, the game introduces the CRTV device—a tool that detects signal frequencies and helps you navigate around creatures. You’ll use this device to avoid a fast, dangerous creature blocking your path. Finally, you’ll enter the Shorefront Family Clinic and pharmacy, solving environmental puzzles based on visual clues (hands, pills, days of the week) to unlock doors and progress deeper into the mystery.
Step-by-Step Walkthrough#
Waking Up and Exploring the Waterfront#
You start at the waterfront in a foggy, quiet area. The game doesn’t explain much, so your first goal is simply to move around and get oriented. Walk forward and check the immediate area—you’ll see boats, docks, and some cages. Try to interact with everything you see; the game uses a small dot indicator to show when an object can be examined or picked up. You can’t sprint yet, which is intentional; the slow pace builds atmosphere. Don’t try to jump in the water or take a boat; there’s nothing to do there. Instead, head toward the buildings and structures you see in the distance.
Mapping the Town Square#
As you explore, you’ll find a maps and prints building that contains a map of the town. This map shows numbered locations (1 through 19) scattered across the island. The town square itself is roughly in the center, with a clinic, pharmacy, post office, and other shops nearby. Take time to read the signs and notices posted around the area. You’ll see a missing cat poster (named Ash, described as gray but actually black and white), a road closure notice (indicating some kind of protest or emergency), and various shop signs. These details aren’t immediately useful for progression, but they build the world and hint at the town’s recent troubles.
Finding the Hotel Room 204 and the Calendar Puzzle#
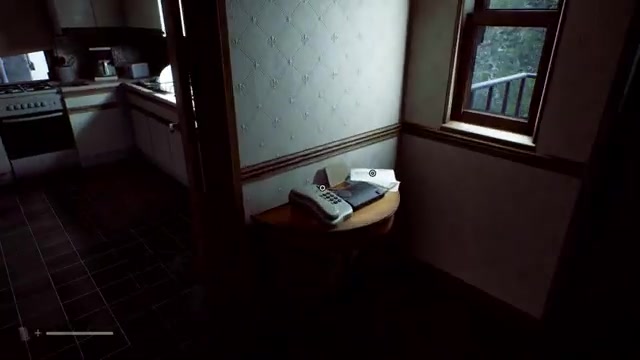
After exploring the town, you’ll find a phone ringing. Answer it when it rings—this is how you save the game and advance the story. The phone will connect you to someone (Zoe) who speaks to you in cryptic terms, asking you to help her and come back to her. After the call, you’ll unlock the ability to run and find yourself in a hotel hallway. Walk down the corridor and enter room 204 (the number matches the room mentioned in the phone call). Inside, you’ll find a document about a hotel room note and a calendar on the wall. The calendar is a puzzle: you need to identify the correct month and day. Look at the note in the room for context—it mentions “5 days” and “1996.” The calendar shows months, and you need to figure out which month and day are relevant. Based on the note’s hints, try January 18th, 1996. If you select the correct date, the calendar will unlock and you’ll receive a key.
Puzzle Hint: The note mentions the lock “could happen in 5 days,” and 1996 is highlighted. Look for dates that make sense in context. The calendar puzzle requires you to match the written clue to the calendar grid—it’s less about guessing and more about reading carefully.
Collecting Items and Escaping the Hotel#
Once you’ve got the key, examine the other items in room 204: medical equipment (vital sign monitors), an empty IV bag, and other medical supplies. Take what you can carry. Exit the room and explore the hotel hallway—you’ll find more rooms (101, 102, 103) but they’re mostly empty. The hallway is dark; if you’ve got a flashlight with batteries, use it sparingly. You’ll eventually reach an elevator. When you call it, something large and terrifying will appear outside the elevator shaft—a creature that looks like it came from another dimension. Don’t panic; just get in the elevator and escape. The game is showing you that there are hostile forces in this town, but you’re not meant to fight them yet.
The Signal Device and Navigating Past Creatures#
After escaping the hotel, you’ll find a CRTV device—a handheld signal detector that becomes one of your most important tools. The game explains that this device can help you navigate and evade threats. You use the D-pad to switch between different signal frequencies, and the device shows you where creatures are and where they’re moving. This is critical: you can’t outrun or fight most creatures early on, so you must use the CRTV to predict their movements and time your passage carefully. When a creature is nearby, watch its pattern on the CRTV screen. Creatures often move in predictable loops—they’ll go to one side, pause, then move to another side. Your job is to wait for them to move away from your path, then make a quick dash to safety.
Reaching Zoe’s House#
The mysterious voice on the phone has been calling herself Zoe and asking you to come back to her. As you explore, you’ll eventually find a house (marked on the map once you’ve seen it). Enter through the front door. Inside, you’ll find personal items, photographs, and a nurse’s uniform covered in dried blood—a clear sign that something terrible has happened. Search the house thoroughly: you’ll find a flashlight without batteries in one room, double-A batteries in another, and a nurse’s ID card. Combine the batteries with the flashlight to get a working light source. You’ll also find an organ transplant card with highlighted numbers on it—write these down; you’ll need them later. Most disturbing, you’ll find a photograph of yourself in the house, suggesting that Zoe knew you before the game started.
The Electrical Card Puzzle#
In Zoe’s house, you’ll find a document describing an electrical card. This card is used at a device (likely a master switch or control panel) to restore power to certain areas. The document mentions that the card uses buttons A and B to apply credit. You’ll also find a reference to a “news agent” where you can buy these cards, but in practice, you’ll find or earn them through exploration. Keep the electrical card in your inventory; you’ll use it to restore power to the clinic later.
The Pharmacy Puzzle: Decoding the Hands, Pills, and Days#
One of the game’s most intricate early puzzles is in the pharmacy. You’ll find a locked safe or door that requires a four-digit code. To solve it, you need to examine signs and posters in the pharmacy and nearby bathroom. The puzzle uses visual clues:
- First digit (hands/fingers): Look for a sign showing hands or fingers. The clue mentions “two hands or six fingers.” Count carefully; the answer is likely two (representing two hands).
- Second digit (pills/items): Find a poster showing pills or medications. Count the distinct types or items shown. The answer is likely five.
- Third digit (days): Look for a sign listing days of the week or showing three items. The answer is likely three.
- Fourth digit (remaining pills): The final clue relates to taking medications responsibly. If the sign shows pills and warns against overuse, count the pills left or infer from context. The answer is likely nine.
The code is 2539 (or similar, based on the visual clues in the pharmacy). Enter this code at the locked door or safe, and it’ll unlock, revealing additional supplies and story documents.
Avoiding the Fast Creature and Using Hide Mechanics#
At several points, you’ll encounter a fast, aggressive creature that patrols an area you need to pass through. This creature moves quickly and will kill you if it catches you. Your options are:
- Use the CRTV to predict its movement: Watch the signal on the device and time your passage when the creature is far away.
- Hide in nearby objects or doorways: The game allows you to hide in certain spots. When you hide, the creature will search for you but won’t find you if you stay still. Wait for it to move away, then continue.
- Take alternate routes: Sometimes, you can go around the creature by finding a different path, though this isn’t always possible.
The key is patience. Don’t panic or try to sprint past; creatures are faster than you. Wait, watch, and move only when it’s safe.
Collecting Health Items and Combining Them#
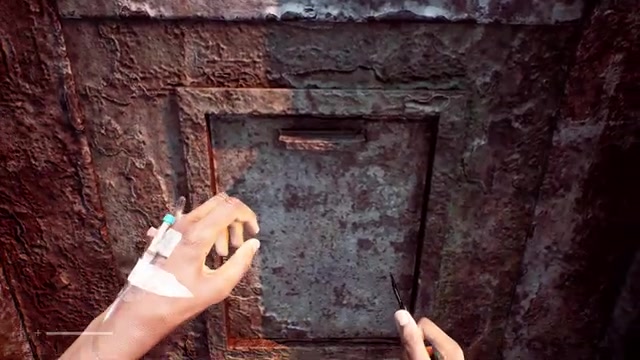
Throughout your exploration, you’ll find IV bags, first aid kits, and other medical supplies. These are your healing items. You can carry multiple copies (the game shows you can have up to four of some items). If you’ve got an IV bag and a syringe or needle, you can combine them into a usable medical item that heals you when equipped. Check your inventory frequently and combine items when prompted. Don’t use healing items carelessly; they’re rare, and you’ll need them for tougher encounters later.
Using the Phone to Save and Receive Story Updates#
Phones are scattered throughout the town. When you interact with a phone, you can dial different numbers:
- Coast Guard: Saves your game. You’ll hear a voice confirm the save.
- Operator services: May provide story information or unlock new dialogue (these services are often suspended, but they work at certain story points).
- Emergency services: Sometimes available; may provide hints or story progression.
Save frequently, especially before entering new areas or before you expect to encounter creatures. There’s no penalty for saving multiple times.
Reading Documents and Email for Story Context#
As you progress, you’ll find documents, emails, and medical records that flesh out the story. These aren’t required to beat the game, but they provide crucial context. For example, you’ll find:
- A triage report dated January 28th, 1996, showing “eight dead” at the clinic.
- Email messages from Jessica asking Zoe to call her back.
- A prescription note from the pharmacy indicating something was wrong with Zoe’s medical work.
- A resignation letter from Dr. Stevenson, dated February 10th.
Read these documents carefully; they hint at a medical crisis or conspiracy that led to the town’s current state.
Troubleshooting & Common Mistakes#
- Stuck on the pharmacy puzzle: Look at every sign and poster in the pharmacy and bathroom. The clues are visual, not written. Count hands, pills, days, and remaining items carefully.
- Can’t get past the fast creature: Don’t try to outrun it. Use the CRTV to watch its pattern, hide in doorways, or find an alternate route. Patience is more important than speed.
- Running out of health items: Avoid combat when possible. The game rewards stealth and evasion over fighting. If you’re low on health, find a safe room and save before proceeding.
- Flashlight dying too quickly: Use it sparingly. Turn it off when you’re in lit areas and only use it in dark hallways or rooms. Batteries are limited early on.
- Missing items in rooms: Examine every object you see. The game uses a dot indicator to show interactive items. Don’t rush through areas.
- Phone calls not working: Make sure you’re at a phone that’s actually connected. Some phones in the game are broken or disconnected. Try different phones if one doesn’t work.
- Unsure which direction to go: Check the map if you’ve found one. If you’re lost, backtrack to a familiar area and try a different path. The game doesn’t punish exploration.
- Creature keeps finding you in your hiding spot: Stay completely still and don’t make noise. Some hiding spots are better than others; try a different one if you’re discovered repeatedly.
Advanced Tips & Time Saves#
Creature Pattern Memorization: After watching a creature’s movement a few times, you’ll start to predict when it’s safe to move. The patterns are consistent, so once you learn them, you can move with confidence rather than hesitation. This saves time on repeat playthroughs.
Skipping Optional Exploration: While exploring is rewarding for story context, if you’re stuck and want to progress, focus on the critical path: phone calls, Zoe’s house, the pharmacy, and the clinic. These are the main progression points. You can always come back to side areas later.
Combining Items Early: If you’ve got an IV bag and a syringe, combine them immediately. A combined medical item heals you more effectively than using separate components. Don’t hoard raw materials.
Saving Before Puzzles: If you’re about to attempt a complex puzzle like the pharmacy code, save first. If you get it wrong, you can reload and try again without penalty. This reduces frustration.
Risky Strategy: Attempting to sprint past creatures without using the CRTV or hiding is almost always fatal. Only try this if you’re absolutely certain the creature is far away and you’ve a clear path. The risk far outweighs any time saved.
FAQ#
How do I save my game in Silent Hill: Townfall?#
Find a phone (usually in buildings or on the street) and interact with it. Dial the Coast Guard number, and a voice will confirm your save. You can save as many times as you want with no penalty. If a phone doesn’t work, try a different one; some are disconnected.
What does the CRTV device do?#
The CRTV is a signal detector that shows you where creatures are and helps you predict their movements. Use the D-pad to cycle through different signal frequencies and watch the screen to see creature positions. It’s essential for navigating past hostile creatures without fighting them.
How do I solve the pharmacy safe puzzle?#
The puzzle requires a four-digit code based on visual clues in the pharmacy and bathroom. Look for signs showing hands (answer: two), pills or items (answer: five), days or three objects (answer: three), and remaining pills (answer: nine). The code is likely 2539, but verify each clue visually in your playthrough.
Can I fight creatures, or do I have to hide?#
You can fight, but it’s not recommended early on. Weapons and ammo are rare, and creatures are dangerous. The game rewards stealth, evasion, and hiding over direct combat. Save your weapons for critical encounters or boss fights later in the game.
Where do I find the flashlight and batteries?#
The flashlight is in Zoe’s house, in an upstairs bedroom. Double-A batteries are also in the house, in a different room. Combine them in your inventory to get a working light. The flashlight uses battery power, so use it sparingly.
What do the phone numbers do, and which one saves the game?#
Different phone numbers connect to different services. The Coast Guard number saves your game. The Operator services number sometimes provides story information but is often suspended. Emergency services may be available at certain story points. Experiment with different numbers as you progress; some unlock new dialogue or hints.
Checklist#
- Wake up at the waterfront and explore the immediate area to find boats, docks, and buildings.
- Head toward the town square and check all nearby buildings (clinic, pharmacy, post office, shops) for items and clues.
- Find and read the map in the maps and prints building to understand the town layout.
- Answer the phone when it rings; this advances the story and unlocks the ability to run.
- Navigate to hotel room 204 and solve the calendar puzzle to unlock the room and collect the key.
- Collect medical supplies and items from the hotel room (IV bags, medical equipment).
- Escape the hotel via the elevator when the large creature appears; don’t try to fight it.
- Find and collect the CRTV signal device; this tool is essential for navigating past creatures.
- Locate Zoe’s house and search it thoroughly for the flashlight, batteries, nurse’s ID, and organ transplant card.
- Combine the batteries with the flashlight to create a working light source.
- Enter the pharmacy and examine all signs and posters to find visual clues for the safe puzzle (hands, pills, days, remaining items).
- Solve the pharmacy puzzle using the code derived from visual clues (likely 2539) and unlock the safe or door.
- Collect health items (first aid kits, IV bags) and combine them when prompted.
- Use the CRTV to navigate past the fast creature by watching its movement pattern and moving only when it’s safe.
- Enter the Shorefront Family Clinic and explore the patient records and medical documents.
- Save your progress frequently at phones by dialing the Coast Guard number.
- Read all documents and emails you find to understand the story and the town’s history.
- Proceed to the next major area or story beat once you’ve collected key items and solved the pharmacy puzzle.
Source & credit#
This guide draws on the excellent video walkthrough by theRadBrad — watch it for the full visual run-through, and give the creator your view:
https://www.youtube.com/watch?v=MyAikMI_ljYFollowing Silent Hill: Townfall? Get an email when we publish a new guide — or update one after a patch.