- Easy
- Difficulty
- 22 min
- Read time
- 15
- Steps
- 1.0
- Checked on

30-Second Quick-Start (TL;DR)
- Complete the opening convent sequence and awaken as Sophia in the plunderer settlement.
- Train combat basics with Irene: learn blocking, harrying (repeated attacks), and dual-weapon combos.
- Join the carnival heist mission: eliminate guards at the southern fort, open canal gates, signal from the church using mirrors.
- Escape the arsenal trap when the army ambushes; recover the treasure chest and flee to the hideout.
- Navigate the island using Sophia’s father’s book and visions as a map; follow stone markers and symbols.
- Solve environmental puzzles: climb ruins, use grapple points, find buried trap doors, and interpret frescoes.
- Collect relics and charms throughout exploration to unlock passive bonuses and new combat abilities.
- Reach the island’s inner sanctum and uncover the truth about the Minotaur, the crown, and Sophia’s father’s fate.
What This Guide Helps You Do
This walkthrough takes you through the full story of Resonance: A Plague Tale Legacy, from the opening convent escape through the final island exploration, teaching you how to navigate combat encounters, environmental puzzles, and narrative-driven sequences. You’ll learn where to find collectibles, which combat abilities to prioritize, and how to solve the book-based puzzle system that guides your path to the island’s treasure. This guide works best for players starting their first playthrough who want a clear, spoiler-aware path without missing major story beats or optional collectibles.
Requirements & Prep
No special items or unlocks are required to begin. The game opens with a tutorial-heavy sequence that introduces all core mechanics naturally. You start with basic sword and shield combat, and new abilities unlock as you progress through story missions.
Combat control notes: The game uses a directional blocking system (hold sword high and firm), timing-based harrying attacks (rapid strikes that destabilize enemies), and combo finishers with daggers. The tutorial teaches these as you encounter them, so no pre-game setup is needed.
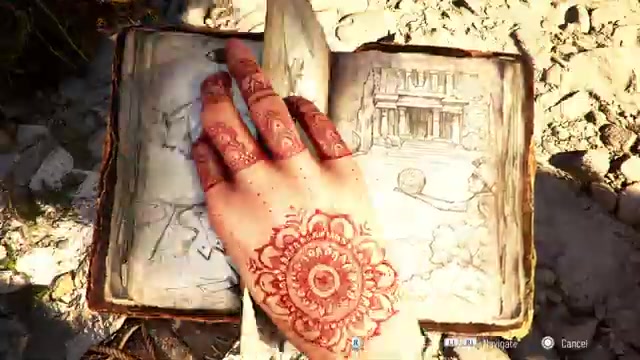
Book and visions: Sophia’s father’s illustrated book becomes your primary navigation tool mid-game. It shows symbols, landmarks, and the island’s layout. Keep it accessible in your inventory—you’ll reference it often to match real locations with sketched symbols.
Route Overview
Resonance: A Plague Tale Legacy follows a linear narrative structure with two major phases: the settlement-based story (training, carnival heist, hideout betrayal) and the island exploration (puzzle-solving, environmental navigation, treasure hunt). The opening establishes Sophia as a young plunderer raised by the gang after surviving a convent. You train with Irene, participate in a high-stakes carnival heist to steal a key from the arsenal, and survive an army ambush that destroys your hideout. From there, you and Lenny use Sophia’s father’s book to navigate the island, solve symbol-based puzzles, climb ancient ruins, and uncover the truth about the Minotaur’s treasure and Sophia’s connection to the island’s visions.
The flow is: Opening → Training → Carnival Heist → Hideout Destruction → Island Navigation → Ruin Exploration → Treasure Revelation. Combat encounters are scripted and story-driven, not procedural; expect intense set-pieces between puzzle sections.
Step-by-Step Walkthrough
The Opening: Convent Escape and Reunion
The game begins with a flashback to Sophia’s childhood at a convent, where she and other children were subjected to mysterious experiments by nuns. The opening cinematic shows her surviving and being rescued by her father, Alec. After the cutscene, you regain control as adult Sophia in the plunderer settlement. Everything here is linear—follow the path marked by NPCs, sprint when prompted, and soak in the character introductions. You’ll meet Ezra (a mentor figure), Irene (the combat trainer), and Pharaoh (the gang leader). These sequences are story-heavy; combat doesn’t begin until training.
Combat Training with Irene
Irene teaches you the core combat loop through a series of sparring matches. The tutorial covers three key mechanics:
- Blocking: Hold your sword high and firm to defend against incoming attacks. Blocking gives you time to analyze your opponent’s patterns.
- Harrying: Perform repeated attacks in quick succession to destabilize enemies. Once an enemy is destabilized, they become vulnerable to finishing moves.
- Dual-weapon combos: After establishing dominance with your sword, switch to a dagger for high-damage finishing strikes. A sword keeps you alive; a dagger wins the fight.
Practice these three mechanics in the sparring matches. Each fight introduces one concept, then combines them. Irene is intentionally difficult—don’t expect to win easily. The goal is to learn the rhythm, not to dominate. Once you’ve sparred with Irene, you’ll face Lenny and then a public fight against Safia at the pit. These are scripted victories; you’ll win as long as you land hits and don’t panic.
The Carnival Heist: Preparation and Briefing
After training, Pharaoh calls a meeting and reveals the plan: steal the island’s key from the arsenal during the carnival festivities. Your role is critical. You must eliminate guards at the southern fort, open the canal gates, climb the church, and signal Irene and Ezra using mirrors. This is a coordinated heist with multiple teams, and timing is everything. Pharaoh explains that the key is the final piece needed to access the Minotaur’s treasure on the island.
Before the heist, you’ll have a conversation with Safia (the fighter from the pit). She hints that Pharaoh is controlling and manipulative, that he’s keeping secrets about the island, and that Sophia should be leading, not following. This foreshadows later betrayals. For now, focus on the mission.
Carnival Heist: Infiltration and Guard Elimination
The heist begins at the carnival. You and Safia must blend in with the crowd, avoid guards, and reach the southern fort. The game guides you with cloth markers on the ground—follow these to stay on the intended path. You’ll pass through crowded carnival areas, dodge checkpoint guards, and slip through narrow passages. When guards stop you, use the “blend in” mechanic by standing still or moving casually. If you’re caught, you’ll have to fight or flee.
Once you reach the fort, eliminate guards silently or in combat. The game doesn’t penalize you for being seen here—it’s an expected combat encounter. Use the mechanics you learned: block incoming attacks, harry to destabilize, and finish with daggers. After clearing the area, open the canal gates as instructed. This triggers the next phase.
Carnival Heist: Church Climb and Mirror Signaling
Climb the church as instructed. Once at the top, you’ll use mirrors to signal Irene and Ezra. The mechanic is straightforward: aim your mirror at the signal sources and reflect light to communicate. The game tells you which signals to target and in what order. Reflect the light correctly, and you’ve completed your part of the heist. Ezra’s team will then attack the arsenal from the rooftops.
The Arsenal Ambush and Escape
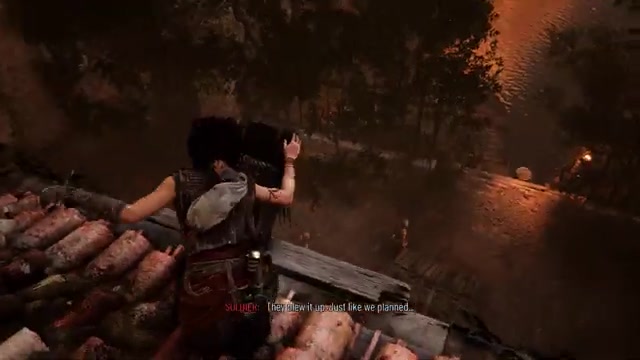
As Irene’s team infiltrates the arsenal and sets the powder depot ablaze, the army reveals itself. It’s a trap. Pharaoh was betrayed—someone told the army about the plan. Suddenly, you’re surrounded and under fire. Combat becomes frantic and desperate.
Fight through waves of soldiers. Use the same blocking and harrying tactics, but be aggressive—hesitation costs lives. You’ll notice allies falling around you. Ezra dies in this sequence, sacrificing himself to help you escape. After intense combat, you’ll be forced to flee. Follow the on-screen prompts to escape the arsenal and make your way back to the hideout.
During the escape, you’ll have a brief moment with Ezra before he dies. He tells you to leave, to get the chest to safety. This is an emotional beat; take it in. The game won’t let you save him—the sequence is scripted.
The Hideout Betrayal
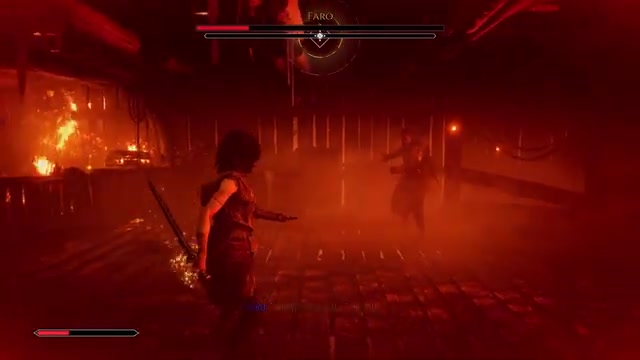
You return to the hideout with the treasure chest, only to find it under attack. The army has found the hideout and is burning it down. Pharaoh is inside, and he’s in a rage. He accuses Lenny of betraying the gang and stealing the chest. Lenny tries to explain that he was protecting it, but Pharaoh doesn’t listen. In a moment of fury, Pharaoh kills Lenny.
This is a turning point. Pharaoh has lost his mind, driven mad by obsession and loss. You escape with Safia and the chest, but the hideout is destroyed, the gang is scattered, and Lenny is dead. Safia suggests you open the chest and examine what’s inside. You discover it contains Sophia’s father’s illustrated book—filled with sketches of the island, symbols, landmarks, and a drawing of a sphere (the key).
Island Navigation: Using the Book
With the book in hand, you and Safia sail to the island. The book becomes your primary navigation tool. It shows symbols, landmarks, and the location of the island’s inner sanctum. As you explore, you’ll match real locations with the book’s sketches. The book has several key symbols:
- The W symbol (or crown symbol): Marks a stone slab or marker.
- Columns and arches: Indicate ruins or ancient structures.
- The watchtower: A structure built by the gang to keep watch over the shore.
- The door: The entrance to the island’s inner sanctum.
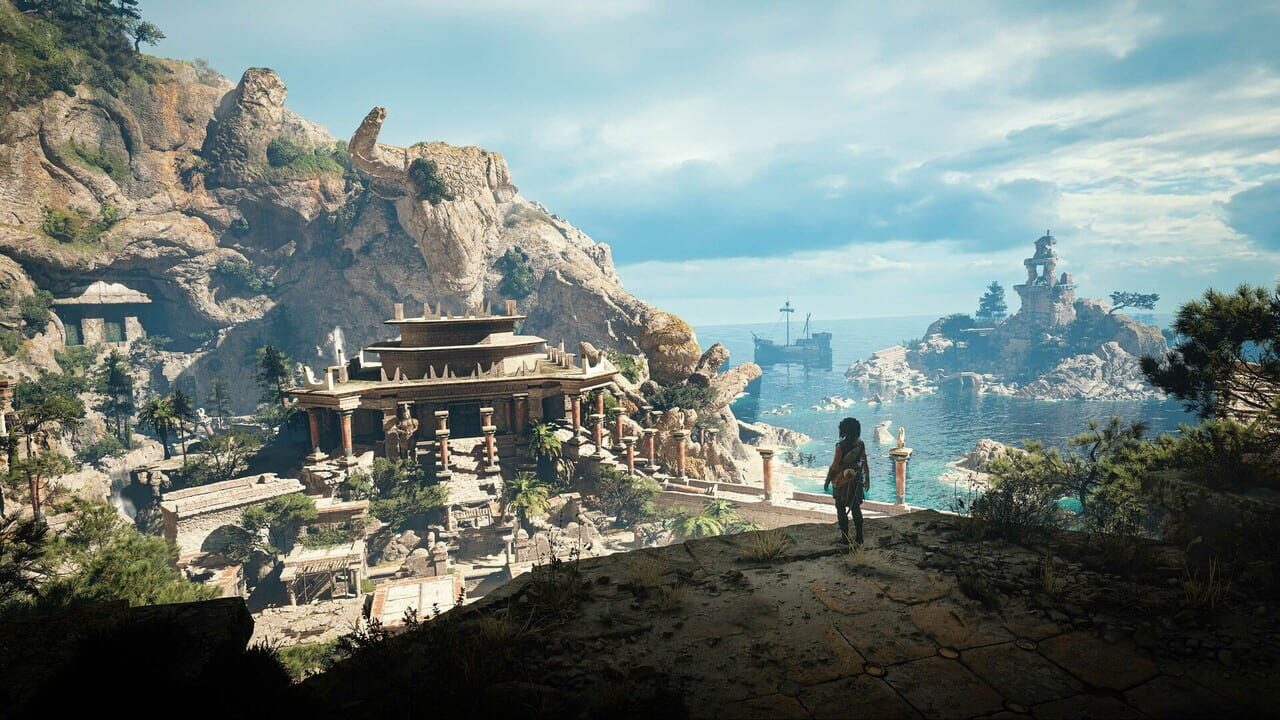
When you arrive on the island, you’ll find a boat stranded on the shore and a cave entrance. The book shows you where to go, but you must interpret the symbols and find them in the real world. This is the core puzzle mechanic of the island section: match the book’s sketches to real locations.
Island Exploration: Ruins and Climbing
After landing, explore the beach area. You’ll find several ruins, including broken columns and remnants of ancient buildings. The book shows a W symbol, which corresponds to a stone slab you’ll find partially buried in sand. Near this slab is a hand-shaped trap door—the gang’s secret passage into the island’s interior.
Open the trap door and descend into the tunnel. This passage leads deeper into the island, away from the main gate. As you progress, you’ll encounter more ruins, ancient structures, and frescoes (wall paintings) depicting warriors fighting for a crown. These frescoes tell the island’s history: ancient warriors fought for possession of the crown and the Minotaur’s treasure.
Climbing and Grapple Mechanics
The island has vertical sections that require climbing. You’ll see grapple points on cliffs and structures. Approach a grapple point and press the interaction button to climb. The game will guide you up the cliff or structure. Some areas have multiple grapple points—chain them together to reach higher elevations. If you fall, you’ll take damage but won’t die (unless you fall into a pit with no recovery option). Be cautious near edges.
Puzzle Solving: Stone Markers and Symbols
As you explore, you’ll encounter stone markers with symbols. These markers correspond to sketches in the book. For example, if the book shows a W symbol next to columns and a giant rock, you’ll search the island for that exact configuration. Once you find the marker, it often reveals a clue or opens a new path.
One key puzzle involves finding a watchtower built by the gang. Climb to the top of this tower and look around. You’ll spot a red mask or marker partially buried in sand—this indicates another hidden passage or trap door. Dig it up or interact with it to reveal the next area.
The Village and Statue
Deep in the island, you’ll discover an ancient village with houses, structures, and a massive statue. The statue depicts a crowned warrior—the Minotaur or the ancient king. Frescoes in the village show warriors presenting a sphere (the key) to this statue or to the sun. This visual language tells you that the sphere is the key to unlocking the statue or the inner sanctum.
Explore the village thoroughly. You’ll find relics (collectibles that grant passive bonuses), charms (ability upgrades), and environmental clues. Some areas have beams or obstacles that require Safia to help you lift or move them. Work together to progress.
The Strange Dust and Visions
As you venture deeper, you’ll encounter strange, glowing dust that reacts to your movement. Sophia recognizes this dust—it’s the same substance from the chest on the boat, the same substance the nuns used in their experiments at the convent. This dust triggers her visions.
When you walk through the dust slowly, nothing happens. But when you move quickly, the dust glows and swirls around you, and Sophia experiences visions. These visions show ancient warriors, the Minotaur, and the trials they faced to claim the crown. The visions are brief but reveal the island’s true purpose: it’s a place of trials, a testing ground for worthy warriors.
The Trials and the Minotaur
As you progress deeper into the island, you’ll encounter a ceremonial chamber. A voice—ancient and powerful—speaks of three trials, each deadlier than the last. Warriors who wish to claim the crown must face these trials and defeat the Minotaur itself. The voice warns that only one warrior will prevail and enter the Minotaur’s lair to claim the treasure.
This is atmospheric storytelling; no immediate combat occurs. But it sets the stage for the final confrontations ahead. Sophia realizes that her visions, her connection to this island, and her father’s obsession are all tied to this place. She was drawn here her entire life.
Final Exploration and Treasure Discovery
Continue exploring the inner sanctum. You’ll find more frescoes, more ancient structures, and more clues about the Minotaur and the crown. The book guides you toward the treasure chamber. Along the way, you’ll solve final puzzles: moving beams, interpreting symbols, and climbing to new heights.
Eventually, you’ll reach a chamber where you see the crown—the treasure everyone has been fighting for. But the crown isn’t alone. Frescoes show multiple warriors claiming the crown, multiple kings, all fighting for the same prize. The crown represents power, wealth, and dominion. It’s what drove Pharaoh to obsession, what led your father to his death, and what has brought you to this island.
The game doesn’t force you to take the crown immediately. You can examine the chamber, read the frescoes, and absorb the weight of what you’ve discovered. Sophia realizes that her father died here, that the gang’s obsession with the island cost many lives, and that the crown—the treasure—may not be worth the price.
Combat Mechanics Deep Dive
Blocking and Defense
Blocking is your foundation. Hold your sword high and firm to defend against incoming attacks. While blocking, you’re not taking damage, but you’re also not attacking. Use blocking to analyze your opponent’s patterns: Do they attack high or low? Do they feint before committing? Once you understand their rhythm, you can counter.
Harrying: The Destabilization Strategy
Harrying means performing repeated attacks in quick succession. Each hit counts toward destabilizing your opponent. Once an enemy is destabilized, they become vulnerable—their guard drops, their stance wavers, and they’re open to a finishing move. The key is timing: don’t just spam attacks. Wait for an opening, then unleash a flurry of strikes. The enemy will try to block or dodge, but if you’re aggressive enough, you’ll break through.
Dual-Weapon Combos
After destabilizing an enemy with your sword, switch to a dagger for a finishing strike. Daggers deal high damage but leave you vulnerable if you miss. Time your dagger strikes carefully. The game rewards precision: a well-timed dagger strike can one-shot weakened enemies. If you miss, you’ll be punished, so only commit to dagger strikes when you’re certain the enemy is destabilized and vulnerable.
Combat Rhythm and Flow
Combat in Resonance: A Plague Tale Legacy is about rhythm. Block, analyze, harass, destabilize, finish. Repeat. Don’t panic when surrounded by multiple enemies. Focus on one enemy at a time. Block their attacks, harass them until they’re destabilized, then finish them. Once they’re down, move to the next target. Positioning matters—try to keep enemies in front of you, not behind. Use environmental objects (walls, pillars) to limit how many enemies can attack you at once.
Builds & Loadouts
Starting Loadout
You begin with a basic sword and shield. This is your primary weapon throughout the game. As you progress, you’ll unlock new abilities and charms that modify your combat effectiveness.
Ability Unlocks (Earned Through Story Progression)
As you complete missions and earn points, you’ll unlock new combat abilities:
- Heroic Surge: Killing an enemy with a critical strike grants a brief surge of protection, absorbing the next hit completely. This is a defensive ability that rewards aggressive play.
- Bull Breaker Kick: A powerful kick that deals significant damage and can knock enemies back. Useful for crowd control.
- Hero Step: A mobility ability that lets you dodge or reposition quickly.
- Momentum Strike: Deals bonus damage after a successful critical strike, rewarding precise timing.
Charms and Passive Bonuses
Charms are passive items that grant permanent bonuses. You’ll find charms as collectibles on the island. Some examples:
- Charm (Slight chance to do more damage with a critical strike): Increases your damage output on precise hits.
- Charm (Slight chance that a throwable falls from a killed enemy): Grants occasional free throwable items when you defeat enemies.
Charms are cumulative—each one you collect stacks with others, gradually improving your overall effectiveness.
Collectibles and Relics
What Are Relics?
Relics are historical artifacts scattered throughout the island. They’re not required for progression, but collecting them enriches the story and may unlock bonuses. The first relic you’ll encounter is a shiny seashell that Sophia’s father used to bring her as a child. Finding it triggers a memory and deepens your connection to the story.
Where to Find Relics
Relics are hidden in optional areas, often off the main path. Explore thoroughly—check side passages, climb to high areas, and examine structures carefully. The game rewards curiosity. If you find a dead end, backtrack and try a different direction. Some relics are buried in sand and require you to dig or interact with them.
Relic Benefits
The exact benefits of collecting relics aren’t fully detailed in the preview, but they likely grant passive bonuses, unlock story content, or provide currency for ability upgrades. Keep an eye out for them, but don’t feel pressured to find every single one—the game is playable and enjoyable without 100% completion.
Troubleshooting & Common Mistakes
- Mistake: Panic-blocking against multiple enemies. Fix: Focus on one enemy at a time. Block their attacks, harass them, finish them. Once they’re down, move to the next target. Positioning is key—use walls and pillars to limit how many enemies can reach you simultaneously.
- Mistake: Committing to dagger strikes too early. Fix: Only switch to a dagger after you’ve clearly destabilized an enemy. If you switch too early, you’ll be vulnerable and punished. Patience is rewarded in this game.
- Mistake: Ignoring the book during island exploration. Fix: The book is essential. Regularly check it to see which symbols you’re looking for and where they might be located. Match real locations to sketched symbols. If you’re lost, consult the book.
- Mistake: Rushing through dialogue and story beats. Fix: This game is narrative-heavy. Take time to absorb the story, listen to character conversations, and enjoy the world-building. Rushing will make you miss important plot points and emotional moments.
- Mistake: Missing hidden passages and trap doors. Fix: Explore thoroughly. If you see a hand-shaped marker or unusual ground texture, interact with it. The gang left markers and hidden passages throughout the island—finding them often leads to shortcuts or collectibles.
- Mistake: Not upgrading abilities when you’ve enough points. Fix: Prioritize survivability early (Heroic Surge), then branch into damage or utility. Don’t hoard points—upgrade as you go to stay competitive in combat.
- Mistake: Ignoring the strange dust and visions. Fix: The dust is a puzzle mechanic. Move quickly through it to trigger visions and progress the story. These moments are intentional and reveal important lore.
- Mistake: Forgetting to use Safia’s help for environmental puzzles. Fix: Some beams or obstacles require both you and Safia to solve. If you’re stuck, ask Safia for help or look for a prompt to interact with her.
Advanced Tips & Time Saves
Combat Flow Optimization
Once you’re comfortable with the combat rhythm, you can speed up encounters by being more aggressive. Don’t play defensively—block just enough to survive, then immediately counter-attack. Aggressive play destabilizes enemies faster and ends fights sooner. This is risky if you’re low on health, but it’s effective once you’ve mastered the timing.
Grapple Point Chaining
When climbing structures with multiple grapple points, chain them together smoothly without stopping. The game rewards fluid movement. Don’t hesitate between grapple points—commit to the climb and maintain momentum.
Symbol Matching Speed Run
If you’re replaying the island section, you can speed up the symbol-matching puzzles by memorizing the key locations. The W symbol is always near a stone slab. The watchtower is always on a high point overlooking the shore. Columns and arches are always near ruins. Knowing these patterns lets you navigate faster on subsequent playthroughs.
Collectible Hunting
Relics and charms are scattered throughout the game. If you’re going for 100% completion, explore every side passage and dead-end. The game doesn’t penalize you for backtracking, and thorough exploration often reveals hidden areas with multiple collectibles. Take your time and enjoy the world-building.
FAQ
How do I defeat enemies in combat?
Use the block-harass-finish cycle: hold your sword high to block incoming attacks, then perform repeated attacks (harrying) to destabilize your opponent. Once they’re destabilized, switch to a dagger for a high-damage finishing strike. Repeat this cycle until all enemies are defeated. Focus on one enemy at a time, and use positioning to limit how many enemies can attack you simultaneously.
Where do I find the island’s key?
The key is the sphere shown in the book’s sketches. It’s located in the treasure chamber deep within the island’s inner sanctum. You don’t “find” it in the traditional sense—you discover it as part of the story progression. The carnival heist gives you a chest containing the book, which guides you to the island. Once on the island, you follow the book’s symbols and landmarks to reach the inner sanctum where the key (sphere) is revealed.
What does the strange glowing dust do?
The glowing dust triggers Sophia’s visions when you move quickly through it. This dust is the same substance from the convent experiments, and it reacts to your movement speed. Moving slowly through it has no effect, but moving quickly causes it to glow and swirl, triggering visions of ancient warriors and the island’s history. These visions are story moments that reveal lore and progress the narrative.
Can I save Ezra during the arsenal ambush?
No, Ezra’s death is scripted and unavoidable. He sacrifices himself to help you escape the arsenal. This is a key story moment that demonstrates the cost of Pharaoh’s obsession and sets up the emotional weight of later events. Accept it as part of the narrative.
What happens if I die during combat?
If you die, you’ll respawn at the last checkpoint. The game doesn’t have a traditional “game over”—it resets the encounter and lets you try again. Use each attempt to learn enemy patterns and refine your strategy. Combat encounters are designed to be challenging but fair; persistence and pattern recognition are rewarded.
Checklist
0 of 20
Source & credit
This guide draws on the excellent video walkthrough by theRadBrad — watch it for the full visual run-through, and give the creator your view: