- Easy
- Difficulty
- 23 min
- Read time
- 15
- Steps
- 1.0
- Checked on
30-Second Quick-Start (TL;DR)
- Complete the carnival heist by eliminating guards at the southern fort, signaling from the church, and opening canal gates for your crew.
- Escape the betrayed arsenal raid with the treasure chest and regroup at the den.
- Recover your father’s illustrated book from the ruins and learn the key is a mysterious sphere.
- Navigate the island’s ancient ruins, solve light-based puzzles using gilded pedestals and spheres, and progress through three deadly trials.
- Avoid spike traps by following cloth markers and light patterns; work with Lenny to activate levers and cross platforms.
- Confront soldiers and the awakening beast in the trial arena while pushing toward the final chamber.
- Keep moving forward—the island calls to Sophia, and turning back guarantees death.
What This Guide Helps You Do
This guide walks you through Resonance: A Plague Tale Legacy’s story progression from the carnival heist through the island’s ancient trials. You’ll understand the narrative beats, solve environmental puzzles, survive combat encounters, and reach the game’s climactic revelation. It’s designed for players who want to follow the story without missing key details, understand puzzle mechanics, and know what to expect in each major set piece.
It’s best for first-time players and those returning after a break who want context on what happens and why.
Requirements & Prep
You’ll need access to the carnival city (unlocked automatically in story), a weapon (sword and dagger learned through training), and the illustrated book your father created (recovered during the island exploration). The game provides all combat training through Irene’s tutorials before the heist begins.
No special items are required to progress, though the book itself becomes crucial for understanding the island’s layout and puzzle solutions. Stamina management matters during extended combat and climbing sequences—pace yourself through longer encounters.
Route Overview
Resonance: A Plague Tale Legacy’s climactic sequence unfolds across three major acts. First, you execute a coordinated heist during the carnival festivities: eliminate guards, signal from the church, and open gates while your crew creates a diversion at the arsenal. The heist goes catastrophically wrong—someone betrayed the plan, soldiers were waiting, and most of your crew dies, including Ezra. You escape with the treasure chest and make it back to the den, only to find Pharaoh has turned paranoid and violent, blaming you for the betrayal.
Second, you recover your father’s illustrated book from the wreckage and discover the “key” everyone fought over is actually a sphere—an artifact that unlocks doors on an ancient island. With Lenny, a fellow plunderer, you sail to the island and begin exploring ruins that hint at a vast ancient civilization. You solve light-based puzzles, navigate crumbling temples, and piece together that this island once hosted a tournament where warriors fought for a king’s crown and treasure.
Third, you descend into the island’s trial chamber, where you face three progressively deadly tests: environmental puzzles with spike traps, combat encounters against soldiers who followed you, and finally, the awakening of the beast itself—the legendary Minotaur that killed your father. Sophia’s visions and the symbols in her father’s book guide you throughout.

Step-by-Step Walkthrough
The Carnival Heist Setup
Pharaoh briefs you and the crew on the plan. Your role is precise: eliminate guards at the southern fort without alerting the entire garrison, open the canal gates to let Irene and Ezra’s teams enter, climb the church, and signal when everything’s in position. The carnival’s chaos provides cover—crowds and festivities mean soldiers can’t secure the entire city. Irene will set fire to the powder depot as a diversion; Ezra’s team will strike the arsenal from the rooftops. Timing is everything.
Before you move, Pharaoh emphasizes that this is your role—stick to it. You want to go further, but he refuses to let you near the island itself. This tension matters; Pharaoh is keeping secrets about your past and the island, and you’re growing frustrated with being sidelined.
Eliminate the Southern Fort Guards
Move to the southern fort during the carnival. Guards are stationed but distracted by the festivities. You need to kill them silently and quickly without raising an alarm. Use your sword and dagger as trained. The first few guards are isolated—take them down one by one. Once you’ve cleared enough, move to the canal gate mechanism.
Stay aware of guard patrol patterns. If you’re spotted, soldiers will converge and the mission fails. Work methodically; there’s no timer pressure here, only the need for stealth.
Open the Canal Gates
Once the guards are down, locate the gate controls. Activate them to open the canal, allowing Irene and Ezra’s teams to enter with equipment and reinforcements. This signals to the rest of the crew that the southern approach is clear.
Navigate to the Church Through the Carnival
With the gates open, make your way through the carnival crowds to reach the church. You’ll pass checkpoints where soldiers ask for carnival permits. Blend in with the crowd—this isn’t combat; it’s stealth through social spaces. Follow cloth markers laid out by your crew to guide you through the city. The markers are small pieces of fabric tied to structures; they form a path directly to the church.
At one checkpoint, a soldier stops you and Lenny for inspection. Stay calm, play along with the carnival spirit, and move through. If you’re wearing a mask, keep it on until you’re past the guards. One checkpoint guard tries to search you—let him, then move on. The guards are bored and distracted; they’re not expecting trouble.
When fireworks light up the sky, that’s Irene’s signal—the powder depot’s about to ignite. Keep moving. The chaos will draw attention away from you.
Climb the Church and Signal
Reach the church and climb to the roof. From this vantage point, you can see the arsenal and the positions of Ezra’s team on nearby rooftops. Wait for Irene’s explosion. When the depot ignites, you’ll see flames and smoke. That’s your cue—light a signal fire or beacon to tell Ezra’s team to attack. The explosion creates the perfect moment of confusion.
Once you’ve signaled, your part is done. Head back to the boats and return to the den. The crew should be bringing the treasure chest back with them.
The Ambush and Escape
When you return to the den, you discover the heist was a trap. Soldiers were waiting at the arsenal. Your crew fought back, but most died. Ezra is dead. The army knew your plan—someone betrayed you to them. The den is under attack; soldiers are burning it down and killing anyone they find.
You fight your way through soldiers to protect the treasure chest and the book. Pharaoh is alive but furious and paranoid. He suspects you of being the traitor because you were the only one at the church, away from the fighting. He accuses you of selling out the crew to the army. You didn’t, but he won’t listen. In his rage, he turns on you, and you’ve got to escape with Lenny and the chest before he kills you.
Grab the book—your father’s illustrated journal—and get out. This is a chase sequence. Run, fight when necessary, and reach the boats. Soldiers pursue you, but you and Lenny make it to the water and escape before the den is completely overrun.
Examine the Book and Discover the Key
Once safe on the boat, open the book your father created. It’s filled with sketches, watercolors, and notes about the island. You see drawings of the landscape, structures, and symbols. Most importantly, you find a detailed illustration of a sphere—the key everyone’s been fighting for. Your father knew about this artifact. He was searching for it, and his visions (which you inherited) led him there. Pharaoh found the book and used it to organize expeditions to the island, but he kept the full truth from you.
The book also shows a massive door, which you recognize from your own visions. You’ve been seeing this place in dreams since childhood, though you didn’t understand why. Now it’s clear: the island’s been calling to you, and the sphere is the tool that opens its secrets.
Sail to the Island
With Lenny, you sail to the island where your father died. The journey is tense—you can see the army’s ships approaching. You’ve got a head start, but not by much. As you near the shore, you spot a massive cave entrance and a stranded boat. The scale of what’s here is overwhelming. This place is ancient, far older than anything in the city, and it’s been waiting for someone to unlock its doors.
Explore the Ruins and Find the Path
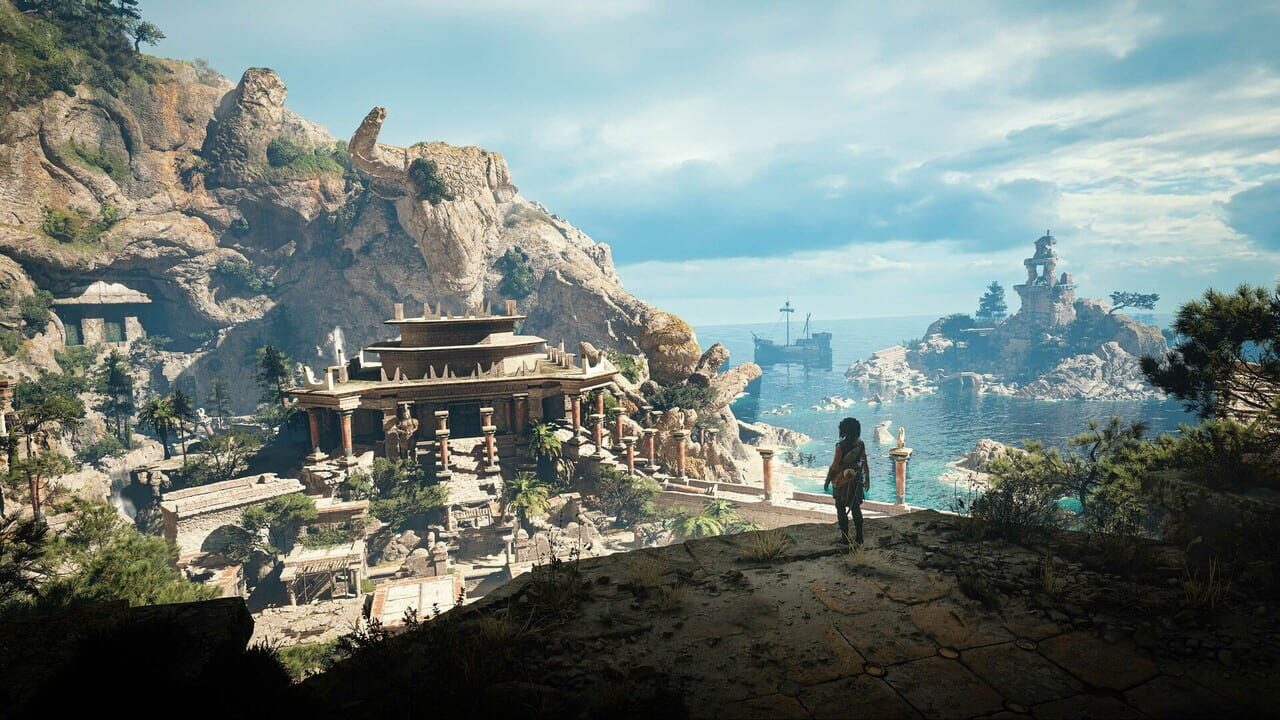
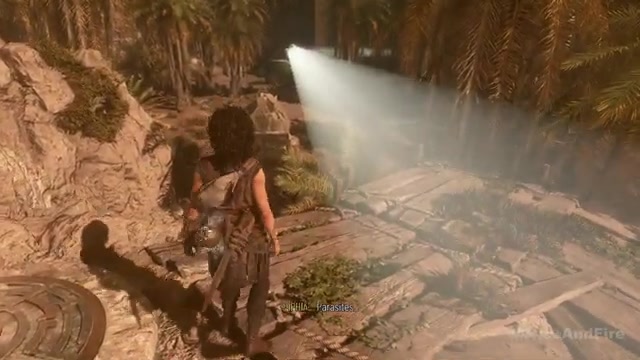
Beach the boat and begin exploring. You’ll find ruins of a civilization—broken columns, stone slabs, and remnants of buildings. These aren’t recent structures; they’re centuries old, possibly from an ancient Greek or Hellenistic culture. Your father was here before; his crew left marks and cloth strips to guide future expeditions.
Follow the cloth markers as they lead inland. You’ll pass an oddly shaped tree (which you remember from visions), discover an engraved gemstone showing a man jumping over a bull (the Minotaur symbol), and eventually reach a cliff face. The markers guide you up. Climb carefully—there are handholds, and Lenny can help pull you up if you need it.
At the top, you’ll find more ruins and a stone slab. This is the entrance to the trial chamber. But before you can descend, you need the sphere—the key. Your visions show you where to look, and Lenny spots a hand emerging from the sand. Dig carefully and uncover a trapdoor. This is where your crew hid the sphere and carved tunnels to bypass the main gate.
Recover the Sphere and Enter the Temple
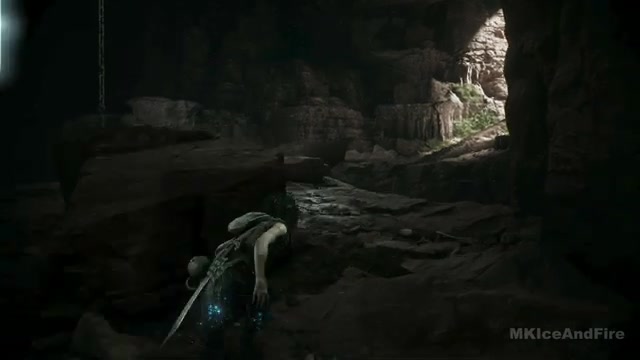
Open the trapdoor and descend into the tunnel network. It’s dark and narrow, carved by hand over many years. Follow the passage until you reach a larger chamber—the gang’s hideout on the island. You’ll see supplies, equipment, and personal items left behind by crew members who never made it back. One object stands out: Ezra’s game board, his favorite possession. He taught you how to play when you were a child, and no one could beat him except you. Seeing it here, unfinished, drives home the cost of Pharaoh’s obsession.
Continue deeper and you’ll emerge into a vast underground chamber. This is where the trials are. You see an enormous statue of a king wearing a golden crown, and below it, massive stone structures that hint at mechanisms and puzzles. This is the heart of the island—the treasure everyone died for, and the beast that guards it.
Solve the Light-Based Puzzles
The trials are built around light and spheres. You’ll encounter gilded pedestals and sockets that accept the sphere you’re carrying. When you place the sphere in a socket, it acts like a lens, directing sunlight (or magical light from the ancient mechanism) to activate doors, platforms, and mechanisms.
In the first puzzle chamber, you’ll see frescoes on the walls showing warriors in a tournament, fighting each other and a creature—the Minotaur. These images tell the story of what happened here centuries ago. Warriors competed for the crown and treasure, and the beast was their final test.
Place the sphere in the first gilded socket. Light will refract through it, illuminating a door or passageway. Move forward. You’ll encounter more sockets and more puzzles. Some require you to position the sphere to reflect light onto specific targets. Others require you to move heavy stone blocks or activate levers. Lenny helps you lift and position objects. Work together—if one of you is holding a light source or sphere in place, the other can move to the next puzzle element.
As you progress, you’ll see more frescoes. One shows the beast emerging from the earth, destroying a city. Another shows warriors with spheres, suggesting they understood how to use these artifacts. The puzzles grow more complex, requiring you to chain multiple light reflections or activate multiple levers in sequence.
Navigate the Spike Trap Corridor
One major obstacle is a corridor filled with spike traps in the floor. These are lethal—one misstep and you’re done. However, your father’s book contains a drawing of this exact corridor, showing the safe path. The key is to follow the cloth markers your crew left behind, or to observe the pattern of the traps and step only where it’s safe.
The traps are triggered by weight or pressure. If you step on a trapped tile, spikes shoot up. You must move deliberately and carefully. Lenny will guide you if you hesitate. In some sections, you need to move a light source to illuminate the safe path, then cross while it’s lit. In others, you simply follow the markers.
If you make a mistake, you’ll take damage. If you fall into a pit of spikes, Lenny will try to pull you out or help you recover. Don’t panic—there are usually multiple attempts before the trap becomes truly inescapable.
Descend into the Trial Arena
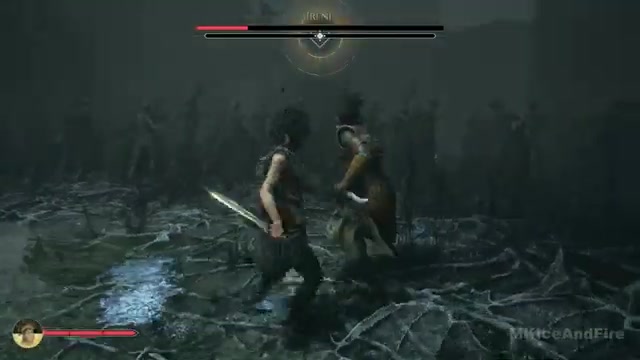
After navigating the puzzles and traps, you reach a massive underground arena. This is where the trials take place. Soldiers from the army have caught up and are pursuing you. Combat erupts. You and Lenny fight together against multiple opponents. Use your sword for defense and your dagger for quick strikes. The arena provides cover—pillars and structures you can use to break line of sight and reposition.
During this combat, the ground shakes. Something massive is awakening below. Soldiers panic and retreat. A sound like breathing echoes through the chamber. The beast is real, and it’s coming.
Face the Beast
The Minotaur emerges from a pit in the center of the arena. It’s enormous, far larger than any creature should be. It has the head of a bull and a humanoid body, but it’s also wrong—tentacles or tails writhe from its back. This isn’t just a monster; it’s something ancient and supernatural, born from the island’s dark magic.
You can’t kill it in a traditional fight. Instead, you need to keep moving and activate the final mechanisms. The arena has rings or platforms that you can activate using the sphere. As you place the sphere in sockets around the arena, doors open and new paths appear. The beast pursues you, but it’s slow and massive—you can outmaneuver it by running and climbing.
Lenny stays close and helps you when soldiers try to flank you. Together, you activate the final sequence. The beast roars, the chamber shakes, and a path to the treasure chamber opens. You run for it, Lenny behind you, and the beast follows but can’t fit through the narrow passages you use to escape.
Reach the Final Chamber
You emerge in the treasure chamber. The king’s crown sits on a pedestal, surrounded by gold and artifacts. This is what everyone died for—the symbol of ancient power and wealth. But it’s also a tomb. Skeletons and bones litter the chamber, evidence of warriors who fell in the trials centuries ago, and crew members from recent expeditions who didn’t survive.
Sophia feels something profound here. The island’s been calling to her, and now she understands why. Her father died here searching for this place and its secrets. Her visions were echoes of the past, imprinted on her by the blood experiments the nuns performed at the convent. The island, the beast, the trials—they’re all connected to her bloodline and her purpose.
Lenny asks if you want to leave. You can take the crown and the treasure, or you can stay and learn more. The choice is yours, but you know you can’t stay long—the army is still on the island, the beast is still hunting, and the chamber won’t remain stable forever.
Boss / Set-Piece Strategy: The Beast Arena
Phase One: The Awakening
Trigger: You descend into the arena and soldiers attack. As combat escalates, the ground shakes and the beast emerges from a central pit.
What to do: Don’t try to fight the beast directly. Instead, focus on surviving soldier encounters while staying mobile. The beast is slow but relentless. Keep distance and use the arena’s pillars and structures as cover. When soldiers attack, eliminate them quickly—use your dagger for finishing moves to conserve stamina.
Safe punish windows: After the beast charges, it takes time to turn. This is when you can run past it or activate nearby mechanisms. Soldiers often cluster near pillars—use area attacks or bait them into the beast’s path.
Phase Two: Activating the Mechanisms
Trigger: Once you’ve cleared enough soldiers, look for gilded sockets around the arena. These are the same light-based puzzles you’ve been solving. The sphere activates them.
What to do: Lenny will point out the sockets or mechanisms. Run to each one and place the sphere (or activate it if the sphere’s already nearby). As each mechanism activates, a door or platform opens. The beast will pursue you, but it can’t navigate the narrow passages. Use this to your advantage—activate a mechanism, run through the opened door, and let the beast slam into the closed passage behind you.
Timing: Don’t linger at a mechanism. Activate it quickly and move. The beast is faster than it looks, and soldiers may try to stop you. Keep momentum.
Phase Three: The Escape
Trigger: After activating the final sequence, the arena begins to collapse or a new path opens. The beast roars and pursues one last time.
What to do: Run. Don’t fight. The beast is too large to fit through the narrow passages you use to escape. Lenny will follow. Sprint toward the exit, jump over obstacles, and don’t stop until you’re in the treasure chamber. If soldiers block your path, eliminate them quickly—a quick dagger strike is faster than a drawn-out sword fight.
If you get caught: The beast’s attacks are powerful and will stagger you. If you’re hit, roll away and create distance. Lenny can help pull you up or distract the beast. Prioritize reaching the exit over defeating enemies.
Builds & Loadouts
You fight with a sword and dagger throughout the game. These are your only weapons, and the game teaches you how to use them through training with Irene before the heist.
Sword: Your primary weapon. It’s slower but deals more damage and has better reach. Use it for blocking and parrying multiple attacks. Holding your sword high and firm gives you a defensive stance that can withstand several hits.
Dagger: Your secondary weapon. It’s faster and deals less damage, but it’s crucial for finishing moves and quick strikes. When an enemy is stunned or vulnerable, a dagger strike is lethal and efficient. Irene teaches you that “a dagger wins the fight”—use it to end encounters quickly.
Combat flow: Block or parry incoming attacks with your sword to destabilize the enemy. When they’re vulnerable, switch to your dagger for a finishing blow. Parrying multiple attacks in a row destabilizes enemies faster, giving you more opportunities for punishes. No mercy—strike hard and don’t give enemies time to recover.
Troubleshooting & Common Mistakes
- Getting lost in the ruins: Follow the cloth markers. Your crew left them to guide future expeditions. If you don’t see one, look around carefully—they’re small and can be tied to trees, rocks, or structures. Lenny will sometimes point them out if you’re stuck.
- Failing the spike trap corridor: Move slowly and deliberately. Watch for the pattern of traps or follow the marked safe path. If you’re uncertain, ask Lenny for guidance—he’ll tell you if a path is safe. Don’t rush; the traps are the only obstacle here, and there’s no time limit.
- Running out of stamina during combat: Stop attacking and let your stamina regenerate. Block or dodge instead of striking. Dagger attacks regenerate stamina faster than sword attacks, so switch weapons if you’re low.
- Soldiers blocking your escape route: Eliminate them quickly with dagger finishers. Don’t waste time on prolonged fights. A quick kill is better than a long battle when you’re trying to escape.
- Not understanding puzzle mechanics: The book shows you solutions. If you’re stuck on a light puzzle, check your father’s sketches—they often illustrate how to position the sphere or activate mechanisms. Lenny also hints at solutions if you wait long enough.
- Beast catching you in the arena: You can’t outrun it forever, but you can outmaneuver it. Use pillars and structures as cover. The beast is large and can’t fit through narrow passages—use this to escape.
- Losing Lenny during combat: He’s durable and will recover if knocked down. Keep fighting and he’ll get back up. If he’s being targeted by multiple soldiers, help him by eliminating threats nearby.
- Missing story dialogue or cutscenes: The game progresses automatically. If you skip dialogue, you’ll miss context. Pay attention to what Pharaoh, Irene, and Lenny say—they explain the plan, the island’s history, and your character’s motivations.
Advanced Tips & Time Saves
Dagger finishers are always faster than prolonged sword fights. If an enemy is stunned, vulnerable, or low on health, switch to your dagger immediately. A single lethal strike ends the fight faster than any sword combo. This is especially true during the arena combat where you’re fighting multiple soldiers simultaneously.
Parrying multiple attacks builds a “destabilize” meter faster than blocking. When multiple enemies attack, parry each strike instead of blocking. This keeps you mobile and builds the destabilize counter, giving you faster opportunities for dagger finishes. Blocking keeps you stationary and drains more stamina.
Use the environment during the carnival infiltration. The crowds are your cover. Walk slowly and deliberately through groups of people to avoid standing out. If a guard is watching you, blend in with the crowd by standing still or moving with the flow of people. Don’t run or act suspicious.
Light-based puzzles always have a visual cue. If you’re stuck on a puzzle, look at the frescoes or your father’s book sketches. They show you what the solution should look like. The sphere always goes into a gilded socket, and light always travels in straight lines. Position the sphere so light reaches the target area.
Cloth markers form a complete path to your destination. If you find one marker, look in the direction it points and you’ll find the next one. They’re never random—they form a deliberate route. Follow them and you’ll never get lost.
FAQ
How do I survive the carnival heist without alerting the army?
Kill guards silently and quickly at the southern fort before opening the canal gates. Stay in crowds during the infiltration phase, blend in with carnival-goers, and follow the cloth markers laid out by your crew. When you reach checkpoints, play along with the guards and move through without drawing attention. The key is stealth and timing—move fast once you’ve cleared guards, but don’t sprint through crowds where you’ll stand out.
What does the sphere do, and how do I use it in puzzles?
The sphere is the key to the island. It acts as a lens in light-based puzzles. Place it in gilded pedestals or sockets, and it’ll refract light to activate doors, platforms, and mechanisms. Your father’s book shows you where spheres go and what they activate. If you’re stuck, check the sketches in the book—they illustrate the solution.
Can I actually kill the Minotaur beast in combat?
No. The beast is too large and powerful to defeat in a traditional fight. Instead, you need to activate mechanisms around the arena using the sphere. As you activate each one, new paths open and the beast pursues you through narrow passages it can’t fit through. Focus on reaching the exit rather than fighting the beast directly. Lenny will help you escape.
What happens if I get caught by soldiers during the escape from the den?
You’ll fight them. Use your sword and dagger as trained. Eliminate soldiers quickly with dagger finishers and keep moving toward the boats. If you die, the game will restart at the last checkpoint. Don’t linger in combat—your goal is to escape with the book and treasure chest, not to defeat every soldier. Run when you can, fight only when necessary.
Where do I find my father’s illustrated book, and why is it important?
The book is in the ruins of the den after the failed heist. Recover it during the escape sequence. It’s crucial because it contains your father’s sketches of the island, the sphere, the puzzles, and the treasure chamber. It also shows you the solutions to light-based puzzles and the layout of the trials. Without it, you’d be lost on the island. The book is your guide and the key to understanding your past.
Checklist
0 of 14
Source & credit
This guide draws on the excellent video walkthrough by MKIceAndFire — watch it for the full visual run-through, and give the creator your view: