30-Second Quick-Start (TL;DR)#
- Install a reactor and use the long-range course plot module to auto-pilot to Ceres (in the north-west asteroid belt).
- Add sensor and weapons navmods to your NAV station to enable combat capabilities.
- Equip sensors (lidar, radar, or better) to reduce target signature lock time and see ships in the Boneyard clearly.
- Select a target on the nav screen, then lock it on the sensors panel (takes time based on your sensors and target signature).
- Use PDCs for auto-defense against missiles; manually fire missiles, railguns, and decoys with hotkeys or firing groups.
- If losing, use COMMS to hail the enemy ship and negotiate surrender (may cost money or allow boarding).
- Salvage navmods from wrecks or buy them from Ceres factions (get friendly first).
What This Guide Helps You Do#
This guide teaches you how to equip, navigate, and fight in ship-to-ship combat in Ostranauts 0.15 and later, so you can safely travel to the Ceres system, engage enemy vessels, and survive encounters through combat or negotiation. It’s written for players who have a basic ship and want to understand the new modular NAV systems, weapon types, locking mechanics, and combat strategies without trial-and-error deaths. Whether you’re starting fresh or returning to an older save, you’ll find everything you need to know about the new combat systems here.
Requirements & Prep#
Before you leave the starting region: Install a reactor in your ship if you haven’t already—it powers your systems. Equip a long-range course plot module to your NAV station so you can auto-pilot across the asteroid belt to Ceres without constant manual steering. Both of these are foundational and’ll make the journey much less tedious.
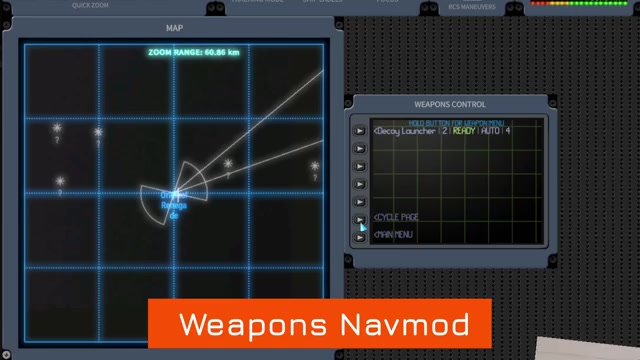
Navmod modules you’ll need: The sensor navmod and weapons navmod are the two critical new additions. The sensor navmod lets you see information about target ships, toggle your own sensors on and off, and mark other vessels. The weapons navmod shows your weapon positions, ammo counts, which weapons are on which sides of your ship, and which are ready to fire. You can also assign weapons to firing groups from the weapons navmod.
Where to get these modules: You can salvage them from wrecks in the Ceres system, or buy them from one of the major Ceres factions. Factions won’t trade with strangers, so you’ll need to get friendly with them first before they’ll sell to you.
Sensors: All ships come with basic sensors pre-installed, but better sensors (lidar, radar, and higher-tier variants) are critical for reducing lock time and seeing distant targets in the Boneyard, where visibility is naturally poor. Without good sensors, tracking other ships becomes much harder.
Optional but Helpful: Before heading to Ceres, explore the starting region’s salvage points to gather basic modules and materials. This gives you a cushion of parts and credits, and teaches you the salvage interface before combat pressure kicks in.
Route Overview#
Your journey to ship combat begins in the starting region, which remains safe and conflict-free. From there, you’ll use your long-range course plot module to auto-pilot north-west to the Ceres system, a large body in the asteroid belt where a regional conflict is actively happening. Ceres is where you’ll find weapons, enemy ships, and the factions that sell or trade combat modules. Once you arrive, you’ll need to decide whether to engage in combat immediately or spend time salvaging wrecks and building reputation with factions to unlock better gear. Combat itself happens in space around Ceres—there’s no docking sequence or transition. You’ll encounter other ships while traveling and can choose to fight, flee, or negotiate.
Step-by-Step Walkthrough#
Preparing Your NAV Station#
The NAV station is now modular, meaning you can customize its layout. Open your NAV station and add the sensor navmod and weapons navmod to your interface. The exact placement doesn’t matter functionally, but putting them side-by-side or in a logical order (sensors on the left, weapons on the right, for example) will make combat faster because you won’t fumble looking for the right panel. If you’ve got a firing groups module, add that too—it gives you a quick-fire button interface instead of relying solely on hotkeys.
Installing Sensors#
Check your ship’s sensor suite. You should have basic sensors already, but they won’t cut it for combat in the Boneyard. If you’ve got the credits or salvage materials, install lidar or radar before leaving for Ceres. These active sensors reduce the target signature and lock time significantly. Without them, locking onto a moving target can take forever, and in a firefight, that delay costs you. The Boneyard—the area around Ceres—is much darker and harder to navigate visually, so good sensors aren’t a luxury; they’re essential for seeing and tracking enemy ships.
Traveling to Ceres#
Set your course plot to Ceres (it’ll show in the north-west of the asteroid belt on your star map). Activate the long-range course plot module, and your ship will auto-pilot toward Ceres. You can step away during this journey—the auto-pilot will handle navigation. Don’t engage in combat during travel; the starting region is safe, and combat won’t come to you there. Once you arrive at Ceres, you’re in a live conflict zone.
Understanding Target Locking#
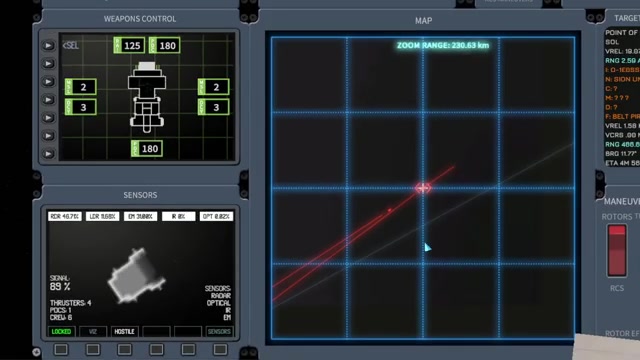
When you encounter an enemy ship, the first step is to select it on your NAV screen. Once selected, go to your sensors panel and choose “Lock” from the main menu. Your ship will now attempt to lock onto the target. This process takes time—how much depends on three factors: your sensor quality, the target ship’s signature (which is affected by its size, distance, and orientation), and the variety of sensors you’ve installed. A small, distant ship with a small signature might lock in seconds with good sensors; a large, close ship might take longer. Watch the lock percentage climb to 100%. Once you hit 100%, you’re locked on, and any missiles you fire will home in on that target.
Watch For: If the target ship moves significantly (especially rotating to present a different angle), the lock can reset or slow down. Keep your ship oriented toward the target to minimize this disruption.
Using PDCs (Point Defense Cannons)#
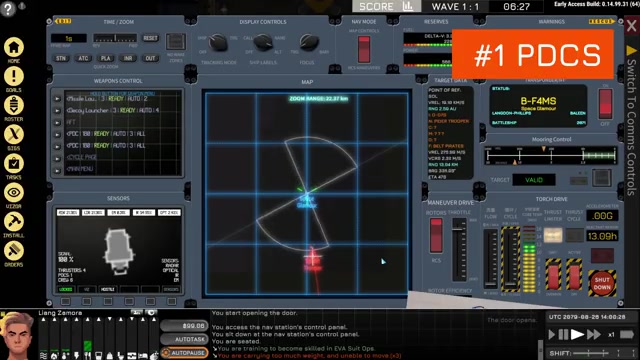
PDCs are your basic defensive weapon. They’ve short cones of fire (meaning they only shoot in a limited direction from your ship) and fire many small bullets quickly, dealing small amounts of single-target damage. The key feature of PDCs is that they can automatically engage incoming missiles and micrometeors if you’ve active sensors (lidar or radar) running. You don’t need to lock a target for this auto-defense to work—just have your sensors active and PDCs armed on the side facing the threat. This makes PDCs invaluable for survival. You can also manually fire PDCs at targets outside their automatic cone by using a hotkey or the firing groups module, but this requires you to aim your ship and predict the target’s movement, so it’s less reliable than auto-fire.
Using Railguns#
Railguns are long-range, single-shot ballistic weapons. They’re slower to fire than PDCs but pack more punch and have a critical advantage: they can punch through basic walls and damage components deeper inside enemy ships. This means if an enemy has internal armor or compartments, railguns can still hurt them. Like PDCs, railguns can be manually fired with a hotkey or firing group, but they don’t auto-fire. You’ll need to manually aim and time your shots, which requires good prediction of where the enemy will be when the shot lands.
Using Missiles#
Missiles are long-range weapons that’ll maneuver to hit moving targets, making them much more forgiving than railguns for aiming. They deal large amounts of circular explosion damage, meaning they damage everything in a blast radius, not just a single point. The trade-off: missiles are expensive to fire (each shot costs more ammunition or resources than PDCs or railguns). Missiles will only home in on targets you’ve locked. If you fire a missile without a lock, it’ll fly in a straight line and miss a moving target. Always lock before firing missiles. Missiles must be manually triggered—they don’t auto-fire even if you’ve got a lock.
Using Decoys#
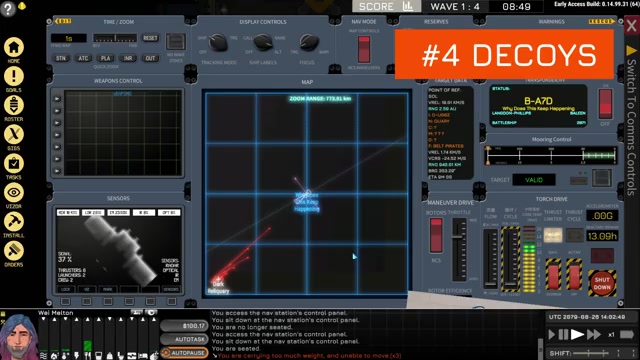
Decoys are a longer-range defensive weapon that fly like missiles but instead of exploding, they’ve got a chance to attract incoming enemy missiles toward them instead of toward your ship. This is your active countermeasure against missile barrages. Like missiles, decoys must be manually fired and don’t auto-engage. If you’re being targeted by multiple missiles, firing decoys in the direction of the incoming fire can save your ship.
Assigning Weapons to Firing Groups#
The firing groups navmod lets you organize your weapons into groups and fire them with a single button press. This is faster than hunting for individual hotkeys during combat. For example, you might assign all PDCs to group 1, all railguns to group 2, and all missiles to group 3. Then, in combat, you can press “1” to auto-fire all PDCs, “2” to manually fire all railguns, and “3” to manually fire all missiles. There are two sizes of firing groups modules, so choose one that fits your ship’s NAV station layout.
Identifying Which Weapons Fire Automatically#
Not all weapons behave the same way. PDCs with active sensors will automatically fire on incoming missiles and micrometeors without any input from you—this is passive defense. Railguns, missiles, and decoys require manual input (hotkey or firing group button) to fire. PDCs can also be manually fired if you want to target something outside their automatic cone, but auto-fire is their strength. Remember: auto-fire for PDCs (defense), manual fire for everything else (offense and specialized defense).
Combat Strategy & Weapon Combinations#
Setting Up a Balanced Loadout#
A typical combat-ready ship should have: PDCs on multiple sides (front, rear, and sides if possible) with active sensors for passive missile defense; railguns for long-range, armor-piercing offense; missiles for burst damage on locked targets; and decoys as a last-resort countermeasure. This gives you layered defense (PDCs stop missiles automatically) and flexible offense (railguns for precision, missiles for burst). The exact number of each depends on your ship’s hardpoints and power budget, but this balance ensures you’re not helpless in any situation.
Locking and Firing Missiles#
Select the target on your NAV screen, lock it on the sensors panel (wait for 100%), then manually fire your missiles using the appropriate hotkey or firing groups button. The missiles will curve toward the target, so you don’t need to aim your ship perfectly. If the target is far away or has a small signature, locking can take time—use this time to maneuver into a better firing position or charge up other weapons. Once locked, you can fire multiple missiles in quick succession if you’ve got the ammo.
Manual Aiming with Railguns and PDCs#
If you want to fire a railgun or manually-aimed PDC at a target that’s outside the weapon’s automatic cone, line up your ship so the weapon faces the enemy, predict where they’ll be in the next second or two, and press the fire hotkey. This is harder than relying on auto-lock missiles, but it lets you engage targets your missiles can’t reach or conserve missile ammo. Railguns are especially good for this because their single-shot nature means a well-timed hit is devastating.
Defensive Tactics#
Keep your PDCs and sensors active at all times during combat. If you see incoming missiles on your sensors panel, make sure your PDCs have a clear line of fire to intercept them. If you’re being overwhelmed, fire decoys toward the incoming threat to distract missiles. If combat is clearly going against you, don’t wait until your ship is crippled—use COMMS to negotiate surrender early.
Negotiation and Surrender#
Using COMMS to End Combat#
If you’re losing a fight or want to avoid combat altogether, swap to the COMMS screen and hail the ship you’re in combat with. Try to open a dialogue with them. They may demand money, allow them to board your ship, or ask for other concessions. Surrender isn’t a free pass—it costs you resources or risks a boarding party—but it’s better than losing your ship entirely. You survive with your life, which means you can mine and salvage another day and rebuild your fleet.
Troubleshooting & Common Mistakes#
- Locking takes forever: Your sensors are too basic. Upgrade to lidar or radar before heading into heavy combat. Also check that your target isn’t rotating constantly—rotation increases lock time.
- Missiles fly straight and miss: You fired without a lock. Always lock the target first on the sensors panel before firing missiles.
- PDCs aren’t stopping incoming missiles: Your sensors aren’t active. Toggle them on in the sensors panel, and make sure you’ve got active sensors like lidar or radar installed, not just passive ones.
- Can’t see enemy ships in the Boneyard: Visibility is naturally poor there. Install better sensors and ensure your sensors are toggled on. Mark ships manually on the sensors panel if you spot them visually.
- Weapons won’t fire: Check that they’re loaded with ammo and that they’re armed (not in a “safe” state). Also verify you’re pressing the correct hotkey or firing group button.
- Firing groups module is confusing: Start with three groups: PDCs, railguns, missiles. Assign weapons to each, then practice firing them one at a time in a safe area before engaging enemies.
- Ship rotates away from target during combat: You’re likely using manual steering when you should be using auto-pilot or setting a waypoint. Let your navigation handle broad orientation changes, and use fine adjustments for aiming.
- Locked target suddenly loses lock: The target rotated sharply or moved out of sensor range. Re-lock immediately; it should be faster the second time if they haven’t moved far.
Farming & Salvage Loop#
Salvaging Wrecks for Modules#
The Ceres system has wrecks scattered throughout the Boneyard. These wrecks contain navmods (including sensor and weapons modules), weapons, and other valuable components. You can salvage these without firing a shot—approach the wreck, dock if possible, and loot the interior. This is safer than combat and lets you build a weapons inventory and module collection before engaging live enemies. Expect to find basic sensor modules, PDCs, and sometimes railguns in wrecks. Rarer items like high-end sensors and missile launchers are harder to come by but do appear in larger or more intact wrecks.
Building Faction Reputation#
The major Ceres factions control trade and salvage rights in the region. To buy modules or weapons from them, you need to get friendly. This likely happens through repeated interactions, completing missions for them, or trading salvage. Once you’ve got reputation, they’ll sell you better sensors, weapons, and navmods at reasonable prices. This is faster than salvaging everything yourself, but it requires initial grinding.
Advanced Tips & Time Saves#
- Mark ships on sensors: Use the mark function on the sensors panel to keep track of multiple targets. This is especially useful in multi-ship encounters so you don’t lose track of who you’re fighting.
- Sensor variety matters: Having both lidar and radar installed (if you’ve got the power budget) locks targets faster than having just one type.
- Orientation affects signature: A ship’s signature changes based on how it’s oriented relative to you. A ship facing you head-on has a smaller signature than one broadside. Use this to your advantage—approach from the side to make your target signature larger, making their lock time longer.
- Decoys as a stalling tactic: If you’re low on ammo and need time to retreat, fire decoys at incoming missiles. Even if only one decoy attracts one missile, you’ve bought yourself seconds to escape.
- PDC placement: Put PDCs on all sides of your ship if possible, not just the front. Enemies can circle you, and rear-facing PDCs will save you from being picked apart from behind.
FAQ#
How do I get to the Ceres system in Ostranauts?#
Use your long-range course plot module to set a course to Ceres, which is located in the north-west of the asteroid belt. Activate the module and your ship will auto-pilot there. You can leave your ship unattended during the journey; the starting region is safe and combat-free, so nothing will attack you during travel.
What’s the fastest way to lock onto a target ship?#
Install high-quality sensors like lidar or radar, and have multiple sensor types if possible. Select the target on your NAV screen, then choose “Lock” on the sensors panel. Lock time depends on your sensor quality, the target’s signature (size, distance, and orientation), and sensor variety. Better sensors reduce lock time significantly—basic sensors can take a long time on distant or small targets.
Which weapons auto-fire and which need manual input?#
PDCs with active sensors (lidar/radar) auto-fire at incoming missiles and micrometeors without any input. Railguns, missiles, and decoys require manual firing via hotkey or firing groups module. PDCs can also be manually fired at targets outside their automatic cone, but auto-fire is their main strength.
Do missiles work without locking the target first?#
Missiles can be fired without a lock, but they’ll fly in a straight line and will almost certainly miss a moving target. Always lock your target on the sensors panel before firing missiles so they’ll home in and maneuver to hit the enemy.
How do I get sensor and weapons navmods?#
Salvage them from wrecks in the Ceres system, or buy them from the major Ceres factions. Factions won’t sell to strangers, so you need to build reputation with them first through repeated interactions or missions before they’ll trade with you.
What should I do if I’m losing a fight?#
Use COMMS to hail the enemy ship and open a dialogue. You can negotiate surrender, which may cost you money or require allowing them to board, but you’ll survive with your life. This is better than letting your ship be destroyed, because you can mine and salvage another day and rebuild.
Checklist#
- Install a reactor in your ship (if not already present).
- Add a long-range course plot module to your NAV station for auto-piloting.
- Add a sensor navmod and weapons navmod to your NAV station layout.
- Install lidar or radar sensors on your ship (upgrade from basic sensors).
- Set your course to Ceres (north-west asteroid belt) and auto-pilot there.
- Upon arrival, salvage wrecks for additional weapons and modules, or begin building faction reputation to unlock trades.
- When engaging an enemy, select them on the NAV screen, lock them on the sensors panel, and wait for 100% lock before firing missiles.
- Keep PDCs armed on multiple sides of your ship and sensors active for automatic missile defense.
- Assign weapons to firing groups (PDCs, railguns, missiles) for faster combat control.
- Use railguns for long-range, armor-piercing shots and missiles for burst damage on locked targets.
- Fire decoys at incoming missiles if you need to buy time or escape.
- If losing combat, use COMMS to negotiate surrender rather than fight to the death.
Source & credit#
This guide draws on the excellent video walkthrough by Kitfox Games — watch it for the full visual run-through, and give the creator your view:
https://www.youtube.com/watch?v=gEmq2SQ1ezIFollowing Ostranauts? Get an email when we publish a new guide — or update one after a patch.