30-Second Quick-Start (TL;DR)#
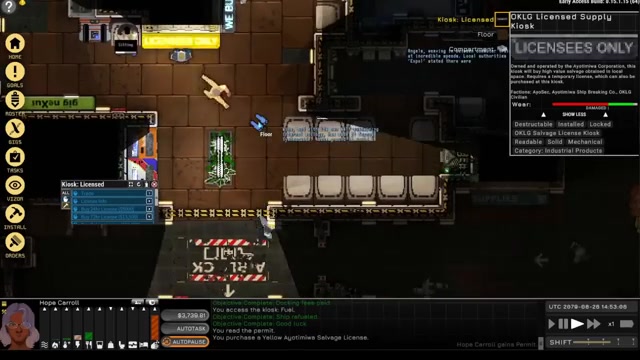
- Obtain a salvage license (costs $5,000 for one day, or find one on a derelict with time remaining)
- Locate a derelict ship near KLEG using your nav console and dock at speeds under 100 m/s
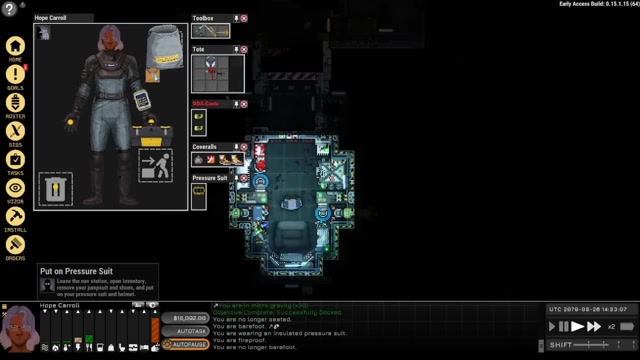
- Suit up in a pressure suit, manage your helmet’s air supply, and enter the wreck
- Extract high-value parts: thrusters, doors, pumps, and full oxygen tanks
- Use your welder to repair damaged parts before selling (increases resale price)
- Return to KLEG and sell items at the Licensees Only kiosk while holding your license
- Repeat: buy a new license, find another derelict, scale up with better equipment and crew
What This Guide Helps You Do#
This guide teaches you how to locate derelict ships, safely salvage valuable components from them, and sell those parts for profit in Ostranauts—the core income loop that funds your survival and ship upgrades in your first hours of gameplay and beyond. You’ll learn which parts are worth your time, how to manage your suit’s life support while working in a hard vacuum, and how to maximize resale value through repairs.
It’s best for new players finishing the tutorial or returning players who want a systematic approach to early-game wealth building. You’ll need access to a basic ship, a pressure suit, and a solid grasp of docking and piloting fundamentals.
Requirements & Prep#
Salvage License: You must have a valid salvage license to sell parts at the Licensees Only kiosk without legal consequences. A one-day license costs $5,000 at the kiosk on KLEG. Alternatively, derelicts sometimes contain expired or near-expired licenses that still have time remaining—the tutorial derelict includes one. If you scavenge without a license and get caught, you’ll face bribes, fines, or jail time.
Pressure Suit: Your basic suit from character creation keeps you alive in hard vacuum, but it only holds the air you captured before sealing the helmet. Monitor your helmet HUD alarms—they’ll alert you when your air is running low. Return to your ship immediately if alarms sound to remove your helmet and cycle fresh air.
Ship Storage: Your ship’s cargo hold limits how much you can carry per trip. Early on, you’ll make multiple runs from derelict to KLEG. As you progress, install storage extensions or use external cargo netting to increase capacity.
Tools: A welder (specifically, a stir welder) is essential for repairing damaged parts before sale. Welders consume batteries quickly; keep cheap Halvorson batteries in stock from the supplies kiosk to keep your welder running.
Navigation Tools: Familiarity with your nav console’s match speed function and understanding of VREL (relative velocity toward/away from target) and VCRS (perpendicular velocity) will prevent collision deaths. Safe docking speed is under 100 m/s; keep it under 200 m/s when maneuvering near stations.
Optional but Helpful: If you can afford it, hire a crew member once you’ve got 60,000–80,000 dollars in collateral death pay. A second spacer can haul salvage while you manage the ship, dramatically speeding up your income. Early on, solo salvage works just fine—it just takes longer.
Route Overview#
The salvage loop is straightforward: acquire a license, navigate to a derelict, dock safely, suit up, extract valuable parts, return to KLEG, and sell at the Licensees Only kiosk. Derelict ships float in the debris field near KLEG, so your nav console will show them as targets once you undock. Each derelict contains a mix of intact and damaged components—thrusters, doors, pumps, and oxygen tanks are your highest-priority targets because they sell for the most and are relatively lightweight. You can repair damaged parts with your welder before sale to increase their value. The entire loop, from undocking to resale, takes roughly 30–60 minutes of real time depending on your ship size and how many trips you need. As you earn more, invest in a larger ship, better tools, and crew to increase your salvage capacity and speed.
Step-by-Step Walkthrough#
Obtain or Renew Your Salvage License#
Before leaving KLEG, check your current license status. If you don’t have one or it’s about to expire, visit the kiosk on the station and purchase a one-day license for $5,000. It’s a mandatory expense—the cost of doing business legally. If you’re low on cash, the gig kiosk offers courier jobs that start and end at KLEG, letting you earn quick money without leaving the station. Look for jobs marked with KLEG as both start and end point to avoid long travel times.
Alternatively, if you find a license on a derelict with remaining time, grab it immediately. This gives you free salvage rights for however long the license lasts. The tutorial derelict includes one such license; always pick it up.
Undock and Navigate to a Derelict Ship#
Return to your ship and unpause the game. Open your nav console and request permission to undock from KLEG. Once permission is granted, hit the CLAMPS button to release your ship from the station. You’re now floating free in space.
Your nav console displays nearby targets, including derelict ships. Select one and set it as your navigation target. The nav console will show you the target’s distance and your current velocity relative to it. Use your thrusters and spin controls to orient your ship toward the derelict. The key function here is “match speed”—activate it to automatically adjust your velocity to match the target’s, making docking much safer.
As you approach, monitor your VREL (relative velocity along the approach vector) and VCRS (perpendicular velocity). Ideally, your VREL should be slowly decreasing as you close in, and your VCRS should be zero or very close to it. If you’re moving perpendicular to the target, correct your heading before continuing.
Dock at a Safe Speed#
Approach the derelict at a speed under 100 m/s. Align your ship’s clamp with the target’s airlock. Once you’re close enough (the game will indicate when), activate the clamp to secure your ship to the derelict. A successful dock locks your ship in place and creates an airlock connection you can use to board.
Colliding at high speed risks hull breaches and crew injuries or death. Take your time with this step, especially early on. You can always slow down and approach again.
Prepare Your Pressure Suit and Enter the Derelict#
Once docked, suit up in your pressure suit. Open your airlock and step into the derelict. Your helmet HUD will display alarms if your air supply is running low—these appear as flashing or beeping indicators. Keep an eye on them throughout your salvage run.
Derelicts are often dark, depressurized, or both. You may need to repair power infrastructure (electrical cables and breaker panels) to restore lighting and open electronic doors. Alternatively, you can pry doors open manually, scrap them for materials, or uninstall them to sell later. The choice depends on your tools and time.
Locate and Extract High-Value Parts#
Your primary targets are thrusters, doors, pumps, and oxygen tanks that still contain air. These items sell for the most and are relatively easy to uninstall and transport. As you explore the derelict, look for these components. You can see what’s inside a part by examining it—a full oxygen tank, for example, is worth far more than an empty one.
To uninstall a part, interact with it and select the uninstall option. The part will be removed and placed on the floor. Drag it back to your ship’s airlock or use your tote bag to carry smaller items. If your ship is small, you may only fit 3–4 major parts per trip; that’s normal. Make multiple runs if needed.
Damaged parts are still worth taking—you’ll repair them later with your welder. They’ll sell for less as-is, but repairing them before sale significantly increases their value, often making the effort worthwhile.
Return to Your Ship and Manage Your Air Supply#
If your helmet alarms start sounding, head back to your ship immediately. Remove your helmet inside your ship’s airlock to cycle fresh air into your suit’s tanks. This takes a moment, but it’s essential—running out of air while suited is fatal. Once your suit is replenished, you can return to the derelict and continue salvaging.
If you’ve collected a good haul (at least 3–4 major parts), consider returning to KLEG to sell. If your ship still has space and your suit’s air is good, you can make another pass through the derelict before heading back.
Dock with KLEG and Navigate to the Licensees Only Kiosk#
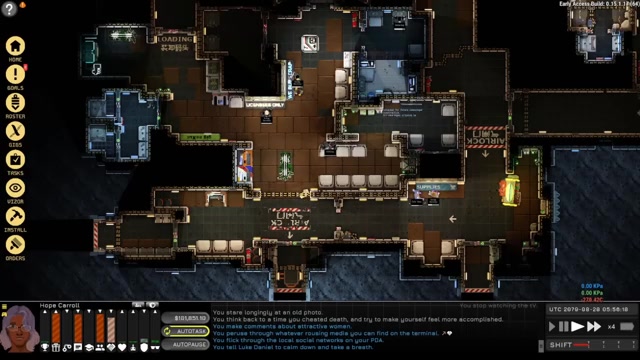
Once you’re ready to sell, navigate back to KLEG and dock. Exit your ship and make your way to the Licensees Only kiosk on the station. This kiosk only accepts salvage from spacers holding a valid license—and only items you’re carrying or dragging. Items left in your ship won’t be sold.
Drag your salvaged parts to the kiosk and select them for sale. The kiosk will display the sale price for each item. Damaged parts sell for less than intact ones, so if you’ve time and batteries, use your welder to repair them first.
Repair Parts Before Selling (Optional but Profitable)#
If you’ve got a welder and batteries, you can increase your profit margin by repairing damaged parts before sale. Set up your welder near your salvage and repair each damaged part until it shows as intact. The improved condition translates directly to a higher sale price at the kiosk—often enough to justify the battery cost and time investment.
Keep cheap Halvorson batteries in stock from the supplies kiosk to fuel your welder. A single battery costs very little and will repair multiple parts, making this a high-ROI activity early on.
Sell and Repeat#
Once your parts are repaired (or if you skip repairs), sell them all at the Licensees Only kiosk. The kiosk pays out immediately and deposits the money in your account. Now you’ve got capital to pay your bills, buy a new license, and fund your next salvage run.
Pay your bills when they come due—the game will notify you. Once you’ve covered your expenses and bought a fresh license, you’re ready to repeat the loop. As you earn more, upgrade your ship, add storage, hire crew, or invest in better tools to increase your efficiency and profit per run.
Farming Loop / Route Efficiency#
Expected Yield Per Run: A typical early-game derelict salvage yields 3–6 high-value parts (thrusters, doors, pumps, full oxygen tanks) per trip. If your ship is small, you may only carry 3–4 items before needing to return to KLEG. A single thruster or pump can sell for thousands of credits, especially if repaired. Conservative estimate: $10,000–$20,000 per full trip (harvest, repair, and sale).
Loop Time: A complete cycle—undocking, traveling to a derelict, salvaging 3–4 parts, returning to KLEG, repairing, and selling—takes approximately 30–60 minutes of real time, depending on your ship’s speed, how much you repair, and how many trips you make. Using time acceleration (2x, 4x, or 16x speed) during passive tasks like repairs dramatically speeds this up.
Optimization Tips:
- Use time acceleration: While your welder repairs parts, activate 4x or 16x time speed. Repairs complete much faster, and you can queue up your next salvage run while waiting.
- Prioritize light, high-value items: Thrusters and pumps are your best targets. Avoid heavy, low-value items like large hull panels unless you’ve got spare cargo space.
- Repair before selling: A damaged thruster might sell for $3,000, but a repaired one sells for $5,000+. The battery cost is negligible compared to the price difference.
- Multiple derelicts: KLEG has many derelict ships in its debris field. If one is picked clean, move to the next. Variety keeps the loop fresh and ensures you always have targets.
- Invest in storage early: Once you’ve got a few thousand credits, buy a larger ship or install external cargo netting on your current one. This lets you carry more per trip, reducing the number of runs needed.
- Hire crew when you can afford it: A second spacer can haul salvage while you manage the ship or work on repairs. This roughly doubles your salvage rate and is a major efficiency boost once you’ve got the capital.
Troubleshooting & Common Mistakes#
- Docking at high speed causes collision damage: Always match speed and approach under 100 m/s. If you collide, you risk hull breaches and crew injuries. Slow down and try again.
- Running out of air in your suit while salvaging: Watch your helmet HUD alarms. If they start beeping, return to your ship immediately and cycle your suit’s air. Don’t ignore the warnings.
- Selling items without a license causes fines or jail time: Always have a valid salvage license before attempting to sell at the Licensees Only kiosk. Check your license’s expiration time and renew before it runs out.
- Damaged parts not selling for as much as expected: Use your welder to repair them first. The improved condition directly increases resale value and often justifies the battery cost.
- Welder dies mid-repair: Welders consume batteries quickly. Keep Halvorson batteries in stock from the supplies kiosk. A single cheap battery will repair multiple parts.
- Can’t fit all salvage in your ship: Make multiple trips, or upgrade to a larger ship. External cargo netting also expands your carrying capacity without requiring a full ship upgrade.
- Derelict doors won’t open: Some doors require power. Repair the electrical infrastructure (cables and breaker panels) to restore power and open them. Alternatively, pry or scrap the door.
- Lost navigation to a derelict: Use your nav console to re-target the derelict. If you’ve drifted far, use match speed to correct your velocity and approach again.
Advanced Tips & Time Saves#
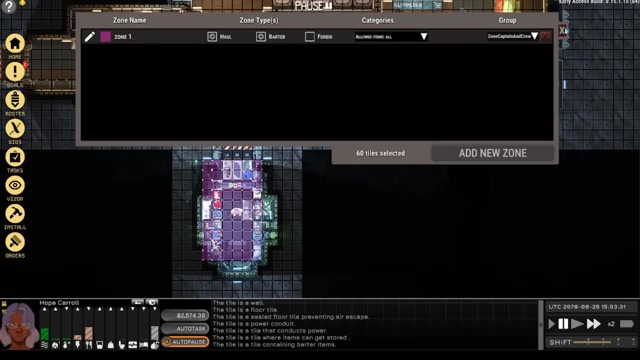
Setting Up Barter and Hauling Zones: Once you’re comfortable with basic salvage, use the zones menu to designate areas on your ship as barter zones. Items you buy at KLEG will automatically be deposited in these zones, and you can sell items directly from them without dragging them to the kiosk. This saves time on large sales. Additionally, create hauling zones in your ship’s cargo hold and use the “haul” order to automatically drag salvaged items into them, speeding up collection.
Pressurizing a Cabin for Safer Work: You can pressurize sections of a derelict or your own ship to work without a suit. This requires installing airlocks, pumps, and oxygen tanks and managing gas mixtures. However, it’s a complex task best attempted after you’re comfortable with basic salvage. For early-game efficiency, stick to suit-based salvage.
Repairing Power Infrastructure First: Some derelicts have intact electrical systems. Repairing the power cables and breaker panels restores lighting and opens electronic doors, revealing more salvage and making navigation easier. This takes time upfront but often uncovers high-value items you’d otherwise miss.
Scavenging Without Removing Everything: You don’t have to uninstall every part. Sometimes it’s faster to pry open a door, grab the portable items inside, and leave. Prioritize based on your ship’s remaining cargo space and the time remaining on your license.
Risky Strategy: Attempting to salvage without a license to save the $5,000 cost isn’t recommended. The fines and jail time far exceed the license cost, and you’ll lose salvage time while incarcerated. Always buy a license.
FAQ#
How do I get a salvage license in Ostranauts?#
Purchase a one-day salvage license from the kiosk on KLEG for $5,000, or find one on a derelict ship with remaining time. You must have a valid license to legally sell salvage at the Licensees Only kiosk. Without one, you’ll face bribes, fines, or jail time if caught selling.
What parts should I prioritize when salvaging a derelict?#
Thrusters, doors, pumps, and full oxygen tanks are your highest-priority targets because they sell for the most and are relatively lightweight. Avoid heavy, low-value items like large hull panels unless you’ve got spare cargo space. Always check if an oxygen tank is full before taking it—empty tanks are worthless.
How do I repair damaged parts before selling them?#
Use your welder to repair damaged parts. Welders consume batteries—buy cheap Halvorson batteries from the supplies kiosk to keep your welder running. Repaired parts sell for significantly more than damaged ones, often justifying the battery cost and time investment.
What happens if I run out of air in my pressure suit while salvaging?#
Your helmet HUD will display alarms when your air is running low. Return to your ship immediately and remove your helmet inside your airlock to cycle fresh air into your suit. If you ignore the alarms and run out of air, you’ll die. Always keep an eye on your suit’s air supply.
How do I dock safely with a derelict ship?#
Approach the derelict at a speed under 100 m/s. Use your nav console’s match speed function to align your velocity with the target. Align your ship’s clamp with the derelict’s airlock and activate the clamp once you’re close enough. Docking at high speeds causes collision damage and hull breaches.
Can I salvage without a pressure suit?#
Not safely in early game. Your basic pressure suit is essential for surviving the hard vacuum of space. You can pressurize sections of a derelict or your ship to work without a suit, but this requires significant setup and is best attempted after you’re comfortable with basic salvage mechanics.
Checklist#
- Check your current salvage license and purchase a one-day renewal ($5,000) if expired or missing
- Return to your ship and request undocking permission from KLEG
- Hit the CLAMPS button to release from the station
- Open your nav console and select a nearby derelict as your target
- Use match speed and approach under 100 m/s
- Align your clamp with the derelict’s airlock and activate clamp to dock
- Suit up in your pressure suit and enter the derelict
- Locate and uninstall high-value parts: thrusters, doors, pumps, full oxygen tanks
- Monitor your helmet HUD alarms; return to your ship and cycle air if alarms sound
- Drag salvaged parts back to your ship’s cargo hold
- Undock and navigate back to KLEG
- Use your welder to repair any damaged parts (optional but profitable)
- Drag repaired parts to the Licensees Only kiosk and sell them
- Pay any outstanding bills
- Purchase a new salvage license and repeat the loop
Source & credit#
This guide draws on the excellent video walkthrough by Kitfox Games — watch it for the full visual run-through, and give the creator your view:
https://www.youtube.com/watch?v=5Drm8ospQaMFollowing Ostranauts? Get an email when we publish a new guide — or update one after a patch.