30-Second Quick-Start (TL;DR)#
- Access the nav station of a combat-oriented ship to begin adding modules.
- Install a weapons module to unlock weapon banks and see firing arcs on your HUD.
- Install a sensors module to activate passive and active sensors for target detection and stat readout.
- Use the sensors module to lock targets and view enemy information before engagement.
- Set individual weapon banks to “free fire” mode so they fire automatically once locked.
- Use the 1 key to fire all weapon banks simultaneously, including torpedoes and rail guns.
- Position your ship to align firing arcs with the target; rotation matters for hit chance.
- Watch for incoming fire (shown as red damage indicators) and manage your ship’s power and thrusters during combat.
What This Guide Helps You Do#
This guide teaches you how to install, configure, and use combat modules in Ostranauts—specifically weapons and sensors modules—so you can detect enemies, lock targets, and engage in ship-to-ship combat with full control over your weapon banks and firing behavior. It’s essential if you’re moving into combat-focused gameplay or preparing for the Fire in the Hold build’s combat features. You’ll get the most out of this if you’ve already mastered basic ship navigation and are ready to add offensive and defensive capability to your vessel.
Requirements & Prep#
You’ll need a ship with available module slots and access to a nav station where you can install new modules. The transcript shows a combat-oriented ship, which suggests the vessel was either purpose-built or retrofitted with combat capability in mind. You should also have (or be able to acquire) a weapons module and a sensors module. No specific consumables or crafting materials are mentioned in the transcript, so assume these modules are either found or purchased through normal progression.
The guide uses keyboard input (specifically the 1 key for firing all weapons), so M&K is the assumed control scheme. If you’re using a controller, you’ll need to map this action to an available button.
Optional but Helpful: Before your first combat engagement, spend time in a safe area rotating your ship and observing how the firing arcs change on your HUD. This teaches you the relationship between ship orientation and weapon coverage without the pressure of an incoming attack.
Route Overview#
Combat in Ostranauts follows this pattern: enter a nav station, install your weapons and sensors modules if you haven’t already, activate your sensors to scan for targets, maneuver into range, use the sensors module to lock your target and read their stats, align your ship’s firing arcs with the enemy, set your weapon banks to fire, and then execute your attack using either targeted firing for specific weapon banks or the all-fire command. The transcript demonstrates a two-ship engagement where you successfully destroy one enemy but take critical damage from a second, illustrating both the power and risk of direct combat.
Step-by-Step Walkthrough#
Install Your Combat Modules#
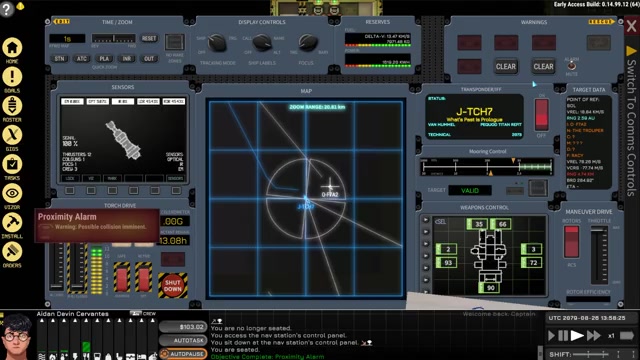
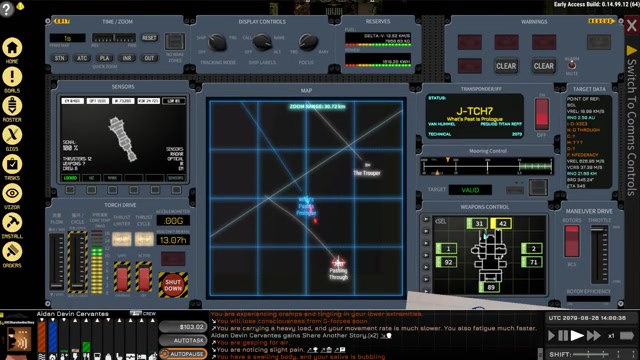
Begin at the nav station of your ship. From here, you can add new modules to your vessel. The two critical modules for combat are the weapons module and the sensors module. Install both if you’ve got the space and resources. The weapons module unlocks access to your ship’s weapon banks (cannons, rail guns, torpedoes, etc.) and displays their firing arcs on your HUD. The sensors module activates your passive and active sensor systems, allowing you to detect, scan, and lock targets.
Activate Your Sensors#
Once the sensors module is installed, unpause the game and toggle on your passive and active sensors through the sensors module interface. Passive sensors will detect nearby contacts; active sensors (like a radar ping) will give you more detailed information about targets in range. When you locate a target, use the sensors module to lock onto it. This reveals the target’s stats and position on your display, and it’s necessary before your weapons can effectively engage.
Power Up Your Weapon Banks#
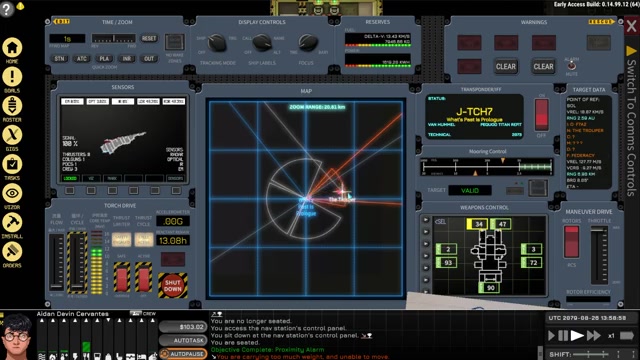
Access your weapons module and turn on the weapon banks your ship carries. Depending on your ship’s design, you may have defensive PDC (point-defense cannon) systems, rail guns, torpedo launchers, and other armaments. As you activate each bank, you’ll see colored arcs appear on your HUD showing the firing cone for each weapon type. These arcs are critical—they show you which direction your ship must face to hit a target with that weapon.
Configure Weapon Fire Behavior#
By default (or through the weapons module menu), set your weapon banks to “free fire” mode. This means that once you lock a target, those weapons will fire automatically the moment they’ve got a lock and the target enters their firing arc. You don’t need to manually trigger each shot; the system handles it. This is especially useful for PDC cannons and rail guns that need to track a moving target.
Maneuver Into Engagement Range#
Navigate your ship toward the target. In the transcript, you teleport close to a neutral contact, but you may need to use conventional thrust or warp instead. As you close distance, watch your sensors display for the target’s position and heading. The closer you are, the easier it is to keep them in your firing arcs. Be aware that if the target is hostile or becomes hostile, they’ll fire back once you’re in range.
Rotate Your Ship to Align Firing Arcs#
Once you’re in range, rotate your ship so that your forward-firing weapons point at the target. In the transcript, you rotate your forward weapons and lock the target; the PDC cannons and rail gun begin firing automatically because they’re set to free fire. The key insight is that weapon arcs are directional. If your weapons face forward but your target is to the side, your shots won’t land. Continuous rotation during combat keeps your weapons trained on the target as they maneuver.
Execute Your Primary Attack#
Once your weapons are locked and firing, watch the HUD for hits. In the transcript, the PDC cannons and rail gun begin chewing through the target’s hull, shown as damage appearing on the enemy ship’s model. The red coloration indicates where incoming fire is hitting you; as the target rotates, the impact zone shifts. If the target’s weapons are disabled or pointed away, you’ve got a window to inflict heavy damage without taking return fire.
Fire All Weapons Simultaneously#
When you’ve got multiple weapon banks ready and a solid lock, press the 1 key to fire all weapons at once. In the transcript, this launches two homing torpedoes in addition to the continuous fire from cannons and rail guns. Torpedoes are slower but more devastating; they home in on the locked target and can deal critical damage. Note that the target’s PDC systems may attempt to intercept incoming torpedoes if they’re pointed in the right direction, so timing matters.
Monitor Your Ship’s Integrity#
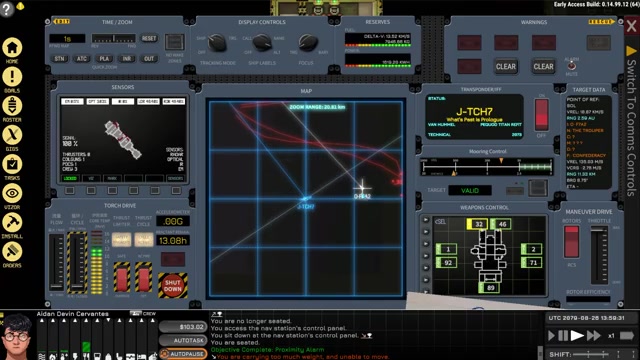
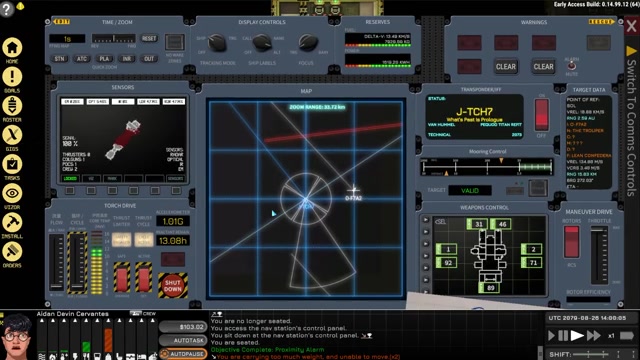
As you engage, incoming fire will damage your ship. The HUD shows red damage indicators where hits are landing. Critical systems—like your nav station, thrusters, and power plant—can be disabled or destroyed by enemy fire. In the transcript, your thrusters are knocked out first (causing the ship to drift), and later your nav station is destroyed, leaving you unable to maneuver or fight back. Always be aware of your ship’s condition and consider disengaging or maneuvering to present a harder target if you’re taking heavy damage.
Boss/Set-Piece Strategy (Phase by Phase)#
The transcript presents a two-ship engagement rather than a traditional boss fight, but the principles apply to any multi-contact scenario. The engagement unfolds in phases based on enemy positioning and damage state.
Phase One: Initial Engagement and Dominance#
Trigger: You lock the first target and open fire with all weapon banks.
In this phase, the first enemy is unprepared or neutral. Your PDC cannons and rail gun fire continuously, chewing through their hull. The safe punish window lasts as long as their weapons are disabled or pointed away. In the transcript, your fire knocks out the target’s thrusters, leaving them unable to maneuver. This is the moment to press the advantage: fire all weapons, including torpedoes, to maximize damage before the enemy can retaliate or escape.
What to watch for: The target may rotate to bring weapons to bear. If you see their weapons aligning with your ship, prepare to maneuver or take evasive action. Also note if critical systems (thrusters, weapons) are disabled; a crippled ship is less dangerous but may still have functional weapons.
Recovery if you’re hit: If the target lands a hit, check your HUD for damage. If your thrusters are still functional, rotate away to present a different part of your hull. If your weapons are still firing, maintain your attack; trading damage is acceptable if you’re winning the exchange.
Phase Two: Second Enemy Arrival#
Trigger: A second contact (the first enemy’s ally) closes to firing range.
Once you’ve crippled or destroyed the first target, a second enemy may engage. This is the critical moment: you’ve likely taken damage, and you’re now facing a fresh opponent. In the transcript, you realize you’re about to face a second enemy and accelerate toward them, cranking up the torch drive. The goal is to close range quickly and either lock and fire before the enemy gets a clean shot, or maneuver aggressively to avoid their initial barrage.
What to watch for: The second enemy will likely have full systems and weapons. They’ll fire as soon as you’re in range. In the transcript, the second enemy lands a hit on your ship before you can fully lock and engage, damaging the front section and eventually destroying the nav station.
Recovery if overwhelmed: If you’re taking critical damage and your nav or power systems are compromised, you’re in a losing position. Consider disengaging by using your thrusters to move away, or if that’s not possible, prepare for a potential loss. The transcript ends with your ship crippled and unable to fight back, demonstrating that even a successful first engagement can turn bad if a second enemy arrives.
Builds & Loadouts#
The combat-oriented ship in the transcript carries a substantial loadout:
- Defensive PDC Cannons: Point-defense cannons that fire automatically once locked. These are continuous-fire weapons with a limited firing arc (forward-facing in this case). They’re effective against hull and can also intercept incoming torpedoes if pointed the right way.
- Rail Gun: A powerful directed-energy weapon with a narrow firing arc. It deals heavy damage per shot and is effective against armor and hull. Like the PDCs, it fires automatically once locked.
- Torpedo Launcher: Fires homing torpedoes that track the locked target. Torpedoes are slower than instant-fire weapons but deal massive damage on impact. They can be intercepted by enemy PDCs if the enemy’s defenses are pointed correctly.
This loadout represents a balanced combat build: PDCs for sustained damage and point defense, a rail gun for burst damage, and torpedoes for finishing blows. The ship also carries a nav station (for navigation and module control) and sensors (for detection and targeting).
Likely alternate loadouts based on context: A more defensive build might prioritize PDC coverage over torpedo capacity, or swap the rail gun for additional point-defense layers. A more aggressive build might carry more torpedo launchers at the cost of PDC coverage. These are inferences based on the modular nature of the game, but they’re not explicitly stated in the transcript.
If you’re building your first combat ship: Start with PDCs and a single torpedo launcher. PDCs give you reliable damage output and some ability to defend against incoming fire, while a torpedo launcher provides a high-damage option for finishing off crippled enemies. Add a rail gun once you understand how to manage power and heat systems.
Troubleshooting & Common Mistakes#
- Weapons won’t fire even though I have a lock: Check that your weapon banks are powered on and set to “free fire” mode. Also ensure your firing arc actually points at the target; a lock doesn’t matter if your weapons face the wrong direction.
- I locked a target but my sensors module shows no stats: Passive sensors may not have enough range or clarity. Switch to active sensors (radar ping) for a more detailed scan. Active sensors take longer but provide full target information.
- Torpedoes aren’t homing in or are missing: Torpedoes are slower than instant-fire weapons and need a clear lock. If the target is maneuvering aggressively, the torpedo may lose track. Fire them when the target is moving predictably or when you’ve crippled their thrusters.
- My ship took critical damage and I can’t maneuver: If your thrusters are destroyed, you’re dead in the water. Check your HUD for which systems are damaged. If your nav station is destroyed, you lose combat control entirely. Avoid taking hits to these critical areas by rotating to present fresh hull.
- I’m facing multiple enemies and losing: Prioritize the closest threat and focus all fire on crippling them before engaging the second. In the transcript, you destroy one enemy but are caught off-guard by the second. Manage your engagement range and don’t let enemies flank you.
- My weapons are set to free fire but they’re not shooting: Free fire requires both a lock AND the target to be in the weapon’s firing arc. Rotate your ship to align the arc with the target. Watch the HUD cone visualization; if the target is outside the cone, no shots will land.
- I accelerated too hard and passed out from G forces: The torch drive (or similar high-acceleration system) applies heavy G forces. In the transcript, you explicitly mention passing out. Reduce acceleration or use a lower-thrust maneuvering system if you need to stay conscious and in control.
- The enemy destroyed my weapons but I’m still alive: If your weapon systems are disabled but your thrusters and nav are intact, you can still maneuver and attempt to escape. If all your weapons are gone, disengaging is your best option.
Advanced Tips & Time Saves#
Teleport for positioning: In the transcript, you teleport directly next to the target to close range instantly. If your ship has a teleport or warp system, use it to bypass travel time and achieve optimal firing range before the enemy reacts. This is a high-risk, high-reward tactic because you’re committed to the engagement immediately.
Disable thrusters first: If you can focus fire on an enemy’s thrusters, you cripple their ability to maneuver. This makes them an easier target for subsequent shots and torpedoes. In the transcript, your fire accidentally knocks out the target’s thrusters early, turning the fight decisively in your favor.
Watch for weapon alignment: Enemy weapons face a direction just like yours do. If an enemy’s weapons point away from you, you’ve got a free-fire window. Use it to deal maximum damage before they rotate to face you. Conversely, if you see an enemy rotating their weapons toward you, prepare to maneuver or brace for impact.
Torpedo timing: Fire torpedoes when the target is either stationary (disabled thrusters) or moving in a predictable line. Homing torpedoes can miss against erratic maneuvering. In the transcript, the torpedoes miss on the first pass but circle back and hit on the second, suggesting they’ve got limited tracking persistence.
Manage power during sustained combat: The transcript doesn’t explicitly detail power management, but your ship loses power toward the end of the engagement. Allocate power to weapons, sensors, and thrusters in priority order. If you’re taking heavy damage, you may need to shed power to non-essential systems to keep critical ones online.
FAQ#
How do I install weapons and sensors modules in Ostranauts?#
Access your nav station and select the option to add modules; choose the weapons module and sensors module from your available inventory. Once installed, they appear as functional systems you can toggle on and off through the nav station interface.
What’s the difference between passive and active sensors in Ostranauts?#
Passive sensors detect nearby contacts with limited detail and range, while active sensors (like radar) provide full target information including stats and exact position, but they take longer to scan and may alert the target to your presence.
Why aren’t my weapons firing even though I have a lock?#
Your weapons require three conditions: power (the weapon bank must be toggled on), a valid lock on the target, and the target must be within the weapon’s firing arc (shown as a colored cone on your HUD). If any condition fails, the weapon won’t fire.
Can I fire individual weapon banks or do I have to fire all at once?#
You can fire individual weapon banks (PDCs, rail gun, torpedoes separately) or use the 1 key to fire all weapons simultaneously. Individual firing gives you more control; all-fire maximizes damage output when you’ve got a solid lock.
What happens if my thrusters are destroyed during combat?#
You lose the ability to maneuver and become a stationary target. Your weapons can still fire if they’ve got power and a lock, but you can’t rotate to change your firing arcs or escape. This is a critical failure state in combat.
Do homing torpedoes always hit their target?#
No, torpedoes can miss if the target maneuvers aggressively or if their PDC defenses are pointed in the right direction to intercept. Torpedoes are most effective against stationary or crippled targets, or when fired in volleys so the target can’t dodge all of them.
Checklist#
- Access your ship’s nav station and confirm you’ve got module slots available.
- Install a weapons module to unlock access to your ship’s weapon banks.
- Install a sensors module to activate target detection and scanning.
- Unpause and toggle on both passive and active sensors through the sensors module.
- Power on all weapon banks (PDCs, rail gun, torpedoes) through the weapons module.
- Observe the firing arcs displayed on your HUD for each weapon type.
- Set each weapon bank to “free fire” mode so they engage automatically once locked.
- Locate a target using your active sensors and lock it.
- Maneuver your ship to close range with the target.
- Rotate your ship so your forward-firing weapons point directly at the locked target.
- Watch for automatic fire from your PDCs and rail gun; verify hits on the target’s hull.
- Press the 1 key to fire all weapons simultaneously, launching torpedoes and any other ready systems.
- Monitor your ship’s HUD for incoming damage (shown as red indicators) and adjust your rotation to present fresh hull if taking heavy fire.
- If a second enemy arrives, decide whether to press your advantage against the first target or disengage and reposition.
Source & credit#
This guide draws on the excellent video walkthrough by Kitfox Games — watch it for the full visual run-through, and give the creator your view:
https://www.youtube.com/watch?v=jrUwj0kNnxUFollowing Ostranauts? Get an email when we publish a new guide — or update one after a patch.