- Easy
- Difficulty
- 16 min
- Read time
- 9
- Steps
- 1.0
- Checked on
30-Second Quick-Start (TL;DR)
- Master three core defensive mechanics: parry (block at the moment of impact), deflect (block + movement stick flick), and Issen counter (attack button during hit contact).
- Parries heat your blade for damage buffs; deflects drain massive enemy stamina (up to 1,875 on bosses vs. 300 for parries).
- Break enemy stamina gauges before triggering finishers to chain multiple enemies into a single devastating combo sequence.
- Use parried arrows as weapons—redirect them into nearby enemies for free damage and crowd control.
- Knock enemies into walls with timed parries to stun them, set up easy finishers, and break their stamina quickly.
- Deflect projectiles (arrows, magic spit) back to attackers to neutralize threats instantly.
- Time blade-to-blade clashes to trigger blade barrage, then alternate attack inputs to land free hits during the animation.
- Enable story mode and action prompts in options if you’re learning the combat system—no shame in playing at your own pace.
What This Guide Helps You Do
This guide teaches you how to turn Onimusha: Way of the Sword’s defensive mechanics into offensive weapons, letting you control every fight by breaking enemy stamina, chaining finishers, and turning incoming attacks into damage opportunities. Whether you’re learning the demo or preparing for the full release, you’ll understand the difference between parrying and deflecting, when to use each, and how to chain multiple enemies into finisher sequences that feel as good as they look. This works best for players new to Onimusha’s combat system, action game newcomers who want to succeed on story mode, and anyone curious about the hidden details that make the combat feel responsive and rewarding.
Requirements & Prep
You don’t need any specific items or unlocks to practice these mechanics—they’re available from the start of the demo and full game. You’ll need a controller (the guide references block, attack, dodge, and directional inputs; keyboard and mouse compatibility isn’t discussed, so controller is recommended for precise timing). If you’re on PlayStation 5, Xbox Series X/S, or PC, you’re ready to play.
Route Overview
Onimusha: Way of the Sword doesn’t have a traditional farming route—it’s a narrative action experience. Instead, this guide focuses on combat mastery: the techniques and defensive mechanics that let you control fights, minimize damage taken, and chain enemies into devastating combo finishers. The core loop involves reading enemy attacks, choosing between three defensive options (parry, deflect, or Issen counter), breaking stamina gauges, and setting up finishers. By understanding when to use each mechanic and how they interact with your environment and nearby enemies, you’ll progress through the story efficiently and make every combat encounter feel like a choreographed samurai film where you’re directing the action.
Step-by-Step Walkthrough
Understanding Parry: The Foundation
Parrying is your first line of defense and one of the most satisfying mechanics in Onimusha: Way of the Sword. To parry, press the block button at the exact moment an enemy attack connects with your body. The timing window is tight but consistent—you’ll see your character’s arm move to intercept the incoming strike, and the attacker will be knocked back slightly.
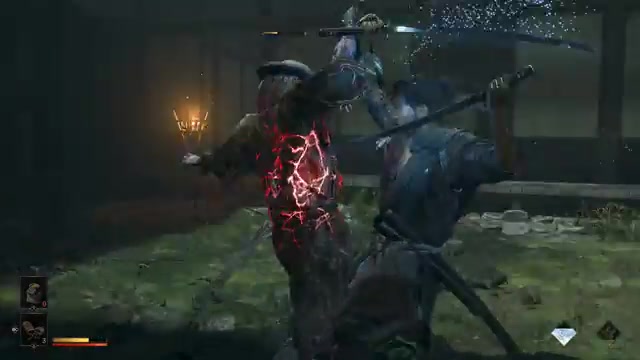
Each successful parry leaves a heated mark on your blade where the attack struck. This is more than visual feedback: parry enough times in succession, and your entire blade will ignite with hot blue flames, temporarily increasing your attack power. This damage buff is your reward for playing defensively and reading enemy patterns. Against most standard enemies, parrying is reliable and safe, though it drains less enemy stamina than deflects (roughly 300 stamina per parry on bosses).
Learning Deflect: The High-Damage Alternative
Deflecting is mechanically different from parrying and deals dramatically more stamina damage—up to 1,875 stamina against a katana-wielding boss compared to 300 from a parry. To deflect, press block and simultaneously flick your movement stick in any direction, or press block plus the examine button (depending on your control scheme). Deflects are your primary tool for quickly breaking enemy stamina gauges and setting up finishers.
The tradeoff is precision: deflects require exact directional input alongside block, making them slightly harder to execute under pressure than a simple parry. But against bosses and tough enemies, the stamina drain is worth the practice. When you see a big obvious swing coming, commit to a deflect rather than a parry if you want to end the fight faster.
Mastering Projectile Defense: Arrows and Magic
Incoming projectiles—arrows, magical spit balls from cheek-like creatures, and other ranged attacks—can be parried or deflected mid-flight. Parrying an arrow will lodge it into the ground near you. If another enemy is close by, that parried arrow can be deflected into their face, turning a defensive action into an offensive one and dealing free damage with forced friendly fire.
Deflecting projectiles is even more powerful: the projectile bounces directly back to the attacker. This is especially useful against archers positioned in awkward locations. You can instantly neutralize them without closing distance. Any projectile type can be deflected this way—test this against the magical spit balls from those odd creatures to see the mechanic in action.
Using the Environment: Wall Stuns and Enemy Pinball
Most enemies can be parried or knocked into nearby walls. When an enemy hits a wall after a parry, they’ll become temporarily stuck, fighting to pull themselves free in a comical animation. During this stuck state, their stamina breaks significantly, and they’re perfectly set up for a finisher attack. This mechanic transforms the environment into a combat tool—choose your fights near surfaces to maximize damage and control.
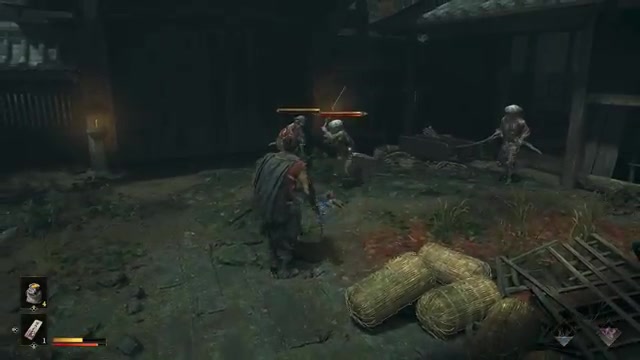
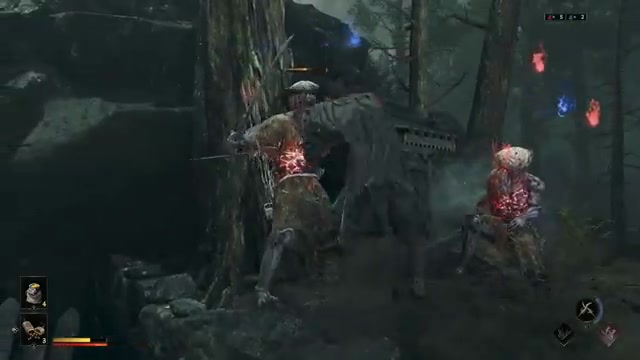
Enemies can also be bumped into other enemies to break their stamina. This creates a “samurai pinball” effect where you use one enemy as a weapon against another. Parry an enemy toward a nearby ally, and you’ll damage both while setting up finishers. This is especially useful in multi-enemy encounters where you want to weaken several targets before committing to finishers.
The Issen Counter: High Risk, High Reward
The Issen counter is a tiny timing window that opens right as an enemy attack connects with your body. At that precise moment, tap the attack button (either one-handed or two-handed input) to automatically dodge around the hit and counter it. This mechanic has no defensive benefit like parries—you’re not blocking or reducing damage. Instead, you’re dodging entirely and landing a free hit.
The skill ceiling is high: mistiming an Issen counter leaves you vulnerable, but nailing it feels incredible. Against spinning wheel enemies, a successful Issen counter will instill them (stop their spin), and if you immediately tap attack again, you can chain into finishers on nearby enemies. At the highest level of play, you could theoretically counter your way through the entire game without ever blocking, but this requires frame-perfect timing and deep pattern knowledge.
Blade Barrage: Clash and Counter
When an enemy swings a katana or large blade, you can time your own swing to hit blade-to-blade. This triggers a blade barrage animation where you and the enemy lock swords. During this lock, press the opposite attack input from the one that started the clash. If you clashed with a one-handed attack, press the two-handed attack button next. You’ll sneak in a free hit while the enemy is locked in animation.
This mechanic is effective against humanoid enemies wielding weapons and feels like a natural extension of samurai dueling. Use it whenever you see a big obvious swing coming from an armed opponent.
Breaking Stamina and Chaining Finishers
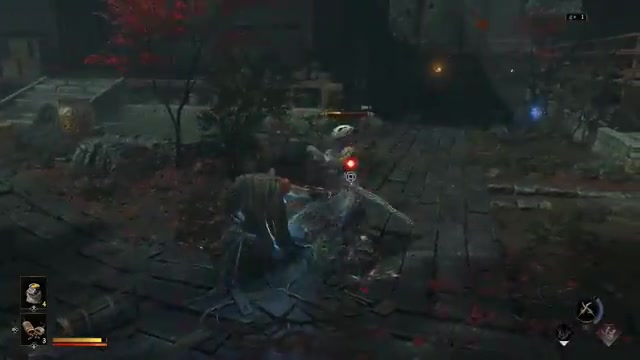
Every enemy has a stamina gauge. Parries, deflects, and environmental damage all chip away at it. Once an enemy’s stamina is completely broken, they become vulnerable to a finisher attack—a targeted strike where you choose to either deal massive damage (red section) or gain health and weapon charge (purple section). Here’s the key: you can break multiple enemies’ stamina gauges before triggering any finisher, then chain them all together in a single long combo sequence.
This is the foundation of advanced Onimusha combat. Stay defensive, use parries and deflects to wear down enemy stamina, and once you’ve broken two or three enemies, start your finisher chain. You’ll transition smoothly from one enemy to the next, dealing catastrophic damage while staying mobile and safe. This approach rewards patience and defensive play over aggressive button mashing.
Dodging and the Reflex Gauge
You’ve got two dodge options: directional dodge (press movement direction + dodge button) for quick lateral movement, or stationary dodge (tap dodge with no directional input) to hold your ground while evading. Timing perfect dodges fills the red reflex gauge in the bottom right corner. When that meter is full, the next perfect dodge triggers brief slow-motion, which you can chain into a reflex combo for bonus damage.
Against unarmed attacks like kicks, dodging and striking after creates a detail animation where your sword hits with the handle instead of the blade. It’s purely visual but adds to the responsive, alive feel of combat.
Handling Special Enemy Types
Spinning wheel enemies covered in metal spikes require careful parrying. Time a parry against their spin attack and knock them into a wall—they’ll get fully stuck, fighting to extract themselves. During this animation, set up a finisher attack by slicing through tail to nose. Alternatively, parry them into nearby enemies to grind their spikes repeatedly into allies, dealing damage and breaking stamina on multiple targets at once. If you use a timed deflect instead of a parry, the spinning enemy bounces directly backward rather than to your side, giving you positioning control.
Cheek-like creatures that spit magic balls and occasionally engorge to detonate themselves need different handling. You can deflect their spit back at them instantly. When they try to detonate, press dodge right before contact, and you’ll grab them, allowing you to manually throw them wherever you want—essentially turning them into an explosive bomb of blue jelly that you control.
Boss/Set-Piece Strategy: Katana-Wielding Boss Example
Phase One: Reading the Pattern
The katana-wielding boss uses large, obvious swings that telegraph their timing clearly. Your primary tool here is deflecting rather than parrying. A single deflect drains approximately 1,875 stamina from the boss’s gauge compared to 300 from a parry—roughly six times more efficient. Watch for the boss’s swing animation, and commit to a deflect (block + movement stick flick) at the moment of impact.
After each deflect, the boss will be slightly off-balance. This is your window to land a free hit or chain another deflect if the boss immediately counters. The goal is to break the boss’s stamina gauge entirely before triggering a finisher.
Stamina Break and Finisher Setup
Once the boss’s stamina gauge is depleted, they’ll become vulnerable to a targeted finisher. At this point, you’ll see two choices: a red section for one free super hard hit, or a purple section to gain orbs for health and weapon charge. Choose based on your current health and weapon charge state. If you’re low on either, go purple. If you’re healthy and need burst damage to end the fight, go red.
After the finisher, the boss will recover and reset their stamina. Repeat the deflect-and-break cycle until the boss is defeated. This approach is safer than trying to land Issen counters and doesn’t require the blade parry damage buff—pure stamina damage is your win condition.
Builds & Loadouts
Onimusha: Way of the Sword doesn’t feature traditional loadout customization. Your katana is your primary weapon throughout, and the game focuses on mastering defensive mechanics rather than swapping gear. However, your blade will show visual changes as you parry (heated marks) and accumulate parry damage buffs (blue flame ignition). These aren’t loadout choices—they’re the result of your defensive play style.
The only customization available is difficulty selection: story mode enables action prompts and reduces enemy damage, while higher difficulties remove these assists. Choose based on your action game experience, not your loadout.
Troubleshooting & Common Mistakes
- Mistake: Parrying when you should deflect. Against bosses and tough enemies, deflects drain far more stamina (1,875 vs. 300). If you’re struggling to break stamina, switch to deflects and accept the slightly tighter timing requirement.
- Mistake: Triggering finishers too early. Don’t finisher a single enemy if two or three nearby enemies have broken stamina. Wait and chain them all together for massive damage and a longer combo sequence. Patience pays off.
- Mistake: Ignoring the environment. Fights near walls are easier—parry enemies into surfaces to stun them and break stamina quickly. Choose your positioning deliberately, not randomly.
- Mistake: Dodging instead of deflecting projectiles. Arrows and magic spit can be deflected back to attackers instantly. Dodging wastes time and doesn’t neutralize the threat. Train yourself to deflect ranged attacks reflexively.
- Mistake: Trying Issen counters without practice. This mechanic has a tiny timing window. In early encounters, stick to parries and deflects. Once you’re comfortable, layer in Issen counters against specific enemy types (spinning wheels, humanoid bosses).
- Mistake: Not using the reflex gauge. Time perfect dodges to fill the reflex meter, then chain a reflex combo for bonus damage. This is free damage if you’re already dodging—don’t ignore it.
- Mistake: Forgetting blade barrage against armed enemies. When you see a big katana swing coming, time a blade-to-blade clash instead of parrying. You’ll lock swords and land a free hit. It’s more rewarding than a simple parry.
- Mistake: Playing on default difficulty if you’re new to action games. Story mode isn’t cheating—it’s the intended difficulty for players who want to experience the narrative and combat at a comfortable pace. Enable it, learn the mechanics, and move up once you’re confident.
Advanced Tips & Time Saves
Chaining Deflects for Rapid Stamina Breaks
Once you’re comfortable with deflect timing, chain multiple deflects in succession against bosses. Each deflect breaks stamina and repositions the enemy. On a katana-wielding boss, two to three consecutive deflects will fully deplete the stamina gauge, letting you finisher immediately. This is faster than mixing parries and deflects and feels incredible when executed smoothly.
Environmental Kills Without Finishers
Parrying an enemy into a wall breaks significant stamina but doesn’t always trigger a finisher. However, if the wall stun is strong enough, you can follow up with another parry into the same wall or a nearby surface to completely break their stamina and set up the finisher. This is useful for managing multiple enemies—weaken one completely, then move to the next.
Projectile Redirection as Crowd Control
When archers or spit-throwing enemies are attacking, prioritize deflecting their projectiles back at them rather than dodging. This neutralizes the threat instantly and deals damage without you moving closer. In multi-enemy fights, this lets you control the pace and reduce incoming damage pressure.
FAQ
What’s the difference between parry and deflect in Onimusha: Way of the Sword?
Parry is block pressed at the moment of impact, heating your blade and building a damage buff. Deflect is block plus movement stick flick, draining massive enemy stamina (up to six times more than parry). Parries are safer and reward defensive play; deflects are riskier but end fights faster. Use parries to build blade damage buffs and feel in control; use deflects when you want to break stamina quickly.
How do I redirect arrows back to enemies in Onimusha: Way of the Sword?
Deflect the arrow mid-flight by pressing block plus movement stick flick at the moment it reaches you. The arrow bounces directly back to the attacker, instantly neutralizing archers. Parrying an arrow lodges it in the ground; if another enemy is nearby, that parried arrow can be deflected into their face for free damage.
Can I chain multiple enemies into a single finisher combo?
Yes. Break multiple enemies’ stamina gauges before triggering any finisher. Once you’ve depleted two or three stamina bars, start your finisher on the first enemy, and you’ll automatically chain into the next vulnerable enemy, creating a long combo sequence. This rewards patience and defensive play.
What’s the Issen counter and when should I use it?
The Issen counter is pressing attack at the exact moment an enemy hit connects with your body, letting you dodge and counter automatically. It’s got a tiny timing window and high risk—mistiming leaves you vulnerable. Use it against spinning wheel enemies or humanoid bosses once you’ve learned their patterns. For beginners, stick to parries and deflects.
Should I play story mode if I’m new to action games?
Yes. Story mode reduces enemy damage and enables action prompts that warn you before attacks. This isn’t cheating—it’s the intended difficulty for players who want to learn Onimusha’s combat system at their own pace. You can toggle prompts on or off anytime under gameplay options. Move to higher difficulties once you’re confident.
How do I handle spinning wheel enemies covered in spikes?
Parry their spin attack and knock them into a wall—they’ll get stuck fighting to pull themselves free. During this stuck animation, set up a finisher. Alternatively, parry them into nearby enemies to grind their spikes into allies for damage. Use a timed deflect instead of a parry to bounce them backward, giving you positioning control.
Checklist
0 of 12
Source & credit
This guide draws on the excellent video walkthrough by Boomstick Gaming — watch it for the full visual run-through, and give the creator your view: