30-Second Quick-Start (TL;DR)#
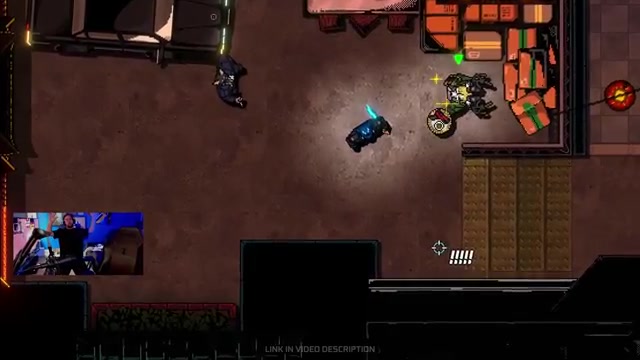
- Master the parry mechanic to reflect enemy projectiles and control space—it’s your core defensive tool.
- Treat gun-wielding enemies as your primary threat; they deal heavy damage and require quick positioning or ranged stuns.
- Use the pistol as a stun weapon, not a kill tool—two shots drop most enemies, but one shot stops them from firing.
- Unlock and equip Charged Punch early to create distance and damage through doors and furniture.
- Knife throw-and-retrieve is timing-intensive but essential; the window is tight, especially against dogs.
- Expand your loadout board in the laundromat base and prioritize Counter-Strike, Quick Step, and Auto Recovery upgrades.
- Learn to chain enemies into each other or into environmental hazards (doors, breakable walls) for free kills.
- Every room is a puzzle—scout for gun positions, breakable walls, and cover before committing to combat.
What This Guide Helps You Do#
This guide teaches you how to survive and master Kusan: City of Wolves’ fast-paced, Hotline Miami-inspired combat system, from basic enemy interactions through boss encounters. You’ll learn enemy threat hierarchy, weapon timing, parry mechanics, and loadout optimization so you can clear levels with confidence and speed. It’s best for players new to the game or those struggling with the rhythm and timing of close-quarters violence in a top-down perspective.
Requirements & Prep#
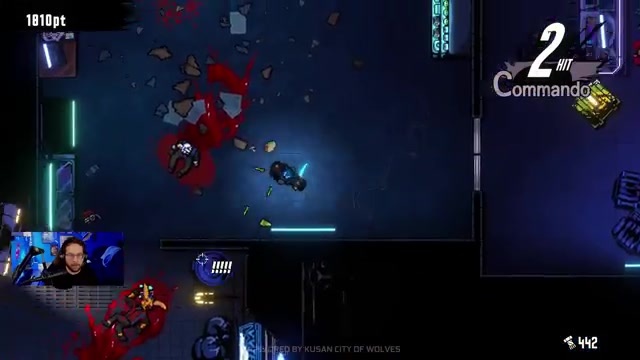
You’ll need access to the laundromat base to manage your loadout and purchase upgrades using noodles (the in-game currency earned by defeating enemies and destroying objects). Before entering a new level, spend a moment in your base to equip weapons and abilities that suit the upcoming challenge. The game is playable on PC (Steam, Epic Games Store), PlayStation 5, Xbox Series X and S, and Nintendo Switch.
Optional but Helpful: Familiarize yourself with the loadout board layout before combat begins. Shrinking upgrades (as shown in the base) frees up space for additional tools without removing them entirely. This flexibility lets you adapt mid-run if you find yourself facing unexpected enemy types.
Route Overview#
Kusan: City of Wolves structures its combat as a series of interconnected rooms and corridors, each presenting a small-scale tactical puzzle. You enter a space, identify enemy positions (especially gun-wielders), locate breakable walls and doors, and execute a sequence of parries, knife throws, punches, and shots to clear the area. The game rewards observation: scope out a room before engaging, plan your approach around environmental hazards, and chain enemies into obstacles when possible. Levels progress from simple one-on-one encounters to multi-enemy gauntlets with mixed weapon types. Breakable walls often hide shortcuts or alternative routes, so test crumbly-looking surfaces. After clearing a level, return to the laundromat base to spend noodles on new weapons, upgrades, and loadout optimization before advancing to the next chapter.
Step-by-Step Walkthrough#
Understanding Your Core Weapons and Tools#
Your primary melee tool is the knife. You throw it by pressing the designated throw button, but you must retrieve it afterward—it doesn’t auto-return unless you’ve unlocked the Auto Recovery upgrade (which brings it back after 3 seconds). The timing window for throwing the knife is tight, especially against fast-moving enemies like dogs. Practice on stationary or slower targets first.
Your fists are always available. A standard punch is quick and safe; a charged punch (hold and release) is a ranged attack that sends a shockwave through nearby objects—including doors and furniture. This is surprisingly effective: a charged punch into a door will send that door flying into enemies behind it for a free kill. Doors are overpowered in this game, so prioritize positioning to use them.
The pistol is a limited-ammo weapon that stuns more than it kills. One shot stops an enemy from firing; two shots kill most standard enemies. Use it to break up dangerous situations or to interrupt gun-wielders who have a clear shot at you. Ammo is finite, so don’t waste shots on melee-only enemies.
The Parry Mechanic and Counter-Strike#
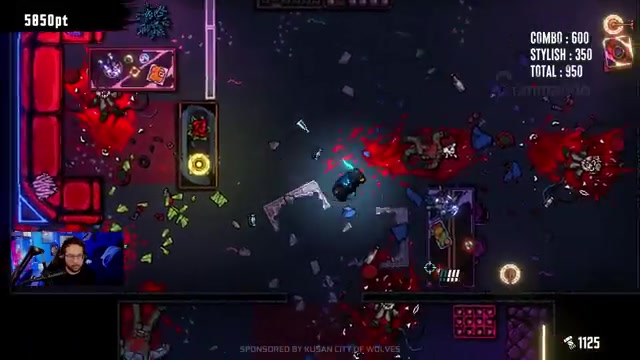
Parrying is your primary defensive and offensive tool. When an enemy fires at you, press the parry button at the right moment to deflect the shot. With the Counter-Strike upgrade unlocked, a successful parry sends the enemy’s projectile back at its source, often killing the shooter instantly. The timing window is tight—you must parry just as the bullet reaches you. Practice this relentlessly, as it’s the difference between a controlled fight and a chaotic death.
Parrying also creates space and rhythm in combat. If you’re surrounded by gun-wielders, focus on parrying their shots and letting Counter-Strike do the work. This turns their firepower into a liability for them.
Engaging Gun Enemies (The Primary Threat)#
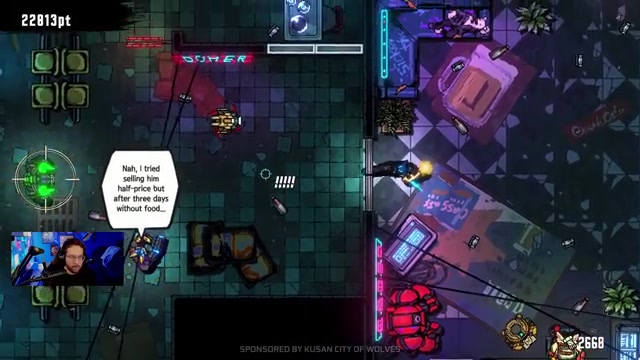
Gun-wielding enemies are your top priority. They deal heavy damage and can kill you in one or two hits if you’re caught in the open. When you spot a gun enemy, immediately assess the room: Where is their line of sight? Is there cover (a door, wall, or furniture) between you and them? Can you approach from an angle they can’t defend?
Your options are:
- Parry their shots and counter: If you’re confident in your timing, bait a shot and parry it back. With Counter-Strike, this often kills them outright.
- Use a charged punch through a door: Position yourself so a charged punch will send a door or large object into them. This bypasses their firepower entirely.
- Stun with the pistol: One shot stops them from firing, giving you time to close the distance and melee them down.
- Knife throw: If you’ve got a clear line and they’re stationary or slow-moving, throw the knife. Retrieve it immediately after the kill.
Never rush a gun enemy in a straight line. They will shoot you. Always use cover, timing, or a ranged interrupt.
Melee Enemies (Dogs and Unarmed Fighters)#
Dogs and unarmed fighters are less immediately dangerous than gun-wielders, but they’re faster and harder to predict. Dogs drop a snare when defeated—this is a temporary slow effect, not a kill hazard, so don’t panic if you get caught in one.
Against dogs, the knife throw is your safest tool, but the timing window is very tight. If you miss, you’ll need to retrieve the knife before they close the distance. Alternatively, charge a punch and release it at point-blank range for a guaranteed hit.
Unarmed fighters go down quickly to punches. One or two standard punches will kill them, or a single charged punch if you’ve got the space to wind up.
Grenade Enemies (Least Threatening)#
Grenade-wielding enemies are the least dangerous unit type in the game. Their grenades create snares (slow effects), not instant kills. You can ignore them in most situations or dispatch them last when the room is otherwise clear. They’re often positioned in the back of formations, so you’ll naturally deal with them after handling gun enemies.
Environmental Hazards and Shortcuts#
Breakable walls are your friends. They’re visually distinct (crumbly, discolored) and often hide shortcuts or alternative routes through a level. Charge-punch through them or punch them repeatedly to break them open. Always test suspicious-looking walls.
Doors can be weaponized. A charged punch sends a door flying into enemies on the other side. This is one of the most reliable kill methods in the game. Position yourself to use doors whenever possible.
Furniture and large objects can be punched and moved (once you unlock the upgrade). Use them as cover or to chain enemies into each other.
Scoping a Room Before Combat#
Before engaging, take a moment to identify all enemies and their positions. Note where gun-wielders are standing, where cover exists, and where breakable walls or doors might help you. This isn’t a twitch-shooter; it’s a tactical puzzle with a time limit. A 10-second pause to plan often saves you a full restart.
If a room feels overwhelming, look for a secret route or alternative entrance. The game sometimes rewards patient exploration over direct engagement.
Boss Strategy: DJ Gar (Chapter 1 Boss)#
DJ Gar is a high-speed, multi-phase encounter that serves as the game’s first major skill check. The boss combines rapid projectile attacks, melee rushes, and environmental hazards. The timing window for parrying his shots is extremely tight—tighter than standard enemies.
Phase 1: Learning the Rhythm#
DJ Gar opens with rapid, predictable projectile volleys. Your goal is to parry each shot and let Counter-Strike return fire. The pattern is consistent enough that you can anticipate the timing after one or two cycles. Don’t try to close the distance while he’s firing. Wait for a pause in his attack, then advance.
If you get hit, don’t panic. Back away, reset your positioning, and return to parrying. The fight is long, and patience beats aggression.
Phase 2: Mixed Attacks#
As the fight progresses, DJ Gar mixes in melee rushes and area attacks. When he charges at you, sidestep and punish him as he passes. His melee attacks are telegraphed—watch for a wind-up and dodge sideways.
Between his attack sequences, close in and land a charged punch or knife throw. Don’t commit to a long combo; hit and retreat. The boss has high health, so this is a war of attrition.
Recovery and Survival#
If you’re low on health or ammo, create distance and focus purely on parrying. Let Counter-Strike whittle him down. Don’t take unnecessary risks. This boss will punish greed.
The fight ends when his health bar depletes. You’ll know you’re close when his attack patterns become more frantic and less predictable—that’s the final phase. Stay calm, keep parrying, and finish him with a charged punch or knife throw when the opportunity arises.
Builds and Loadouts#
Early Game Loadout (Chapters 1–2)#
Start with these upgrades if available:
- Counter-Strike: Successful parry returns projectiles to sender. This is your most powerful defensive tool—prioritize it immediately.
- Charged Punch: Hold and release to send a shockwave through objects. Doors become weapons with this upgrade.
- Quick Step: Increases movement speed. The difference is noticeable and helps you reposition faster in tight situations.
- Auto Recovery: Knife returns after 3 seconds. This saves time retrieving and lets you throw more freely.
Fit these onto your loadout board in the laundromat. You’ve got limited space, so prioritize Counter-Strike and Charged Punch first. As you earn more noodles and expand your board, add Quick Step and Auto Recovery.
Mid-Game Loadout (Chapter 2+)#
As new weapons unlock, add:
- Boomerang Blade: After throwing your knife, press throw again at the correct moment to return it to your hand instantly. This requires precise timing but eliminates the retrieval delay. Takes up significant board space.
- Pistol: Equip this for levels with multiple gun enemies. It’s a stun tool, not a primary weapon.
- Crossbow: Mentioned as available but not demonstrated in detail. Likely a mid-range alternative to the pistol.
- Magnetic Shot and Magnetic Punch: Mentioned but not explained. Likely utility tools for specific enemy types or environmental puzzles.
Your board can be optimized by shrinking upgrades—this reduces the space they occupy without removing them. Use this to fit more tools without sacrificing existing ones.
If you’re under-geared: Focus on Counter-Strike and Charged Punch. These two tools solve most early-game problems. Your knife and fists are always available, so you’re never truly helpless. Use pistol ammo sparingly for gun enemies only.
Troubleshooting and Common Mistakes#
- Getting one-shot by gun enemies: You’re rushing them in a straight line. Stop. Use cover, parry their shots, or use a charged punch through a door instead.
- Missing knife throws repeatedly: The timing window is tight. Practice on stationary enemies first. Throw when the enemy is moving toward you, not away.
- Forgetting to retrieve your knife: After throwing, immediately move back to pick it up. If you don’t have Auto Recovery, this is a manual step. Plan your throws so you can safely retrieve.
- Wasting pistol ammo on melee enemies: Save bullets for gun-wielders. Melee enemies die faster to knives and punches.
- Panicking in multi-enemy rooms: Scope the room first. Identify gun positions and plan a route that uses cover and doors. Engage one enemy at a time when possible.
- Not using doors as weapons: Charged punch + door = free kill. This is overpowered and should be your default strategy whenever a door is nearby.
- Ignoring breakable walls: They hide shortcuts and resources. Always test crumbly-looking surfaces.
- Parry timing too early or late: The window is frame-tight. Practice against stationary gun enemies. Parry just as the bullet reaches you, not before.
Advanced Tips and Time Saves#
Chaining Enemies Into Each Other#
If you can position two enemies so that one’s attack hits the other, you can eliminate both with minimal effort. For example, lure a spinning disc enemy toward a charging enemy and let them collide. It’s risky but rewarding if you pull it off.
Using Furniture to Create Barriers#
Once you unlock the upgrade to punch and move large objects, you can reposition furniture to create cover or block enemy paths. It’s subtle but powerful in crowded rooms.
Pre-Positioning Before Parries#
Stand slightly to the side of a gun enemy’s line of sight before baiting a shot. This gives you a clear parry angle and makes Counter-Strike more likely to hit. Don’t stand directly in front of them.
Knife Throw into Retrieval Loop#
If you’ve got Auto Recovery, throw your knife and immediately move away. The knife will return after 3 seconds, giving you time to engage another enemy or reposition. This creates a rhythm where you’re always cycling between knife throws and melee punches.
FAQ#
How do I parry bullets in Kusan: City of Wolves?#
Press the parry button just as the bullet reaches you—the timing window is very tight and frame-precise. The Counter-Strike upgrade makes successful parries send the bullet back at the shooter, often killing them instantly. Practice against stationary gun enemies until the timing feels natural.
What’s the best way to deal with multiple gun enemies at once?#
Identify their positions first, then use cover (doors, walls, furniture) to break their line of sight. Parry their shots one at a time, or use a charged punch through a door to eliminate one quickly. Never rush multiple gun enemies in a straight line—they will kill you. Prioritize the one with the clearest shot at you first.
Should I use the pistol or knife more often?#
Use the pistol exclusively for gun enemies—one shot stuns them, two shots kill them. Save your knife for melee enemies and situations where you’ve got time to retrieve it. Pistol ammo is limited, so treat it as a precious resource. Your knives and fists are your primary tools.
How do I unlock new weapons and upgrades?#
Defeat enemies and destroy objects to earn noodles (the in-game currency). Return to the laundromat base and purchase new weapons and upgrades from the shop. New items unlock as you progress through chapters. Your loadout board has limited space, so prioritize Counter-Strike, Charged Punch, and Quick Step first.
What does the Boomerang Blade upgrade do?#
After throwing your knife, press the throw button again at the correct moment to return the knife to your hand instantly. This eliminates the manual retrieval step and lets you throw more frequently. The timing window for the return throw is tight, so practice in safe situations first.
Are breakable walls important?#
Yes. Breakable walls (visually crumbly or discolored) often hide shortcuts, alternative routes, and resources. Always test suspicious-looking walls by charging a punch or hitting them repeatedly. They’re a key part of level design and reward exploration.
Checklist#
- Unlock Counter-Strike as your first upgrade—it turns enemy firepower into a liability.
- Unlock Charged Punch second—it weaponizes doors and furniture for free kills.
- Practice parrying against stationary gun enemies until the timing feels automatic.
- Never rush gun enemies in a straight line; always use cover or a ranged interrupt first.
- Use the pistol only for gun enemies—one shot stuns, two shots kill. Save ammo.
- Throw your knife at melee enemies (dogs, unarmed fighters) when you’ve got a clear line and time to retrieve.
- Before engaging a room, take 10 seconds to identify all enemy positions, gun placements, and environmental hazards (doors, breakable walls).
- Use charged punches through doors to eliminate gun enemies without taking fire.
- Test all crumbly-looking walls—they often hide shortcuts and resources.
- Expand your loadout board in the laundromat base and optimize upgrades to fit more tools.
- Between levels, return to the base to spend noodles on new weapons and upgrades that match the next chapter’s enemy types.
- In boss fights, prioritize parrying and patience over aggression—let Counter-Strike whittle the boss down while you focus on survival.
Source & credit#
This guide draws on the excellent video walkthrough by Boomstick Gaming — watch it for the full visual run-through, and give the creator your view:
https://www.youtube.com/watch?v=2xjWD4MQCGEFollowing Kusan: City of Wolves? Get an email when we publish a new guide — or update one after a patch.