30-Second Quick-Start (TL;DR)#
- Answer the radio and meet Agent Zoe Divera at the hotel to unlock the main quest chain.
- Complete the introductory combat tutorial and defeat the Artist boss in the Echoes of Infinity area.
- Collect three map kit sensors across the central zone and activate the central pylon to unlock fast travel.
- Guard the maintenance worker Baker and restore power to the checkpoint (he will die; this is scripted).
- Navigate the underground supply lines through the Vercon building field office to reach Zoe at the watchtower.
- Accept the mission to find the source of Hiss resonance tremors in the evacuation zone.
- The Unknown is reached through the Echoes of Infinity, a reversed art museum-like dimensional space triggered during story progression.
What This Guide Helps You Do#
This guide walks you through the opening hours of Control Resonant and shows you how to progress toward the Unknown—the game’s central dimensional anomaly that serves as a key story location. You’ll learn the route through Manhattan, understand the power restoration puzzle, and know what to expect from the early boss encounters. If you’re a first-time player looking for a clear path through the opening sequence without getting lost or wasting time on optional detours, you’re in the right place.
Requirements & Prep#
You’ll start Control Resonant by choosing your weapon form: Strike (30% critical chance, low recovery), Glaive (higher damage, no crit, low recovery), or a third unnamed form. Strike is recommended for new players thanks to the early critical chance bonus. You don’t need any special items or consumables before starting—the game provides all tutorial equipment and healing elements as you go.
Control Resonant plays smoothly on both controller and keyboard, though a controller is recommended for the fluid traversal and combat mechanics. If you’re on PC, you’ll want to enable DLSS 4.5 support, which significantly improves performance. Head to your graphics settings, find Deep Learning Super Sampling, and set it to Performance mode for optimal frame rates.
Optional but Helpful: Spend some time in the opening arena tutorial to understand how the falter meter works. Dealing damage fills it, and when it’s full, you can execute enemies for large damage and health drops. This mechanic is central to survival in later encounters.
Route Overview#
Your journey to the Unknown starts the moment you wake up in the oldest house and answer a distress radio call. You’ll meet Agent Zoe Divera outside a hotel in Manhattan, then fight through Hiss-corrupted enemies in an arena tutorial. After defeating the Artist boss in a dimensional space called Echoes of Infinity, you’ll return to the city and begin mapping zones by collecting and activating sensor pylons. From there, you’ll tackle power restoration puzzles, infiltrate supply lines, and finally reach the watchtower where Zoe gives you the mission to investigate the evacuation zone—where the Unknown’s influence is strongest. The Unknown itself is accessed through another dimensional rift similar to Echoes of Infinity, triggered during story progression as you uncover more about the Hiss and the patterning phenomenon.
Step-by-Step Walkthrough#
Wake Up and Answer the Radio#
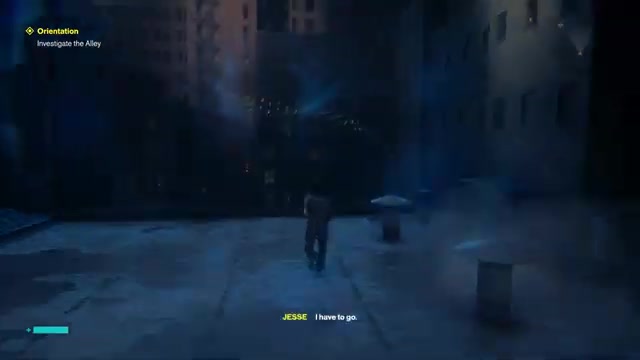
You’ll begin in a dark space with voices and screaming. A board or entity asks you to choose your starting weapon form. Select Strike for the critical chance bonus, though any form works fine. After confirming your choice, you’ll see a photograph of Dylan and Jesse, establishing the story context. The case files and memos scattered around the room provide lore but aren’t necessary for progression—feel free to skip them if you want to move faster. Head forward through the environment until you trigger a radio sequence where a distress call comes in. You’ll hear Agent Zoe Divera identify herself as Supervisory Special Agent from Manhattan Sector 22. She directs you to meet her at the tall white building with a big neon sign that says “hotel.”
Navigate to the Hotel and Meet Zoe#
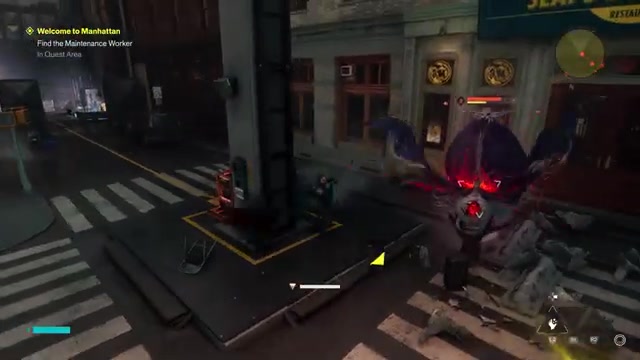
Exit the oldest house and enter the open Manhattan environment. Enemies are around, but you can avoid most of them at this stage. Head toward the hotel building—Zoe will guide you via radio. As you move through the streets, you’ll run into your first combat encounters with Hiss-corrupted enemies. These fights are introductory, so focus on dodging left and right (there’s no blocking or parry system for basic enemies) and attacking when it’s safe. When enemies die, they drop health elements that match your health bar in the lower left. Grab these to stay alive. The combat feels extremely fluid and fast-paced, so don’t panic if you take damage—healing drops come frequently.
Enter the Arena and Learn Combat Mechanics#
Once you reach the hotel area, you’ll be directed into an arena where you must defeat waves of heavy enemies. This is a tutorial encounter that’ll teach you about the falter meter—a stagger gauge on the bottom of your screen that fills as you deal damage. When the meter is full, you can perform an execution (press L3 or the equivalent on your controller) to deal massive damage and generate health drops. The key to surviving arena fights is keeping enemies stunned by chaining attacks and using executions when the meter fills. After defeating the waves, you’ll receive a new weapon form option—the Drill, which has a secondary attack that hits multiple enemies. Grab it; the secondary attack is powerful and great for crowd control.
Defeat the Artist Boss in Echoes of Infinity#
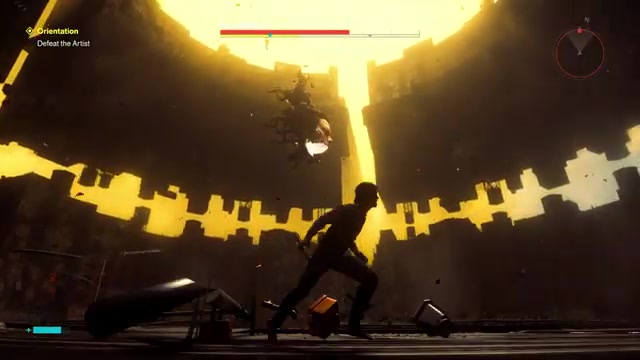
After the arena, you’ll enter Echoes of Infinity, a reversed, art museum-like dimensional space. This is your first major boss encounter. The Artist is a large entity with a massive health bar and a varied attack pattern. The fight breaks down into multiple phases:
Phase One: The Artist uses wind-up attacks and throws objects at you. Dodge by moving left or right at the last moment—timing is critical since the tracking on projectiles is very tight. When the Artist winds up for a large attack, that’s your punish window; close the distance and attack twice before backing away. The falter meter will build slowly. Don’t try to tank damage; every hit hurts, and health drops are rare in this fight.
Phase Two: As the Artist’s health drops, it’ll change attack patterns and may float or reposition. Keep using the same strategy: dodge incoming attacks, punish after wind-ups, and build the falter meter. When the meter fills, execute for a large chunk of damage. If you’re low on health and see a health drop on the ground, grab it instead of attacking.
Survival Tip: This fight is challenging on a first attempt. If you die, you’ll respawn and can retry. The key is patience—don’t rush in; wait for safe windows and punish consistently. After defeating the Artist, you’ll gain a new combat ability (Barrage, which summons an ally that can be thrown and detonated) and access to talent points and new weapon forms in a loadout menu.
Return to Manhattan and Explore the Dimensional Rift#
After the Artist fight, you’ll see a cutscene with Dylan and Jesse in a memory-like space. You’ll gain the ability to double jump and a new movement ability called Rush, which lets you dash forward quickly. These traversal tools are essential for reaching the Unknown later. You’ll also spot a massive dimensional fault or chasm in the distance—this is a landmark you’ll see throughout the game. The visual and audio design here is striking; take a moment to observe it, as it’s directly connected to reaching the Unknown.
Meet Zoe at the Hotel and Get Your First Mission#
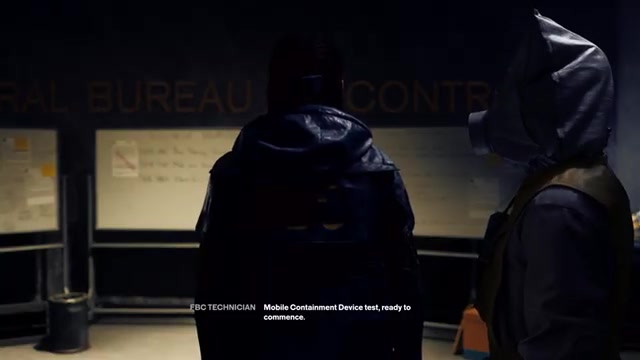
Return to the surface and meet Zoe at the hotel. She’ll explain the situation: the Hiss is a viral resonance spreading through Manhattan, and there’s also a patterning phenomenon—a refractive distortion in the city caused by an unidentified resonant entity. Zoe will give you a Mobile Containment Device (MCD) to wear; this is a plot device that allows her to track you and can be activated as a kill switch if necessary. Accept her orders and head to the watchtower. Before you go, Zoe will ask you to help the mapping team set up sensor pylons across the city.
Collect Map Kit Sensors and Activate the Central Pylon#
Travel to the central zone and find the mapping team. They’ll direct you to collect three sensor kits scattered around the zone. Each sensor is on the ground or on a building; use your new double jump and Rush abilities to reach them. Once you’ve got all three, return to the central pylon (a large tower-like structure) and activate each sensor by interacting with it. The sensors align automatically, and the pylon activates, giving you a bird’s-eye map of the zone and unlocking fast travel doors in that area. Fast travel doors are marked on your map and let you move instantly between zones—these become invaluable for navigating the city.
Guard the Maintenance Worker and Restore Power#
Zoe will ask you to guard a maintenance worker named Baker while he repairs the power system to the central checkpoint. Baker is difficult and will eventually abandon the job, leaving you to complete the repair yourself. Follow the arrows and diagrams provided in the environment. You’ll need to move a power charge to the central checkpoint, stabilizing cables along the way. This is a straightforward sequence; just follow the visual cues and interact with the highlighted objects. Baker will die during this section (killed by Hiss corruption)—this is scripted and unavoidable. Report his death to Zoe, and she’ll tell you to continue with the mission.
Navigate the Underground Supply Lines#
Zoe will direct you to the Vercon building, the FBC’s front operation disguised as a vacuum cleaner importer. To reach it, you’ll go through underground supply lines. These tunnels are overrun with Hiss enemies, so combat is unavoidable. Use your combat skills—dodge, attack, build the falter meter, execute when full. The traversal in these tunnels is straightforward; just follow the path and clear enemies as you encounter them. Health drops are more frequent here, so you can afford to be more aggressive. After clearing the supply lines, you’ll emerge in the field office.
Reach the Watchtower and Receive Your Next Objective#
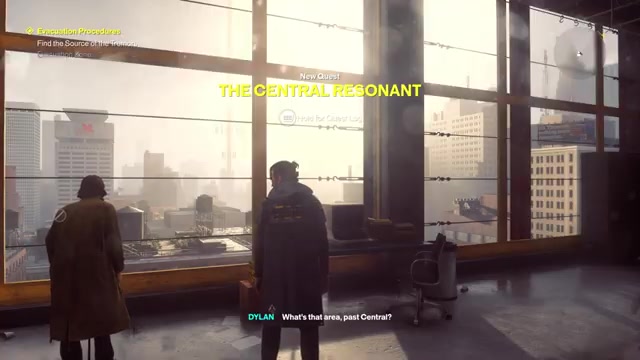
Once you reach the field office, you’ll need a security key card to proceed to the watchtower. Zoe has a plan: she’ll arrange for you to get the authorization you need. Head to the watchtower by following the elevator key Zoe gives you. The watchtower is Zoe’s base of operations—a sparse but functional command center. She’ll explain the full scope of the crisis: the evacuation zone is quarantined and full of Hiss, the west incursion zone shows signs of patterning, and there’s a mold infestation in the park. Your primary objective is to find the source of Hiss resonance tremors in the evacuation zone. This is where your path to the Unknown truly begins.
Boss/Set-Piece Strategy: The Artist (Echoes of Infinity)#
Phase One: Initial Engagement#
Trigger: The fight begins immediately when you enter the arena. The Artist will float in place and begin its attack sequence.
Attack Pattern: The Artist uses three main attacks in this phase: slow wind-up melee swings, projectile throws, and area-of-effect energy blasts. The wind-ups are long and telegraphed, giving you a clear punish window. Projectiles track moderately and are avoidable with side dodges. Area blasts are telegraphed by a charging animation.
Safe Punish Window: After the Artist completes a wind-up melee swing, it has a 2-3 second recovery window. Close the distance immediately and land two to three hits before backing away. Don’t overcommit; retreat after your second hit to avoid the next attack. The falter meter will build slowly across multiple hits.
Dodging Projectiles: When the Artist throws projectiles, dodge left or right at the last possible moment. Early dodges won’t work due to the projectile tracking. Wait until the projectile is nearly on you, then dodge sharply. If you’re caught by a projectile, you’ll take damage but won’t be stunned; keep moving and find the next safe window.
Phase Two: Mid-Fight Transition#
Trigger: At roughly 50% health, the Artist will reposition and change its attack pattern. You may see a brief animation where it floats higher or shifts to a new area of the arena.
New Mechanics: The Artist may now use a delayed attack pattern—it’ll wind up, pause, then attack. This is designed to punish players who dodge too early. Wait for the actual attack before dodging. Additionally, the Artist may summon smaller projectiles in waves rather than single throws.
Falter Meter Execution: If the falter meter is full, trigger an execution immediately. This is your highest damage window and will deal a significant chunk of health. After execution, the Artist will briefly stagger, giving you a few free hits before it recovers.
Phase Three: Low Health Push#
Trigger: At approximately 20% health, the Artist becomes more aggressive. Attack frequency increases, and there are fewer recovery windows.
Survival Strategy: Health drops become your lifeline here. If you see a health drop, prioritize collecting it over attacking. You may need to break your attack rhythm to grab healing. The falter meter will build faster due to increased attack frequency, so executions will come more often—use them aggressively.
Final Push: In the last 10% of health, the Artist will use its most dangerous attack pattern. Stay mobile, dodge consistently, and only attack when you’re absolutely certain it’s safe. One or two hits per window is better than being greedy and taking damage. Once the falter meter fills, execute immediately for the kill.
If You Get Punished: If you take a hit and your health is critical, immediately back away and look for a health drop. Don’t attempt to continue attacking; recovery is more important. The Artist has long attack animations, so you’ll have time to reposition and heal.
Builds & Loadouts#
Your starting loadout consists of your chosen weapon form (Strike recommended) and basic combat abilities. As you progress through the opening, you’ll unlock new weapon forms and abilities:
- Strike Form: 30% critical chance, low recovery. Recommended for new players.
- Glaive Form: Higher raw damage, no critical chance, low recovery. Better for consistent damage output.
- Drill Form: Blunt damage, medium damage, low recovery. Features a powerful secondary attack that hits multiple enemies.
After defeating the Artist, you’ll unlock Barrage, a combat ability that summons an ally that can be thrown and detonated for increased damage if the ally has low health. You’ll also gain access to talent points that modify your weapon forms and abilities. Early talents include increased critical hit chance after dodging attacks and guaranteed health drops after killing enemies with certain abilities.
Recommended Early Loadout: Use Strike form as your primary weapon. Slot Barrage as your combat ability for crowd control. Invest talent points into critical chance bonuses and health generation to improve survivability. As you unlock more forms and abilities, experiment with combinations that suit your playstyle—the game’s progression is designed to be flexible.
If you’re under-geared: Stick with Strike form and focus on building the falter meter consistently. The falter meter matters more than raw damage early on; executions deal massive damage and generate health, so prioritize meter-building over raw hits. Avoid overcommitting to attacks, and always leave yourself an escape route.
Troubleshooting & Common Mistakes#
- Getting lost in Manhattan: Always check your quest markers on the map. The game provides clear directional arrows. If you’re unsure, open your quest log and confirm your current objective. Fast travel doors become available once you activate pylons, so use them to skip long traversals.
- Dying in the Artist fight: You’re probably overcommitting to attacks. After landing two hits, back away immediately. The Artist’s wind-ups are long; wait for them to finish before attacking. Dodging late (at the last moment) is more effective than dodging early.
- Missing health drops: Health drops are small and can be hard to spot during combat. Keep your eyes on the ground, especially after executing enemies. If you’re low on health, retreat to a safe distance and look for drops before re-engaging.
- Not building the falter meter: The falter meter builds through consistent hits. Don’t try to dodge every attack; land hits when safe, build the meter, and execute when full. Executions are your primary damage source early on.
- Struggling with traversal: Double jump and Rush are your main movement tools. Double jump by pressing jump twice in mid-air. Rush by pressing the sprint button while moving. Practice these in open areas before attempting difficult platforming sections.
- Power puzzle confusion: Follow the visual arrows and diagrams provided in the environment. The puzzle is linear; you’re moving a power charge along a predetermined path. Interact with highlighted objects and move to the next waypoint. There’s no hidden solution—just follow the markers.
- Baker dying unexpectedly: Baker’s death is scripted and unavoidable. Don’t waste time trying to save him; focus on completing the power restoration. After his death, continue the mission as directed.
- Can’t find the watchtower: Zoe will provide clear directions. Follow the quest marker on your map. If you’re having trouble, use fast travel doors to jump closer to the destination, then navigate on foot from there.
Advanced Tips & Time Saves#
Aerial Execution: You can perform executions while airborne if the falter meter is full. This is useful for maintaining momentum during traversal sequences and can catch enemies off-guard. Practice this technique in the arena tutorial before attempting it in real combat.
Double Jump Platforming: Double jump can be used to reach seemingly unreachable areas. If you see a ledge that looks too high, try double jumping toward it. The game’s level design often rewards exploration, and extra health upgrades are hidden in hard-to-reach spots.
Rush Canceling: You can cancel Rush mid-dash by dodging. This allows for quick repositioning and can help you escape dangerous situations faster than normal movement. Use this sparingly, as it consumes your dodge window.
Projectile Dodging: Projectiles in this game have tight tracking. Instead of predicting their path, wait until they’re nearly on you, then dodge sharply. This feels counterintuitive but is more reliable than early dodges.
Health Management: Don’t enter a boss fight at full health if there are health drops available beforehand. The game’s difficulty is tuned around managing health during combat, not starting with a buffer. Use pre-fight health drops to learn the boss’s patterns safely.
FAQ#
How do I reach the Unknown in Control Resonant?#
The Unknown is accessed through the Echoes of Infinity, a reversed dimensional space similar to the art museum area where you fight the Artist boss. During story progression, particularly as you investigate the evacuation zone and uncover more about the patterning phenomenon, you’ll encounter rifts that lead to the Unknown. The first major rift is triggered after you defeat the Artist and return to the surface. Later in the game, as you pursue the source of Hiss resonance tremors, additional rifts will become accessible.
Do I need to defeat the Artist boss to progress?#
Yes, defeating the Artist is mandatory for story progression. The Artist is the first major boss encounter and blocks your path to the watchtower and all subsequent missions. There’s no way to bypass this fight or progress without defeating it.
Can I parry or block attacks in Control Resonant?#
No, Control Resonant doesn’t have a parry or block system for regular combat. Your only defensive option is dodging. You must move left or right to avoid incoming attacks. Some advanced abilities may have defensive properties, but they’re not available in the early game.
What happens if I die in the opening area?#
If you die in the arena tutorial or any early fight, you’ll respawn at a checkpoint and can retry immediately. There’s no penalty for dying during the opening sequence beyond losing progress in that specific encounter. You keep all upgrades and abilities you’ve unlocked so far.
How do I unlock fast travel in Control Resonant?#
Fast travel doors become available after you activate a central pylon by collecting and aligning three sensor kits in that zone. Once a pylon is active, fast travel doors appear throughout the zone, allowing instant travel between them. The first zone (central) is where you’ll activate your first pylon during the early game.
What is the falter meter and how do I use it?#
The falter meter is a stagger gauge that builds as you deal damage to enemies. When the meter is completely full, you can trigger an execution (press L3 or the equivalent on your controller) to perform a finishing move that deals massive damage and generates health drops. Executions are your primary source of damage and healing early on, so prioritize building the falter meter over raw hits.
Checklist#
- Choose your starting weapon form (Strike recommended for new players).
- Read the introductory lore and case files to understand the story context.
- Answer the radio distress call and meet Agent Zoe Divera at the hotel.
- Complete the arena combat tutorial and learn the falter meter mechanic.
- Defeat the Artist boss in Echoes of Infinity using dodge, punish, and execute tactics.
- Unlock double jump and Rush traversal abilities after the Artist fight.
- Collect three map kit sensors in the central zone and activate the central pylon.
- Guard the maintenance worker Baker and restore power to the checkpoint (Baker will die; continue the mission).
- Navigate the underground supply lines through the Vercon building, defeating Hiss enemies along the way.
- Reach the watchtower and meet Zoe for your next mission briefing.
- Accept the mission to find the source of Hiss resonance tremors in the evacuation zone.
- Prepare for the next phase by upgrading your weapons and abilities with talent points as they become available.
Source & credit#
This guide draws on the excellent video walkthrough by theRadBrad — watch it for the full visual run-through, and give the creator your view:
https://www.youtube.com/watch?v=_KOpeis0mi4Following Control Resonant? Get an email when we publish a new guide — or update one after a patch.