30-Second Quick-Start (TL;DR)#
- Your starting weapon choice matters: Strike form gives 30% critical chance; Glaive trades crit for raw damage.
- Combat is dodge-only—no parry system exists; roll at the last second to avoid projectiles and melee attacks.
- Build your Falter meter (stagger gauge) by dealing damage; when full, execute the enemy for massive damage and health recovery.
- After defeating the Artist boss, unlock Barrage (summon ally to throw and detonate) or Shield Bash combat abilities.
- Prioritize talent upgrades that boost critical hit chance on dodge and execution damage multiplier early.
- Collect health elements (red pickups) dropped by killed enemies—these are your only healing source in combat.
- Movement abilities (double jump, dash, rush) are as important as weapons; master traversal to avoid damage.
- Test loadouts in the Arena before committing; you can swap abilities later without penalty.
What This Guide Helps You Do#
Choose and master the best weapon forms and combat abilities in Control Resonant so you can clear enemy encounters efficiently, survive boss fights, and build synergistic loadouts that match your playstyle. This guide works best for players starting their first playthrough or returning players who want to optimize their combat setup without grinding trial-and-error builds.
Requirements & Prep#
You’ll encounter weapon and ability choices naturally as you progress the story. The first major choice comes right away: selecting your starting Strike, Glaive, or third form. No consumables or pre-farming needed. The game runs smoothly on PC with Nvidia DLSS 4.5 enabled (if available), which significantly improves frame rate and visual clarity during intense combat—optional but helpful for tracking fast-moving enemies and projectiles.
Control Resonant uses a dodge-and-execute combat model, not blocking or parrying. On controller, map dodge to a button you can press repeatedly; on keyboard and mouse, test your dodge timing in the tutorial encounters before facing harder enemies.
Route Overview#
Combat revolves around a three-step cycle: deal damage to build the Falter meter, dodge incoming attacks to stay alive and build critical hit chances, and execute enemies when their Falter meter fills to trigger massive damage and health recovery. You’ll start with a basic melee weapon (Strike, Glaive, or blunt form) and unlock combat abilities after defeating story bosses. The game introduces new enemy types and attack patterns gradually, so early encounters teach you dodge timing before you face the Artist boss, where all these systems converge. After that victory, you’ll have access to secondary combat abilities (like Barrage or Shield Bash) and a growing talent tree to customize your build. The flow is: equip weapon → learn dodge patterns → fill Falter meter → execute → repeat, with abilities adding utility and crowd control as you progress.
Step-by-Step Walkthrough#
Choose Your Starting Weapon Form#
At the very beginning, you’ll select your weapon form. Three options appear: Strike (30% critical chance, medium damage), Glaive (higher raw damage, no critical bonus), and a third blunt form. Strike is recommended for new players because the 30% critical chance is substantial and rewards aggressive, rhythmic attacking. Raw damage from Glaive is valuable if you prefer straightforward hits without relying on critical strikes. Test whichever feels natural; you can unlock and swap secondary forms later, so this choice isn’t permanent.
Understand the Falter Meter and Execution System#
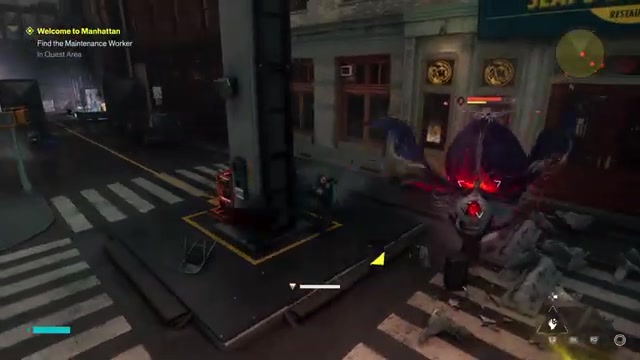
Every enemy has a Falter meter (visible as a stagger gauge at the bottom of the screen). Deal damage with your weapon to build this meter. When it fills completely, the enemy enters a vulnerable state and you can perform an execution—a powerful finishing move that deals massive damage and guarantees a health element drop. Executions are your primary healing tool, so prioritize building and triggering them in every fight. Faster or harder-hitting weapons fill the Falter meter quicker.
Master Dodge Timing#
Control Resonant has no parry or block system; you survive by dodging. Roll at the last possible moment before enemy attacks connect. Dodging also grants a brief invulnerability window and can trigger talent bonuses (like increased critical hit chance). Enemies fire projectiles and perform melee combos, so watch their wind-up animations and roll when you see the attack commit. Early encounters give you time to learn; the Artist boss will test your timing severely, so practice rolling through projectiles in the arena encounters before facing that fight.
Collect Health Elements#
Defeated enemies drop red health elements. These are your only source of healing in combat. Grab them immediately, especially after executions when you’ve likely taken damage. If you see a large health element on the ground and you’re not in immediate danger, pick it up to top off your health bar. Healing isn’t automatic, so managing pickups is a survival skill.
Engage Early Arena Waves#
The game forces you into an arena encounter early on, requiring you to defeat all waves of heavy enemies. This is a tutorial disguised as combat. Use it to practice your dodge timing, learn which enemy types attack in which patterns, and get comfortable with the Falter meter. You’ll respawn if you die, so treat this as a low-stakes learning zone. Prioritize smaller enemies first to generate health pickups, then focus on the heavy units.
Defeat the Artist Boss#
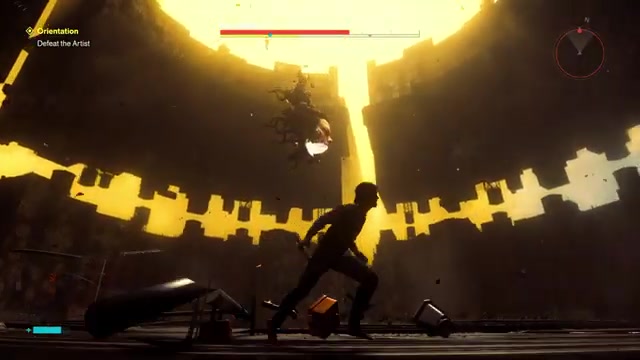
The Artist is the first major boss and serves as a skill check. It has a massive health bar and multiple attack phases. The fight teaches you to manage dodging, health pickups, and Falter meter execution timing under pressure. See the Boss Strategy section below for phase-by-phase details. After this victory, you’ll unlock your first combat ability choice.
Choose Your First Combat Ability#
Post-Artist, you’re offered combat ability selections. Barrage summons an ally that can be thrown and detonated, dealing more damage if the ally has low health. Shield Bash lets you shield and bash enemies, creating crowd control. Barrage is more aggressive and rewards positioning; Shield Bash is defensive. Pick Barrage if you want offensive pressure, or Shield Bash if you prefer survivability. Both are viable; test them in the Arena before committing to a full loadout.
Unlock and Equip Talent Upgrades#
After defeating story bosses, you earn talent points. Spend these on upgrades that enhance your playstyle: dodge-triggered critical hit bonuses, execution damage multipliers, or health generation on kills. Early priorities are critical chance boosts (they compound with Strike form’s 30%) and execution damage (since executions are your primary damage and healing tool). The talent tree grows as you progress, so don’t worry about perfect optimization early on.
Visit the Arena to Test Loadouts#
The Arena is a safe zone where you can swap weapons, abilities, and talents without permanent consequences. Before committing to a build for a story mission, test it here against dummy enemies. This prevents wasting talent points or ability selections on setups that don’t feel good in practice. You can exchange abilities later if needed, but testing first saves time.
Boss/Set-Piece Strategy: The Artist#
The Artist is a large floating entity with a massive health bar and multiple distinct attack phases. It’s the skill-check boss that forces you to combine dodging, Falter meter management, and health pickups into a cohesive strategy.
Phase 1: Ground Attacks and Projectiles#
Trigger: The fight begins immediately when you enter the arena. The Artist floats above you and performs slow wind-up attacks, then hurls projectiles at you.
Safe Punish Windows: After the Artist completes a wind-up animation (watch for the glowing tell), you’ve got a 2-3 second window to close the gap and attack. Deal as much damage as possible during this window to build the Falter meter. Don’t overextend; retreat after 2-3 hits to prepare for the next attack phase.
Dodge Projectiles: The Artist fires projectiles with heavy tracking. Dodge at the last second—rolling too early wastes your invulnerability window and leaves you vulnerable to the next volley. If you’re caught without a dodge ready, create distance by sprinting or using your dash ability.
Manage Health: Health elements will drop as you deal damage. Grab them when safe, especially if you’re one hit away from death. Don’t chase pickups into danger; prioritize survival first.
Phase 2: Stagger and Execution#
Trigger: When the Falter meter fills, the Artist enters a vulnerable state and flashes with a visual tell.
Execute Immediately: Press the execution input (shown on-screen) to perform a massive finishing move. This deals huge damage, generates a health element, and resets the Falter meter. Executions are your primary damage source, so prioritize filling the meter as much as possible.
Recovery: After an execution, the Artist will resume attacking. Back away and reset your positioning before engaging again.
Phase 3: Intensified Attacks#
Trigger: As the Artist’s health drops below 50%, attack patterns accelerate. Projectiles come faster, wind-ups shorten, and the boss may chain multiple attacks without pausing.
Adapt Your Timing: Dodges now need to be more precise. Roll through projectiles rather than around them—the invulnerability window is your safety net. If you miss a dodge, immediately sprint away to create distance and reset.
Prioritize Executions: With attacks coming faster, you’ll fill the Falter meter more quickly. Aim to execute every 15-20 seconds. Each execution heals you and resets the fight’s momentum in your favor.
Phase Transition Tell: When the Artist’s health reaches critical levels, it may perform a unique finishing animation or change arena positioning. This signals the final phase is near. Maintain aggressive Falter meter building and execute as soon as possible.
Pro Tip: If you’re struggling to dodge projectiles, focus on staying mobile. Use your dash ability to reposition constantly. The Artist’s tracking is strong, but it can’t follow if you’re always moving. Prioritize staying alive over dealing damage—a living player with 20% health can still win by executing, but a dead player has already lost.
Builds & Loadouts#
Aggressive Critical Build (Recommended for New Players)#
Weapon: Strike form (30% critical chance)
Combat Ability: Barrage (summon and throw ally for burst damage)
Talents: Dodge-triggered critical hit chance, execution damage multiplier, critical hit damage boost
Playstyle: Attack aggressively to build Falter meters quickly, dodge to trigger critical bonuses, execute frequently for healing and damage. Barrage provides additional crowd control when you need breathing room. This build rewards active, rhythmic play and generates consistent healing through executions.
Defensive Balanced Build#
Weapon: Glaive (higher raw damage, no crit bonus)
Combat Ability: Shield Bash (defensive utility)
Talents: Health generation on kills, execution recovery boost, reduced damage taken
Playstyle: Trade critical chance for raw damage output and defensive tools. Shield Bash creates breathing room when surrounded. This build prioritizes survivability and works well if you prefer a more cautious pace.
If you’re under-geared: Stick with Strike form and focus entirely on Falter meter building and executions. Don’t worry about secondary abilities or complex talent synergies. Executions heal you, so mastering that cycle is your foundation. Once you’re comfortable, layer in combat abilities and talent optimization.
Troubleshooting & Common Mistakes#
- Dodging too early: You’ll waste your invulnerability window and leave yourself vulnerable to follow-up attacks. Roll at the last possible moment before the enemy attack connects.
- Ignoring health elements: Health pickups are your only healing. If you see one and it’s safe to grab, get it. Don’t let your health pool deplete to critical levels unnecessarily.
- Overcommitting to damage: Attacking without watching for enemy wind-ups gets you hit. After 2-3 hits, back away and prepare to dodge. Patience and rhythm matter more than raw aggression.
- Not building the Falter meter: Executions are your primary damage and healing tool. If you’re not focusing on building the Falter meter, you’re missing your main damage phase. Every hit should contribute to filling that gauge.
- Forgetting movement abilities: Double jump, dash, and rush aren’t just for traversal—they’re combat tools. Use them to reposition, escape, or close gaps during safe windows. Mastering movement is as important as weapon timing.
- Swapping abilities mid-fight: You can’t change loadouts during combat. Test builds in the Arena first. Committing to a setup for a story encounter prevents mid-fight regret.
- Chasing enemies into corners: Tight spaces limit your dodge options. Fight in open areas when possible. If cornered, use dash or movement abilities to escape before enemies pin you down.
- Panic rolling: Rolling repeatedly without watching enemy patterns wastes stamina and leaves you vulnerable. Roll intentionally, based on observed attack timing.

Advanced Tips & Time Saves#
- Execution Chaining: If you execute an enemy and immediately see another enemy’s Falter meter is nearly full, pivot to that target and execute again. Chaining executions keeps your health topped off and maintains offensive momentum. This requires practice but dramatically improves survivability in multi-enemy encounters.
- Projectile Baiting: Some enemies telegraph projectile attacks with obvious wind-ups. Let them commit to the attack, then dodge through the projectile at the last second. This creates a guaranteed safe window to close distance and attack. Riskier but faster than playing defensively.
- Movement Ability Canceling: Dash and double jump can interrupt attack animations or reposition you mid-combo. Experiment with canceling your own attacks to create unexpected spacing. This is advanced and requires practice but allows for creative repositioning.
- Talent Synergy Stacking: Some talents stack multiplicatively. For example, critical hit chance from dodge + critical hit damage boost + execution damage multiplier create exponential damage scaling. Prioritize talents that amplify each other rather than spreading points thinly.
FAQ#
What’s the best starting weapon in Control Resonant?#
Strike form is recommended for new players because it grants 30% critical chance, a substantial bonus that rewards aggressive, rhythmic attacking. Glaive offers higher raw damage if you prefer straightforward hits without relying on critical strikes. Both are viable; your choice depends on whether you want critical scaling or raw output.
How do I heal in Control Resonant combat?#
You heal by performing executions on enemies. When an enemy’s Falter meter fills, execute them to trigger a massive finishing move that deals huge damage and drops a health element. Grab the health element to restore your health bar. Executions are your only healing source, so prioritize building and triggering the Falter meter constantly.
Is there a parry or block system in Control Resonant?#
No, Control Resonant has no parry or block system. You survive entirely by dodging. Roll at the last moment before attacks connect to trigger invulnerability. Dodging is your only defense, so timing and practice are critical.
What’s the Falter meter and how do I use it?#
The Falter meter is a stagger gauge that fills when you deal damage to enemies. When it fills completely, the enemy enters a vulnerable state and you can perform an execution—a powerful finishing move that deals massive damage and heals you. Executions are your primary damage and healing tool, so focus on building the Falter meter in every fight.
Can I swap weapons and abilities during combat?#
No, you can’t change loadouts during an active fight. Test your builds in the Arena before committing to a story encounter. You can exchange abilities later from the loadout menu, but not mid-combat.
What combat ability should I choose after defeating the Artist?#
Barrage summons an ally you can throw and detonate for burst damage, rewarding aggressive positioning. Shield Bash provides defensive utility and crowd control. Pick Barrage if you want offensive pressure; pick Shield Bash if you prefer survivability. Both are viable—test them in the Arena to see which fits your playstyle.
Checklist#
- Choose your starting weapon form (Strike recommended for critical scaling; Glaive for raw damage).
- Learn the Falter meter system: deal damage to build it, execute when full for healing and massive damage.
- Practice dodge timing in early arena encounters; roll at the last moment before attacks connect.
- Collect health elements (red pickups) dropped by defeated enemies—these are your only healing source.
- Complete the Artist boss fight; this teaches you to combine dodging, Falter management, and health pickups.
- Choose your first combat ability after the Artist (Barrage for aggression, Shield Bash for defense).
- Spend talent points on upgrades that boost critical hit chance and execution damage multiplier early.
- Test all weapon forms and abilities in the Arena before using them in story encounters.
- Master movement abilities (double jump, dash, rush) as combat tools, not just traversal.
- Prioritize building and executing Falter meters over raw damage output—executions heal and reset the fight.
- In multi-enemy fights, chain executions to maintain health and momentum.
- Stay mobile and reposition constantly; the Artist’s tracking is strong but can’t follow constant movement.
Source & credit#
This guide draws on the excellent video walkthrough by theRadBrad — watch it for the full visual run-through, and give the creator your view:
https://www.youtube.com/watch?v=_KOpeis0mi4Following Control Resonant? Get an email when we publish a new guide — or update one after a patch.