30-Second Quick-Start (TL;DR)#
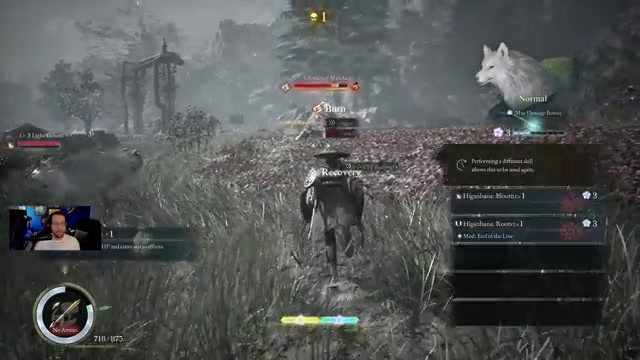
- Open your inventory, find Koo’s Higabana Seeds ability, and swap its mod to Rapid Cooling to recover FP when hitting burning enemies.
- Learn the launcher combo: R1 (or right bumper) then Square (or X) to pop enemies airborne, then cast Higabana Seeds for bonus damage and FP recovery.
- Equip the “End of the Line” mod on Koo’s roots ability to gain a vigor buff after igniting enemies with fire.
- Use your hair utility (right trigger) to create vertical tether points and horizontal bridges for stealth positioning and elevation gains.
- Send Koo in to pounce enemies by aiming your ranged weapon and clicking the right stick—upgrade pounce in the skill tree early.
- Invest skill points into Emma’s expanded entanglement gauge and Koo’s attack dog skill for better combo and damage potential.
- Unlock helm splitter (2 points into Emma’s hair attribute) and taunt/detect hidden item (2 points into Koo’s pounce) as soon as possible.
- Keep Koo’s recovery tonic S equipped as an automatic use, and stay fed (D-pad down) to passively regenerate health between encounters.
What This Guide Helps You Do#
This guide teaches you the core mechanics, ability synergies, and early-game progression tricks in Beast of Reincarnation so you can stop feeling lost in combat and start understanding why the game’s systems reward certain playstyles. You’ll learn how to chain your fire abilities into FP recovery, use your hair and ranged weapon to control the battlefield, and unlock the skills that make the game’s combat loop actually click. This works best if you’re in your first 2–3 hours, before the difficulty curve starts to feel unfair.
Requirements & Prep#
You’ll need access to your inventory menu and the skill tree (both accessible from the main pause menu). No special items or quest flags are required—these tips apply from the very start of the game. The guide assumes you’re playing on PlayStation (R1, Square) or Xbox (right bumper, X); inputs are interchangeable and both controller layouts are supported. Keep at least one healing item in your quick-slot, and make sure Koo has a recovery tonic equipped before entering combat encounters.
Optional but Helpful: Before you start optimizing, spend 10 minutes in a safe area (like your base or a low-level enemy zone) practicing the launcher combo and aerial attacks. The muscle memory will pay off immediately once you understand the timing.
Route Overview#
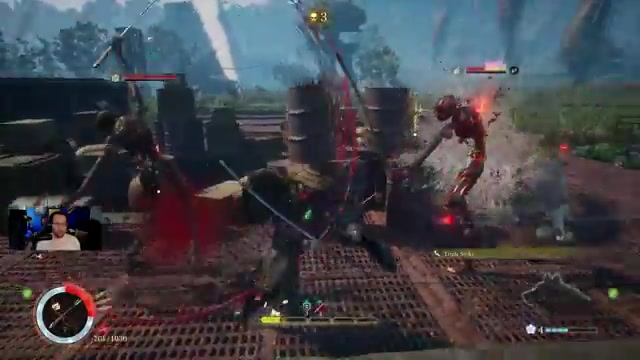
Beast of Reincarnation’s early game combat isn’t about following a linear path—it’s about understanding how your three main tools (Emma’s ranged weapon, Koo the companion dog, and your hair utility) work together. Your progression flows through learning one mechanic at a time: first, you’ll master the fire-to-FP recovery loop with Higabana Seeds. Then you’ll chain that into launcher combos and aerial attacks. Next, you’ll unlock Koo’s pounce and taunt abilities to control enemy positioning. Finally, you’ll get helm splitter (a critical area-of-effect attack) and the expanded entanglement gauge, which makes the game’s intended playstyle—launching into the air, repositioning with your hair, and slamming down with helm splitter—actually feel powerful. By the end of these early tips, you’ll understand why the game keeps pushing you upward and into the air: it’s because that’s where your best damage and utility live.
Step-by-Step Walkthrough#
Unlock and Mod Higabana Seeds for FP Recovery#
Open your inventory and toggle over to Koo’s abilities. Select Higabana Seeds (his fire skill) and click it again to open the mod menu. You’ll see several mod options available. Select Rapid Cooling, which grants Koo one energy (FP) each time he hits a burning foe. Since Higabana Seeds deals burning damage, this creates a feedback loop: you cast the ability, it burns the enemy, and you get back part of the FP cost immediately. If you had 4 FP and cast Higabana Seeds for 3 FP, you’ll earn back 1 FP just from the burn, leaving you with 2 FP to spend on your next ability. This is one of the earliest power spikes in the game and costs nothing but a mod swap.
Chain Launcher Combos into Higabana Seeds#
Now that you understand the FP recovery mechanic, learn to set it up consistently. Start with a basic attack (Square or X). Immediately follow it with your skill input (R1 or right bumper). Koo will jump in and launch the enemy into the air. While the enemy’s airborne, cast Higabana Seeds. The burn damage will be slightly more powerful when the target is in the air, and you’ll recover FP from the hit. After you cast Higabana Seeds, keep pressing the basic attack button—Emma will automatically jump up into an aerial combo, extending your damage. This three-step sequence (basic attack → skill → Higabana Seeds while airborne → keep basic attacking) is the foundation of early-game combat and should become your default opener.
Practice Slow-Motion Aiming with Your Ranged Weapon#
Your ranged weapon has a built-in slow-motion mechanic that many players miss. Jump into the air, then hold the jump button to perform a root jump (a sustained hover). While you’re airborne, trigger your ranged weapon’s aim mode—you’ll automatically enter slow-motion, giving you time to line up shots without the pressure of real-time aiming. Combine this with your launcher: pop an enemy into the air with the launcher combo, jump yourself, hold jump to hover, then slow-mo aim and shoot. This gives you a clean damage window and teaches you how to use verticality to your advantage.
Equip End of the Line for a Vigor Buff Chain#
Go back to your inventory and select Koo’s roots ability (the second ability slot). You’ll notice it has no mod installed—mods are removable, and removing a mod lowers the FP cost of that ability. On the roots ability, equip the End of the Line mod. This mod grants Emma a +3 vigor buff if you hit a foe with a status ailment. Here’s the synergy: cast Higabana Seeds to light an enemy on fire (status ailment applied), then immediately cast End of the Line. You’ll get the vigor buff—a temporary attack boost shown by the katana icon above your entanglement gauge. This two-ability chain is efficient, costs little FP, and keeps your damage scaling up as you fight.
Master Your Hair Utility for Positioning and Elevation#
Hold right trigger to activate your hair utility. The game will explain that you can create bridges, but it won’t show you all the ways to use it. Cast your hair on a vertical surface (a wall, cliff face, or enemy), and it’ll create a vertical tether point you can instantly launch yourself toward. This is your primary way to gain elevation and escape danger. On horizontal surfaces, you create a bridge you can walk or run across. While holding right trigger, move your camera—the hair will bend and follow your camera direction, letting you create angled paths and reach otherwise inaccessible areas. Use this for stealth positioning: cast a vertical tether to climb above an enemy, then drop down for a stealth assassination or a helm splitter (once you unlock it).
Send Koo In to Pounce and Draw Aggro#
Aim your ranged weapon at an enemy. You’ll see a pounce rate percentage above their health bar—this is Koo’s chance to instantly kill or heavily damage the target when sent in. Click the right stick while aiming to send Koo to pounce. He’ll draw aggro and deal damage based on his strength stat and your investment in the pounce skill. This is useful for controlling which enemy you fight first and for dealing with threats from a distance. The pounce rate scales with upgrades to Koo’s pounce skill in the skill tree, so invest early if you plan to rely on this.
Invest in the Right Skill Tree Upgrades#
Open the skill tree and toggle to Koo’s page. Put 2 points into the pounce skill—this unlocks two critical abilities: taunt and detect hidden item. Taunt makes Koo draw enemy attention away from you, giving you free positioning and damage windows. Detect hidden item makes Koo dig up free loot as you explore. Both are essential early game tools. On Emma’s skill tree, go left and invest in the attack dog skill, which increases Koo’s damage when sent in. Then go right and invest heavily in the expanded entanglement gauge—each upgrade gives you more notches on your entanglement meter (the charge bar at the bottom center of your screen). More notches mean longer slow-motion duration and more combo attack uses, which are your primary damage tools.
Equip Koo’s Skills and Healing Items#
Go to Koo’s page in your inventory and scroll to the bottom where you’ll see equipment slots. Skills you unlock in the skill tree need to be manually equipped here to take effect. For example, once you unlock lay land mine, you need to equip it in this menu for Koo to use it in combat. More importantly, equip a healing item like recovery tonic S in Koo’s automatic use slot. Koo will then use healing items on you automatically when you take damage, keeping you alive without burning through your own healing vials. This is a huge quality-of-life upgrade for survivability.
Stay Fed for Passive Health Regeneration#
Press D-pad down to open your eating menu. When you’re full (not hungry), you’ll passively regenerate health over time. This is easy to miss but incredibly valuable for maintaining health between encounters. As you explore and move between combat areas, keep your hunger meter topped off. You won’t need to use healing vials as much if you’re consistently regenerating, which saves resources for boss fights or emergencies.
Choose Armor Based on Your Playstyle, Not Just Defense#
When swapping armor sets, look at the bottom of the description for the enemy awareness stat. High defense armor like chain mail has extreme enemy awareness, meaning enemies spot you more easily—bad for stealth. The starter armor has lower defense but much lower visibility, making it better for sneaking. Don’t assume higher defense is always better. If you’re struggling with stealth sections, stick with the starter armor. If you’re taking too much damage in open combat, swap to chain mail and accept the visibility trade-off. This choice should be situational, not permanent.
Reach Stat Thresholds for Critical Unlocks#
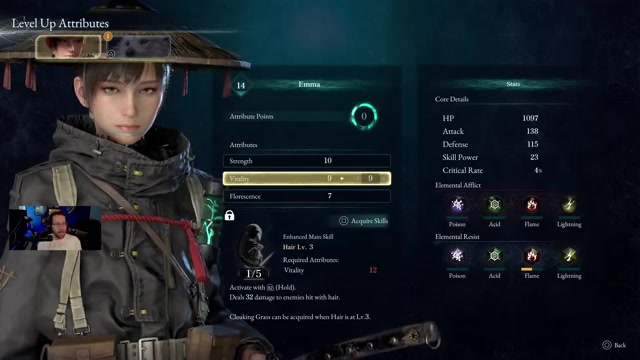
Early on, prioritize getting Emma’s vitality to 9 and Koo’s strength to 9. Once Koo’s strength is at 9, invest 2 points into his pounce attribute to unlock taunt and detect hidden item (as mentioned earlier). For Emma, invest 2 points into her hair attribute—this unlocks helm splitter, the single most important attack in your early-game arsenal. Helm splitter is a powerful area-of-effect attack you perform by holding the attack button while airborne. It’s the payoff for all the launcher combos and vertical positioning you’ve been practicing.
Learn the Helm Splitter Combo Sequence#
Once you’ve got helm splitter unlocked, the intended combat flow becomes clear. Use this sequence: basic attack (to start the combo), then skill attack (R1 or right bumper, to launch the enemy), then hold right trigger to create a jump point on the enemy, then hold the attack button in the air to perform helm splitter. This is a clean, repeatable combo that uses most of your tools and deals significant damage. You can also use Koo’s Higabana Bloom ability as an initiator—it creates a jump point you can launch from directly into helm splitter. Or, if you target an enemy and hold right trigger, you’ll create a jump point right on them, which chains perfectly into helm splitter. The game’s combat wants you to be vertical and mobile; helm splitter is how you punish that positioning.
Enable Taunt and Detect Hidden Item#
Once you’ve unlocked taunt and detect hidden item, go back to Koo’s equipment menu and equip taunt. Koo will now use it to draw enemy aggro, letting you position freely and land uninterrupted hits. If you don’t want Koo to automatically dig for items (for example, if you’re in a time-sensitive area), click the right stick to toggle detect hidden item on or off. This gives you full control over Koo’s autonomous behavior.
Troubleshooting & Common Mistakes#
- You’re running out of FP in combat: You’re not using the Higabana Seeds + Rapid Cooling loop. Every time you cast Higabana Seeds on a burning enemy, you get FP back. If you’re not seeing that recovery, check that Rapid Cooling is actually equipped on the ability.
- You’re taking too much damage and dying quickly: Make sure Koo has a recovery tonic S equipped in his automatic use slot, and keep your hunger meter full (D-pad down) so you’re passively regenerating. If you’re still struggling, swap to the starter armor for better stealth and enemy avoidance.
- Enemies are spotting you instantly during stealth sections: You’re wearing chain mail or another high-awareness armor. Switch back to the starter armor, which has much lower enemy awareness. Check the armor description’s enemy awareness stat before equipping.
- Your pounce rate is too low and Koo never insta-kills: Invest points into Koo’s pounce skill in the skill tree, and also invest in the attack dog skill on Emma’s tree to boost Koo’s damage. The pounce rate percentage will increase as you upgrade.
- You’re not doing enough damage with helm splitter: Make sure you’ve invested in the expanded entanglement gauge (Emma’s skill tree, right route) so you’ve got enough charges to use helm splitter repeatedly. Also confirm you’re holding the attack button while airborne to trigger helm splitter—it won’t activate if you just press it once.
- You can’t figure out how to climb that wall: Use your hair utility (right trigger) on the vertical surface. It creates a tether point you can launch yourself toward. If the wall’s too high, create multiple tether points by casting hair, launching to the first one, then casting hair again from the new position.
- Your ranged weapon slow-mo isn’t activating: You need to jump first, then hold the jump button to perform a root jump, then aim your ranged weapon. If you just aim while standing, you won’t get slow-motion. The slow-mo only triggers while airborne.
- You unlocked a skill but it’s not working in combat: Go to Koo’s equipment menu and manually equip the skill. Unlocking a skill in the skill tree doesn’t automatically activate it—you have to equip it in your loadout.
Advanced Tips & Time Saves#
Once you’re comfortable with the core loop, here are a few time-saving and damage-boosting tricks. If you’re in a multi-enemy encounter, use taunt on one enemy to lock its attention while you focus on another. This lets you control the pace of the fight and avoid getting surrounded. When using helm splitter, try to hit multiple enemies at once—the area-of-effect is wide enough to catch nearby targets, multiplying your damage output. If you’re low on health and Koo’s automatic healing is on cooldown, immediately eat something (D-pad down) to trigger passive regeneration while you reposition. Finally, the hair utility isn’t just for climbing—use it to create bridges between distant enemies, then jump across and cast helm splitter from above for a surprise attack. The game rewards creative use of your tools, so experiment with combining abilities in ways the tutorial doesn’t explicitly teach.
FAQ#
How do I recover FP quickly in Beast of Reincarnation early game?#
Equip the Rapid Cooling mod on Koo’s Higabana Seeds ability. Every time you cast Higabana Seeds and it inflicts burn on an enemy, you get back one energy (FP). This creates a sustainable FP loop where you can cast the ability more often than its base cost would normally allow. Combine it with the launcher combo (basic attack + skill) to ensure you’re hitting burning enemies consistently.
What’s the best early-game skill tree investment path?#
Prioritize Emma’s expanded entanglement gauge (right route) and Koo’s pounce skill (unlock taunt and detect hidden item). Then invest in Emma’s hair attribute to unlock helm splitter, and in Koo’s attack dog skill to boost his damage. These four upgrades unlock the core mechanics that make the combat system click. After that, get Emma’s vitality and Koo’s strength to 9 for stat thresholds.
How do I unlock helm splitter and why is it so important?#
Invest 2 points into Emma’s hair attribute in the skill tree. Helm splitter is a powerful area-of-effect attack you perform by holding the attack button while airborne, and it’s the payoff for the game’s constant push to launch enemies and reposition vertically. Without helm splitter, the combat feels disconnected; with it, you understand why every ability wants you in the air.
Should I prioritize defense or stealth when choosing armor?#
It depends on the situation. Higher defense armor like chain mail has extreme enemy awareness, meaning enemies spot you easily. If you need to sneak, use the starter armor despite its lower defense. If you’re in open combat and getting hit too much, swap to chain mail and accept the visibility trade-off. Check the enemy awareness stat on the armor description before equipping.
How do I use the hair utility for more than just bridges?#
Cast your hair on vertical surfaces to create tether points you can launch toward for elevation. While holding right trigger, move your camera to bend the hair and reach different angles. You can also cast hair on enemies to create a jump point directly on them, which chains into helm splitter. Use it for stealth positioning by climbing above enemies, then dropping down for a surprise attack.
Why is Koo’s taunt ability so useful?#
Taunt draws enemy aggro away from you, letting you position freely and land uninterrupted combo attacks. In multi-enemy encounters, use taunt on one enemy while you focus on another. This gives you control over the pace of the fight and prevents you from getting surrounded. Make sure to equip taunt in Koo’s equipment menu after you unlock it.
Checklist#
- Open inventory, go to Koo’s abilities, select Higabana Seeds, and equip the Rapid Cooling mod.
- Practice the launcher combo: basic attack → skill attack → Higabana Seeds while enemy is airborne → continue basic attacking.
- Learn slow-motion aiming: jump, hold jump, then aim your ranged weapon while airborne.
- Equip End of the Line mod on Koo’s roots ability to chain a vigor buff after Higabana Seeds.
- Practice using your hair utility (right trigger) on vertical surfaces to create tether points and on horizontal surfaces to create bridges.
- Aim your ranged weapon at an enemy, check the pounce rate percentage, and click the right stick to send Koo in to pounce.
- Go to the skill tree and invest 2 points into Koo’s pounce to unlock taunt and detect hidden item.
- Invest in Emma’s expanded entanglement gauge (right route in skill tree) and Koo’s attack dog skill.
- Get Emma’s vitality and Koo’s strength to 9, then invest 2 points into Emma’s hair attribute to unlock helm splitter.
- Learn the helm splitter combo: basic attack → skill attack → hold right trigger on enemy → hold attack button in air.
- Equip a recovery tonic S in Koo’s automatic use slot, and keep your hunger meter full (D-pad down) for passive health regeneration.
- Equip taunt in Koo’s equipment menu and use it to control enemy aggro in multi-enemy encounters.
Source & credit#
This guide draws on the excellent video walkthrough by Boomstick Gaming — watch it for the full visual run-through, and give the creator your view:
https://www.youtube.com/watch?v=6vZ-KlxhKe4Following Beast of Reincarnation? Get an email when we publish a new guide — or update one after a patch.