- Easy
- Difficulty
- 13 min
- Read time
- 1.0
- Checked on
Upgrade the rapier first in Valor Mortis, not the saber you start with. Materials are limited, and the rapier is a stronger long-term investment because it hits weak spots directly, parries more efficiently, and later restores endurance and health on successful parries. This guide covers where to find the rapier, how to split your upgrades across the ranged weapons, where to grab the early embers and blight materials, and how to spend your skill points so parrying carries you through the game.
Quick start: upgrade path in 7 steps
The fastest way to a strong early build is to skip the saber at the workbench and put your first materials into the rapier and your ranged weapons.
- Beat the first boss for real (roughly two hours in) and reach the main hub. Do not spend upgrade materials on the saber at the workbench.
- Walk out the opening to the left of the workbench, cross the graveyard on the right side, and pull out the rapier at the blockage at the end.
- Put your upgrade materials into the rapier, and learn to parry with it.
- Upgrade the first levels of the musket, blunderbuss, and pistol, because you’ll use all three.
- Fast travel to the Valley of Ash military camp and pick up the Dominatus and Surplus embers.
- After you get the blue whip (roughly three hours in), collect pure blight material in the Valley of Ashes quarry for the level four rapier upgrade, and distilled blight material behind the church for the level seven upgrade.
- Spend skill points on endurance, health, and parry impact first.
What to prepare before you start upgrading weapons
You need the main hub unlocked, catalyst for the workbench, and a clear plan for where limited upgrade materials will go.
Catalyst is the soul-style currency in Valor Mortis. At the workbench you can buy materials with catalyst, but rarer upgrade materials appear the further you progress, and that supply is also limited. That’s why your first big decision matters: every material sunk into the wrong weapon is gone.
- The main hub: Reaching it unlocks fast travel and gives you a workbench on the left side.
- Catalyst: Needed for workbench purchases and for resetting skill points. Resetting costs some catalyst, but it’s allowed.
- The blue whip (Optional but helpful for now, required for the quarry route): You get this new power around three hours in, after the next region’s village. It enables the blue grapple points needed for the pure blight material.
- Fire transmutation: Your fire magic is incredibly useful, and the blob enemies in the early cave die easily to it.
Why the rapier beats the saber as your first upgrade
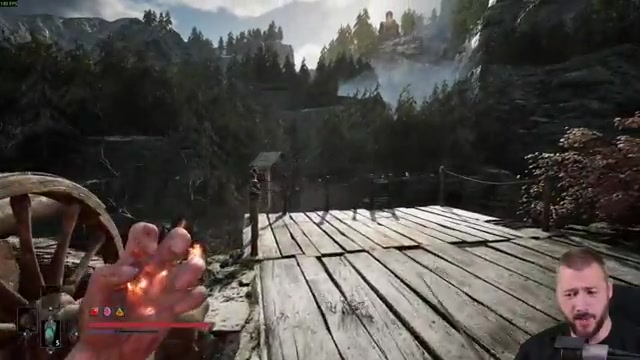
The rapier is the better first upgrade because it targets weak spots directly, deals more posture damage, and parries more efficiently than the saber.
The saber is an okay weapon: it can both parry and block, which makes it a good training tool for the first two hours. But the rapier trades blocking for power. You can stab a soldier and burst the pustules on their body for massive damage. Bosses with weak spots can be stabbed over and over again. The rapier can’t block, but its parry timing is tighter and its parries are better, with more posture damage to the enemy.
The upgrade tree makes the rapier even stronger. You can unlock endurance restoration on successful parries, and later health restoration on successful parries. Master this weapon and it becomes extremely strong.
How to find and unlock the rapier in the main hub area
The rapier sits about two minutes from the workbench, at a blockage at the end of the graveyard.
Leave the hub through the opening on the left
From the workbench, look to its left. There’s an opening you can pass through. Go through it.
Cross the graveyard on the right side
Travel through the graveyard, keeping to the right side. At the end you reach a blockage.
Pull out the rapier at the blockage
Pull out the rapier here. From this point, make it your main weapon and route your upgrade materials into it.

How to split upgrades across the musket, blunderbuss, and pistol
Unlike melee weapons, you should upgrade all three ranged weapons at least a little, because each has a distinct job.
- Musket: Take out enemies that are too far away to reach.
- Blunderbuss: Best against bosses and against enemies standing extremely close, including elites that are super annoying. A shotgun blast followed by a critical attack takes down tough enemies fast.
- Pistol: Pinpoint, close-quarters shots into weak points when the rapier can’t reach them. It also detonates explosive barrels for safe kills.
Put points into the first levels of all three rather than maxing one. The rapier is where your deeper investment goes.
How to unlock the pure blight and distilled blight upgrade materials
Pure blight material powers your level four rapier upgrade, and distilled blight material powers your level seven upgrade.
Get the pure blight material in the Valley of Ashes quarry
You need the blue whip first. Travel to a lantern, then fast travel to the Valley of Ashes quarry. Turn around from the lantern and ride the elevator up (you’ll have unlocked it by this point). Position yourself next to the pulley and grapple, grapple again, and pull the object down. Jump on so it carries you up.
You then face a group of annoying enemies. You can ignore the first row by jumping over them. Pull down the next object, then the one after, and jump up to the musketeer. Another musketeer will be shooting you in the back, so deal with that quickly. Up here you collect the blue pure blight material.
Clear the top of the quarry and loot the flask upgrade chest
From the pure blight spot you can drop down and fight on. Two enemies will try to shoot you from above, plus another with a rifle, so take them down before pushing further. Then comes the hard part: one of the more annoying enemies in the game, with strange windups that are hard to read. A shotgun blast followed by a critical attack gets them down. The chest nearby gives an upgrade to your flask.
Get the distilled blight material behind the church
Return to the main hub. Outside the main door that leads back toward the first boss, run around the church and look for breaks in its outside wall. Pull yourself up there, make your way around outside and inside, and jump over the broken part to the back side. The distilled blight material is there.
How to grab the Dominatus and Surplus embers early
Two hidden embers in the Valley of Ash area, Dominatus and Surplus, are worth collecting right after you reach the hub and unlock fast travel.
Embers are slotted into the lower five spots that unlock as you level up at various intervals. Surplus gives you more catalyst when killing enemies. Dominatus restores health when you perform critical attacks, meaning backstabs, executions after parrying an enemy, and the critical attack you get after dodging a red attack and triggering the time slow.
Fast travel to the Valley of Ash military camp lantern
Fast travel to the lantern at the military camp. Turn away from the open gate and the lantern, head up the stairs, and use the cannon on top to clear out part of the camp.
Sneak the right side and use the pistol and barrels
Go down, but instead of charging in, take the right side past everything. Climb the ladder into the tower and stab the enemy in the chest until he dies. Then pull out your pistol and shoot the two explosive barrels as enemies shamble forward. Fire kills them. One annoying elite with a shield remains: either drop on him and stab him, or wait until he walks to a barrel and detonate it. This is an easy catalyst farm early on.
Loot the Dominatus chest
Jump down and head left. The Dominatus ember is in the chest here.
Climb the hill, pass the cave, and take the Surplus ember
Head up the hill alongside the road. A cave requires you to traverse by jumping over the left side, and two blobs attack from the sky. Burn them with fire transmutation. Rush past them, climb the ladder, and finish the short platforming section. At the very end a chest holds the Surplus ember. Then jump down, activate the cannon, shoot the gate, and continue the level.
Why you must master parrying in Valor Mortis
You’ve got to master parrying because it’s the fastest way to kill normal enemies, the only reliable way to break posture-bar enemies, and a hard requirement for bosses around the midway point.
On rebel enemies you’ve got two options: stab them three or four times in quick succession before they react, or parry one swing and instantly execute them. Enemies with a posture bar under their life bar don’t stagger from stabbing, and light attack spam against them gets you killed. Instead of dodging around and wasting time, parry their attacks to break their posture and end the fight quickly.
Some bosses can’t be beaten without parrying. Around the midway point of the game it becomes a hard stop if you never learned it.
React to the attack, don’t guess the windup
The parry window is forgiving, even on the rapier with its tighter timing. Bait an enemy to attack, then react at the moment of the strike. There’s more windup time than you’d expect. Parry too early and you’ll have to dodge away. Windup attacks are the main trap: a mistimed parry there gets you hit multiple times.
Use the first two hours to practice
The saber blocks, so you can afford mistakes early. After two hours, tighten up your timing.
Best skill point order for a rapier parry build
Put your first points into endurance and health, then max parry impact, then add what you’re struggling with. You can reset your skills any time for a catalyst cost.
- First points: Endurance and health.
- Neftoglobin: Skip extra points here. Neftoglobin is the resource for your magic, and you get enough by default.
- Parry impact: Max it out. Successful parries deal increased posture damage. Choose it over the blocking upgrade, which only reduces endurance cost and grants more recoverable health without a real combat advantage. Advanced parrying also makes bosses stagger faster.
- Next, as needed: More health if you’re dying, more endurance if you’re running dry.
- Next row: Take airborne aiming, which lets you slow time while airborne to shoot. Then put the next four points into melee damage.
- Remnants vs. headshot damage: Put at least two points into headshot damage, then top off endurance and life. Headshots make certain elites far more convenient.
- Finishing touches: One point in ferrofluid flask refill, four more into melee endurance cost reduction, then more maximum health and endurance.
5 upgrade and combat mistakes that waste materials or get you killed
- Upgrading the saber at the first workbench: Materials are limited. Walk to the graveyard and get the rapier first.
- Maxing one ranged weapon: All three have roles. Upgrade the first levels of the musket, blunderbuss, and pistol.
- Parrying too early: React in the moment of the strike. Watch for windup attacks, which punish early parries.
- Light attack spamming posture-bar enemies: They don’t stagger from stabbing. Parry to break their posture.
- Charging into the military camp: Use the cannon, the pistol, and the explosive barrels instead of fighting the whole camp.
- Forgetting fire transmutation: It cleanly handles the blobs in the cave and many other early threats.
Valor Mortis best weapon upgrade path: which weapon to upgrade first FAQ
Which weapon should I upgrade first in Valor Mortis?
Upgrade the rapier first, not the saber. The rapier hits weak spots directly, does more posture damage, parries more efficiently, and its upgrades later restore endurance and then health on successful parries.
Where do I find the rapier in Valor Mortis?
The rapier is about two minutes from the main hub workbench. Go through the opening to the left of the workbench, travel through the graveyard on the right side, and pull out the rapier at the blockage at the end.
Should I upgrade the musket, blunderbuss, and pistol too?
Yes, upgrade at least the first levels of all three. The musket handles far-away enemies, the blunderbuss suits bosses and close elites, and the pistol makes precise close-quarters shots into weak points.
What do the pure blight and distilled blight materials do?
Pure blight material is for your level four rapier upgrade, and distilled blight material is for your level seven upgrade. Pure blight is in the Valley of Ashes quarry, and distilled blight is behind the church near the main hub.
Can the rapier block?
No, the rapier can’t block. In exchange, its parries are more efficient and do more posture damage than the saber’s.
Can I reset my skill points in Valor Mortis?
Yes, you can always reset your skills. It costs some catalyst, which makes it safe to experiment.
Valor Mortis best weapon upgrade path: which weapon to upgrade first checklist
0 of 12
Source & credit
This guide draws on the excellent video walkthrough by P4wnyhof — watch it for the full visual run-through, and give the creator your view: