30-Second Quick-Start (TL;DR)#
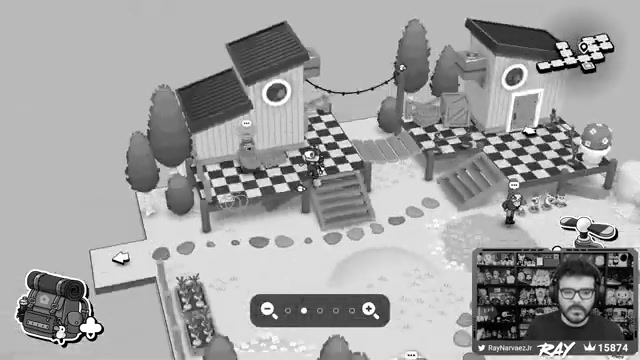
- Start in Homelander (your grandmother’s house) by collecting your camera and taking a photo to unlock the first quest.
- Fix the antenna outside, then watch the broadcast about the Whirling Birch Festival to learn the game’s goal.
- Solve puzzles by taking photos of critters, landmarks, and completing NPC quests in each region.
- Collect stamps for each completed objective; you need a minimum number to unlock the bus to the next area.
- Use your camera’s zoom and lock-on features (hold Square) to photograph hard-to-reach or moving subjects.
- Talk to every NPC—they’ll ask you to find items, take specific photos, or fix things using your camera’s tools (scissors to cut, hammer to nail).
- Explore thoroughly; critters and items are often hidden in the background or above your head.
- Proceed through Homelander → Croton (Crop area) → Tail Thorp and beyond, completing quests to earn the bus stickers that let you travel.
What This Guide Helps You Do#
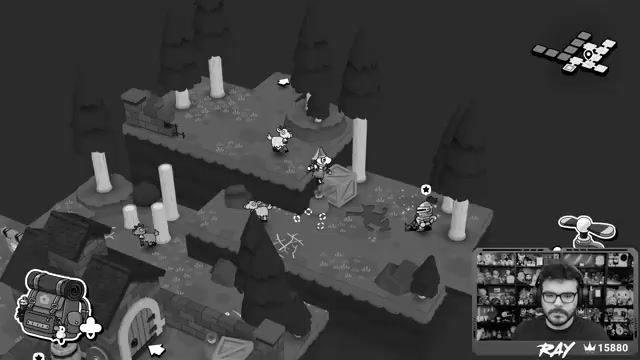
This guide walks you through every major quest, critter location, and landmark in Toem 2’s opening regions, helping you complete your first few areas and understand the game’s core loop. You’ll learn how to use your camera’s tools, solve environmental puzzles, and find every hidden animal and NPC objective. It’s perfect for first-time players who want a thorough, spoiler-light roadmap and returning players who want to 100% the game without missing hidden critters or quests.
Requirements & Prep#
You start with nothing except your pajamas. Your grandmother will give you clothes, then a vintage camera with a dynamic zoom lens. The camera is your only tool at the start, but you’ll unlock new camera functions as you progress: lock-on (hold Square to focus on moving targets), scissors (press X while zoomed in to cut vines and flowers), and a hammer (press X to nail things down). You don’t need special items before leaving Homelander, but talking to every NPC before you go is strongly recommended—they’ll hint at what to look for.
Pro Tip: Check the Pause Menu for Help
The game has a built-in help section that explains camera controls. If you’re stuck on how to use a tool, pause and review the tutorial text. The game also shows you which NPCs have quests (camera icon) versus which are just flavor dialogue.
Route Overview#
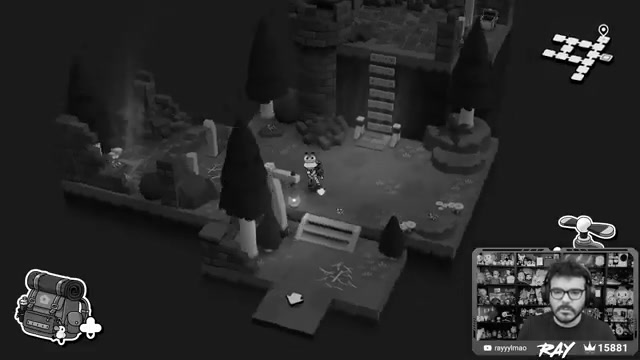
Toem 2 is structured as a series of interconnected regions accessed by bus. You start in Homelander (your grandmother’s house), complete quests there, then travel to Croton (a farm area), then Tail Thorp (a rustic village). Each region has the same completion requirements: photograph all critters (animals), complete all NPC quests, and photograph the region’s main landmark building. The game uses a stamp system—each completed objective earns a stamp sticker you place on your map. Once you’ve earned enough stamps (typically 10 per region), you can take the bus to the next area. The core loop is simple: talk to NPC → receive quest → explore to find items or subjects → photograph or interact → return to NPC → earn stamp → repeat.
Step-by-Step Walkthrough#
Homelander: Wake Up and Get Ready#
You begin in your grandmother’s bedroom. She’s about to wake you, and you’ll need to get out of bed. Head to your wardrobe (inside your room) and grab your clothes. Your grandmother will comment on how you look. Next, she’ll hand you a vintage camera with a propeller attachment (the “selfie copter”). Take a photo of your grandmother to test the camera—this unlocks your first objective and teaches you the basics of the photo mechanic.
Fix the Antenna Outside#
Your grandmother asks you to fix the antenna outside because the radio signal is poor. Head outside and you’ll see the antenna on the roof. She suggests giving it a kick or two. Jump (press Square) and climb up the boards by pressing against them while in the air. Once you reach the antenna, kick it or interact with it to improve the signal. This triggers a broadcast about the Whirling Birch Festival, which is the game’s main story event. Return inside to watch the full broadcast with your grandmother.
Photograph the First Critters in Homelander#
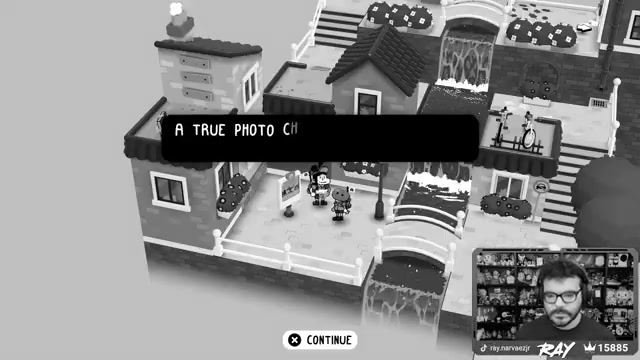
After the broadcast, your grandmother tells you to explore and find critters to photograph. The first quest from the bus stop attendant (Kiosk) asks for photos of critters. Look around Homelander for small animals: you’ll find a Tato (a small rodent-like creature), a forest bird perched high on a branch, and a Fuzz Peed Cow. To photograph them, open your camera and frame them in the viewfinder. For creatures that are far away or moving, hold Square to lock onto them—this keeps your focus steady even if they move. Take a photo of each one and return to Kiosk to complete the quest. Each completed objective earns you a stamp, which you place on your map.
Complete the Paper Airplane Quest#
An NPC will ask you to throw a paper airplane for them and fetch it when it lands far away. They’ll show you how by throwing it themselves—it travels quite a distance. Retrieve it and bring it back. This simple fetch quest teaches you to explore the map thoroughly.
Unlock the Camera’s Lock-On Feature#
An NPC will teach you the lock-on mechanic by asking you to photograph a specific object (an eye symbol will appear on things you can lock onto). Hold Square while aiming at the target to lock your view onto it. This is essential for photographing fast-moving critters or distant subjects. Practice with the object they point out, then use this skill throughout the game.
Collect All Stamps and Leave Homelander#
Once you’ve photographed all the critters and completed all the quests in Homelander, you’ll have earned enough stamps to leave. Say goodbye to your grandmother (she’ll wish you well), then head to the bus stop and talk to Kiosk. He’ll confirm you’ve enough stamps and take you to the next region. You’re now ready to move on.
Croton (Crop Area): The Farm Region#
You arrive in Croton, a peaceful farm area filled with gardens, orchards, and pastoral characters. The region is larger than Homelander and has more complex quests involving multiple steps. This is where you’ll learn the game’s puzzle-solving loop: NPCs ask for help, you photograph or retrieve items, and you use your camera’s tools to interact with the environment.
Meet Pearl and Learn to Cut Things#
Pearl, the gardener, is having trouble with rebellious vines that have sprouted spores. She asks you to cut the spores using scissors. Open your camera, zoom in on a spore flower, and press X to cut it. The scissors are a new camera tool you’ll use throughout the game. After you cut the spores, Pearl will give you scissors to keep and ask you to help her manage the vines. This quest opens up several follow-up tasks.
Find and Photograph Jam Apples#
Several NPCs need jam apples. Explore Croton and look for jam apple trees (they’re scattered around the map). Photograph them or collect them as items. You’ll need at least five jam apples to complete various quests. Some NPCs will ask you to make jam from the apples—find the jam-making station or NPC who can process them.
Locate the Four Guard Gnomes#
An NPC will ask you to find four missing guard gnomes scattered throughout Croton. One is stuck in a field with birds (near a scarecrow), another is hidden in or near a building, and others are in less obvious locations. Take photos of each gnome or interact with them to complete this quest. The scarecrow quest ties into this—rescuing the scarecrow from the bird-filled field will help you retrieve one of the gnomes.
Help the Scarecrow and Rescue the Gnome#
A scarecrow is trapped in a field full of birds and is terrified. The NPC who owns the scarecrow (who has ornithophobia, a fear of birds) asks you to move it to safety. Find a way to relocate the scarecrow to an indoor location or a bird-free area. Once you do, the NPC will reward you with a ribbon or other item, and you’ll retrieve one of the four gnomes.
Fix the Windmill and Bake Bread#
A baker is worried because the windmill is broken and they’re running out of flour. You’ll need to repair the windmill using your camera’s hammer tool. Open your camera, zoom in on the windmill’s broken parts, and press X to hammer them back into place. Once the windmill is fixed, the baker will resume baking, and you can collect fresh bread. Some NPCs need bread or toast, so this quest unlocks other objectives.
Toast Bread at the Gadget Museum#
Inside the Gadget Museum, you’ll find a toaster. Place a slice of bread inside and press X (or interact) to toast it. Toasted bread is needed for some NPCs or quests. This simple environmental puzzle teaches you to use objects in the world.
Find Unconventional Pots#
An NPC wants an unconventional pot for gardening. They don’t want a regular flowerpot—look for unusual containers like boots, jars, cans, or other repurposed items. You’ll find several around Croton. Photograph or collect them and bring them to the NPC. Each one counts toward the quest.
Plant Seeds in the Fancy Pot#
Another NPC has stubborn seeds that won’t grow in regular soil. They ask you to plant them in a fancy pot and find a suitable location. Once you place the seeds in the fancy pot, they’ll bloom into a beautiful flower. This quest teaches you that some objectives require multiple steps and items from different NPCs.
Participate in the Photo Challenge: Find the Giant Chicken#
The Photo Challenger Guild member asks you to find and photograph a giant chicken. This is a trick question—the “giant chicken” is actually the large barn or chicken coop building in Croton. Photograph the building to complete the challenge. This teaches you that some challenges have lateral solutions.
Clean the Pigs#
An NPC’s pigs ran away covered in mud. They ask you to photograph the pigs or clean them. Search Croton for the muddy pigs and take photos of them in their current state. Once you’ve documented all three pigs, the quest completes and the NPC is relieved.
Find the Missing Siblings#
A young character is worried about their siblings who are lost in the wilds. You’ll need to find and photograph each sibling in different locations around Croton. They’re hidden but not too far off the beaten path. Once you’ve photographed all of them and reported back, the family reunites.
Search for Missing Clouds and Interpret Their Shapes#
An NPC loves cloud-watching and asks you to find clouds that match specific shapes they describe (like a bee, a butterfly, or other animals). Look up at the sky and use your camera to zoom in on clouds. When you find one that matches the description, photograph it. This quest encourages you to look upward and explore the sky, which many players miss.
Locate the Missing Cat#
An NPC’s cat is missing and hiding somewhere in Croton. Search thoroughly—the cat is easy to overlook because it blends into the scenery. Check high places, behind buildings, and in unexpected spots. Once you find it, take a photo and return to the NPC. This is often the last critter players find in the region.
Find the Needle in the Haystack#
An NPC asks for a needle hidden in a haystack. Literally search the haystack area and look for a small needle. Once you spot it, photograph it or interact with it. This straightforward scavenger hunt tests your observation skills.
Smear Jam on the Bee Feeder#
An NPC is tending bees but is too busy to feed them. They ask you to smear jam on the bee feeder to keep the bees happy. Find the bee feeder (usually near the bee area) and interact with it while holding jam. The bees will be satisfied, and you’ll earn a stamp.
Collect All Stamps and Move to Tail Thorp#
Once you’ve completed all quests and photographed all critters and landmarks in Croton, return to Kiosk at the bus stop. He’ll confirm you’ve enough stamps and offer to take you to Tail Thorp, the next region.
Tail Thorp: The Rustic Village#
Tail Thorp is a larger, more complex region filled with a tavern, blacksmith shop, and various NPCs with interconnected quests. The difficulty and puzzle complexity increase here. Several quests involve multiple steps and require you to revisit NPCs after completing prerequisites.
Help the Apprentice and Learn the Hammer Tool#
A young apprentice wants to prove themselves to their master (a blacksmith or builder). They ask you to help repair a collapsed structure. You’ll need to rebuild it using your camera. Open your camera, position the structure pieces, and then use the hammer tool (press X) to nail them together. This introduces the hammer as a core mechanic. After you complete the repair, the master will be impressed and ask you to fix other structures around Tail Thorp.
Repair Structures Throughout Tail Thorp#
Now that you’ve proven yourself, the master will point you toward other broken structures. Search Tail Thorp for damaged buildings, fences, or objects. Use your camera’s hammer tool to nail them back together. Each repair earns a stamp and progresses the apprentice’s storyline.
Complete the Climbing Challenge and Find the Flag#
A member of the “Mountain Goats” climbing club challenges you to find a hidden flag somewhere in Tail Thorp. The flag is typically on top of a high building or structure. You’ll need to climb, jump, and navigate platforming sections to reach it. Use the climbing mechanic (press against boards while in the air to grab them) to ascend. Once you reach the flag, photograph it or interact with it to complete the challenge.
Explore the Tavern and Break Pots in the Rage Room#
The tavern is a social hub where many NPCs gather. Inside, you’ll find a rage room where you can break pots for fun and profit. Open your camera and use the hammer tool to smash every pot in the room. This is both a quest objective and a stress-relief activity. Breaking all the pots earns you a trophy and items.
Investigate the Basement and Meet the Haunt#
The tavern owner warns you about something spooky in the basement. Head downstairs and you’ll find a summoning circle and a mysterious creature called a Haunt. Photograph the Haunt to add it to your critter collection. The basement also has a radio playing a strange tune—this is atmospheric flavor but also a clue that something supernatural is happening.
Help the Treasure Hunter and Locate Apprentices#
An NPC is searching for treasure using an old map. They’ve sent their son and other apprentices to scout locations, but everyone got lost or distracted. The NPC asks you to find and photograph each apprentice. Search Tail Thorp thoroughly—apprentices are often stuck in silly situations or hiding. Once you’ve found them all and photographed them, report back to the NPC.
Find the Missing Donkey#
An NPC is worried about their donkey, which has wandered off. Search Tail Thorp for the donkey and photograph it. It may be in an unexpected location or with another NPC. Once you find it, take a photo and return it to the owner.
Admire the Archer’s Skill and Find the Arrow#
An archer brags about their skill and shoots an arrow across the map. They challenge you to find where it landed. Search Tail Thorp for the arrow (it’s often embedded in a tree or wall in a distant part of the map). Photograph it to complete the challenge. This quest encourages exploration and teaches you that NPCs’ actions have consequences you can photograph.
Collect All Critters and Landmarks in Tail Thorp#
Like the previous regions, Tail Thorp has critters (animals) and a major landmark building (often a bell tower or other notable structure). Photograph all of them to complete your collection. Use your lock-on ability for fast-moving critters and zoom in for distant ones.
Earn the Final Stamps and Prepare to Leave#
Once you’ve completed all quests, photographed all critters, and documented the landmark, return to Kiosk at the bus stop. You’ll have earned enough stamps to leave Tail Thorp and continue to the next region.
Troubleshooting & Common Mistakes#
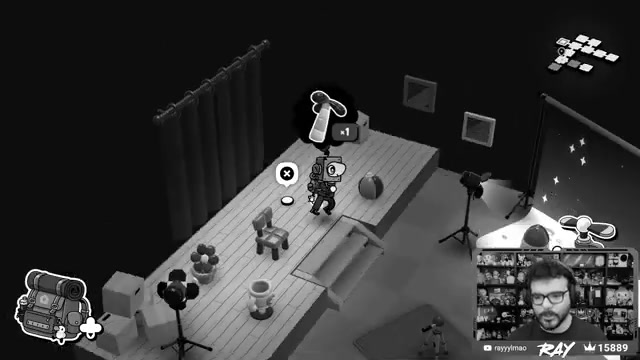
- Can’t find a critter: Look up, down, and in the background. Many critters are perched on high branches or hiding behind buildings. Use your camera’s zoom to scan the entire screen carefully.
- Photo is blurry or won’t register: Make sure the subject is fully in frame and in focus. Hold Square to lock onto moving targets. If it’s still not working, try taking another photo from a different angle.
- Can’t figure out what an NPC wants: Talk to them again—they’ll repeat their request. If you’re still confused, check your quest log (pause menu) to see the objective description. Some quests require you to complete other quests first.
- Stuck on a platforming section: Remember that you can climb by pressing against boards while in the air. Jump repeatedly and press into surfaces to ascend. Some areas require precise timing—take your time and don’t rush.
- Can’t use a camera tool (scissors, hammer): You must open your camera first (not just aim it). Zoom in on the target, and the correct tool will auto-select. Press X to use it. If nothing happens, you might be at the wrong angle or distance.
- Missing a quest or NPC: Explore every building and talk to every character. Some NPCs are easy to miss because they’re in side rooms or less obvious locations. If you’re stuck, systematically visit every location on the map.
- Stamps won’t place correctly: You can re-stamp by pressing Triangle if you don’t like the placement. Place it wherever you want—the game doesn’t require perfect alignment.
- Can’t access the next region: You need a minimum number of stamps (typically 10 per region) to earn a bus sticker. Complete more quests and photograph more critters until you’ve enough.
Advanced Tips & Time Saves#
- Map Out NPCs Early: Before exploring, talk to every NPC and write down their requests. This prevents you from wandering aimlessly and helps you plan efficient routes to gather items.
- Use the Camera Zoom Strategically: Zoom out to see the big picture and spot critters from a distance. Zoom in to photograph specific details and use tools precisely. Switching between zoom levels saves time.
- Revisit Locations After Quests: Some NPCs will have new dialogue or quests after you complete their initial request. Check back with them to unlock follow-up objectives.
- Look for Environmental Clues: If an NPC mentions something specific (like a bird-filled field or a broken windmill), that’s a hint about where to find items or what to fix. Pay attention to their dialogue.
- Platforming Shortcuts: Some areas have multiple paths. If you’re struggling with a difficult climb, there may be an easier route nearby. Explore alternative paths before giving up.
- Take Multiple Photos: If you’re unsure whether a photo will register, take it again from a slightly different angle. The game is forgiving, and extra photos don’t hurt.
FAQ#
How do I photograph a moving critter in Toem 2?#
Hold Square while aiming at the critter to lock onto it—this keeps your camera focused on the subject even if they move. Once locked on, take your photo normally. Locking on is essential for fast-moving animals and is taught early in the game.
What does the stamp system do in Toem 2?#
Stamps are rewards for completing objectives (quests, photographing critters, documenting landmarks). You collect stamps and place them on your map. Once you’ve enough stamps (typically 10 per region), you can take the bus to the next area. Stamps are purely progression-based—there’s no penalty for placing them incorrectly, and you can re-stamp with Triangle.
Where do I find the camera tools like scissors and hammer?#
You don’t find them as separate items. Instead, your camera automatically equips the correct tool when you need it. When you open your camera and zoom in on something that needs cutting (like a vine), the scissors will auto-select—just press X. Same for the hammer. The tools are built into your camera, not carried separately.
Can I skip regions or do I have to visit them in order?#
You must visit regions in order. The bus system only takes you to the next available region once you’ve earned enough stamps in your current area. You can’t jump ahead or go backward.
What happens if I miss a critter or quest in a region?#
You can’t progress to the next region without enough stamps, so you’ll naturally be forced to find most objectives. However, the game doesn’t lock you out of a region after you leave—you can return to previous areas if you want to complete anything you missed. Some content may be easier to spot on a second visit.
Is there a time limit or penalty for taking photos slowly?#
No. Toem 2 is a relaxed, exploration-focused game with no timers, fail states, or combat. Take your time photographing and exploring. The game encourages you to pause and observe the world.
Checklist#
- Wake up in Homelander and collect your clothes from the wardrobe.
- Receive your camera from your grandmother and take a photo of her to test it.
- Fix the antenna outside by climbing and kicking it.
- Watch the broadcast about the Whirling Birch Festival.
- Photograph the first three critters in Homelander (Tato, forest bird, Fuzz Peed Cow).
- Complete the paper airplane fetch quest.
- Learn the lock-on mechanic (hold Square) by photographing the marked object.
- Collect all remaining critters and complete all quests in Homelander until you’ve 10 stamps.
- Say goodbye to your grandmother and take the bus to Croton with Kiosk.
- In Croton, meet Pearl and learn to cut vines using the scissors tool (press X in camera).
- Collect at least five jam apples and help NPCs who need them.
- Find and photograph all four guard gnomes scattered throughout Croton.
- Rescue the scarecrow from the bird-filled field and move it to safety.
- Repair the windmill using the hammer tool to help the baker.
- Toast bread at the Gadget Museum’s toaster.
- Collect unconventional pots (boots, jars, cans) for the gardener.
- Plant seeds in the fancy pot and photograph the resulting flower.
- Photograph the giant chicken (barn building) for the Photo Challenger.
- Find and photograph all three muddy pigs for the NPC who lost them.
- Locate and photograph all missing siblings scattered around Croton.
- Search the sky for clouds matching specific shapes and photograph them.
- Find the hidden cat (often overlooked) and photograph it.
- Find the needle in the haystack and photograph it.
- Smear jam on the bee feeder to complete the beekeeper’s quest.
- Collect all critters and photograph the main landmark (Grand Sunflower or similar) in Croton.
- Return to Kiosk with 10+ stamps and travel to Tail Thorp.
- Help the apprentice rebuild a collapsed structure using the hammer tool.
- Repair all other broken structures throughout Tail Thorp as requested by the master.
- Complete the Mountain Goats climbing challenge and find the hidden flag.
- Enter the tavern’s rage room and break all the pots with your hammer.
- Explore the tavern basement, photograph the Haunt, and listen to the mysterious radio.
- Find and photograph all apprentices the treasure hunter is looking for.
- Locate the missing donkey and photograph it.
- Find the arrow the archer shot and photograph it.
- Collect all remaining critters and photograph the main landmark in Tail Thorp.
- Return to Kiosk with 10+ stamps and prepare to leave Tail Thorp for the next region.
Source & credit#
This guide draws on the excellent video walkthrough by Ray Narvaez Jr — watch it for the full visual run-through, and give the creator your view:
https://www.youtube.com/watch?v=GVNSaEgIBwcFollowing Toem 2? Get an email when we publish a new guide — or update one after a patch.