- Easy
- Difficulty
- 18 min
- Read time
- 13
- Steps
- 1.0
- Checked on
30-Second Quick-Start (TL;DR)
- Watch the opening cutscenes to learn that Calvin Rafferty’s fiancée Fay is in a coma; a book called “Recitations of the Tenebrous Soul” can wake her.
- Navigate down the flooded stairwell in your apartment building to avoid zombies; take the boat to Miskatonic Library.
- Retrieve electrical fuses from the radio store, then use them to restore power at the Gate Switchboard building.
- Encounter Gohonta in the Restricted Section of the library; he agrees to translate the resurrection ritual if you retrieve Lorelei from the Devil’s Reef Hotel.
- Collect gasoline and a gear from the fire station and printing house to repair the crane blocking the hotel route.
- Operate the crane to move the obstruction and clear the path to Devil’s Reef Hotel.
- Enter the hotel, survive the poisoned fog and hostile creatures, and locate Lorelei in the basement performance area.
- Return Lorelei to Gohonta to receive the translated resurrection ritual and progress the main quest.
What This Guide Helps You Do
This guide walks you through the Welcome to Arkham opening sequence and the early main quest in The Sinking City 2, from waking up in your flooded apartment through retrieving the translated resurrection ritual from Gohonta. You’ll learn how to navigate the drowned city, solve environmental puzzles, manage combat encounters with mutated creatures, and unlock the path to Devil’s Reef Hotel. It’s essential for first-time players and anyone restarting who wants to understand the quest structure and avoid getting stuck on environmental or puzzle elements.
Requirements & Prep
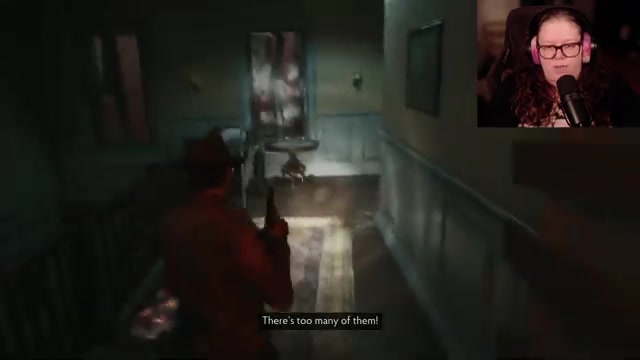
You’ll need basic combat supplies as you progress: ammunition for your handgun and shotgun, healing items (the game provides these during exploration), and a willingness to reload saves if combat gets overwhelming. The game auto-saves at major story beats, so you won’t lose significant progress. Both controller and keyboard-and-mouse setups work fine; on keyboard you press E to crouch, but you can remap the controls. Keep your flashlight equipped at all times in dark areas, since visibility is essential for spotting hazards and enemies.
Route Overview
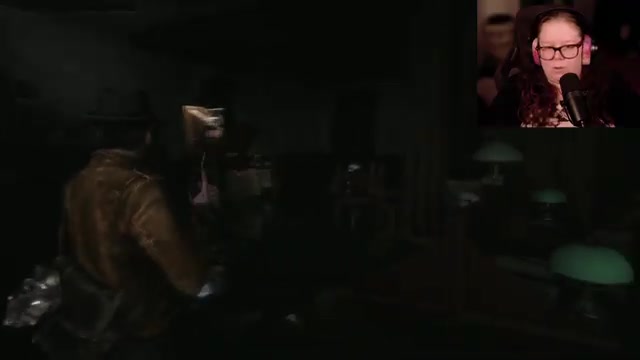
The Welcome to Arkham quest begins in your apartment as you wake up after a traumatic event. You’ll descend through your flooded building, take a boat to Miskatonic Library, and navigate the library’s lower levels to reach the Restricted Section. There you’ll meet Gohonta, a scholar who’s grafted parasitic creatures called slithers into his eye sockets to read forbidden texts. He’ll agree to translate a resurrection ritual for you, but only if you retrieve Lorelei, a performer trapped at the Devil’s Reef Hotel. To reach the hotel, you must first repair a broken crane by collecting gasoline and a gear from nearby buildings. Once the crane is operational, you’ll move the obstruction blocking the hotel route, fight your way through the hotel’s interior, and locate Lorelei in the basement. Returning her to Gohonta completes the opening quest arc and unlocks the next phase of the story.
Step-by-Step Walkthrough
Wake Up and Escape Your Apartment
You begin in your apartment bedroom after a nightmare. Interact with objects around you to ground yourself in the environment—there’s a mirror that shows your actual reflection, a detail many games skip. Your fiancée Fay is in a coma, and you’ve learned that a book called “Recitations of the Tenebrous Soul” held in the Miskatonic University library might be the key to waking her. Grab the dagger on a nearby table; you’ll need it later.
Leave the bedroom and move through your apartment. You’ll see a letter from your neighbor warning you about “occult chanting” and threatening to call the authorities if the disturbances continue. It’s flavor text that reinforces the game’s atmosphere. Head toward the front door and prepare to descend.
Navigate the Flooded Stairwell
Exit your apartment and begin descending the staircase. The building is flooded, and water rises as you go down. The game is designed so stairs and upper passages stay safe from the zombie-like creatures roaming the streets—they can’t climb. As you descend, you’ll see the evacuation in progress outside; boats are leaving the city, and an automated warning system announces that Arkham is lost and all residents must evacuate immediately.
At the bottom of the stairwell, you’ll find a boat waiting. Board it and prepare to navigate the flooded city. Your boat has fuel, so you can travel freely for now. The waterways are narrow, so take your time steering. Watch for environmental hazards like worms or tentacles in the water—don’t touch them, as they deal damage.
Reach Miskatonic Library and Dock
Follow the waterway toward Miskatonic Library. The game guides you visually; the library is a large, recognizable building. As you approach, you’ll encounter a gate blocking direct access. Your boat docks automatically at a safe point. When you disembark, you’ll be on a plateau or ledge that allows you to enter the library building itself.
Before entering the library proper, you may see a dead body—Harry, your contact. Don’t panic; you’ll encounter more corpses as you progress. It reinforces that the city is truly abandoned and dangerous.
Retrieve Electrical Fuses from the Radio Store
Once inside the library area, you’ll find a note explaining that the floodgate panel needs renewable fuses to restore power. It directs you to a radio store across the street where spare fuses are kept. Navigate to the radio store building. You’ll likely encounter corpses and possibly hostile creatures—use your gun if needed, but conserve ammunition.
Inside the radio store, search for the fuses. The game highlights interactive items, so look carefully. Once you’ve got the fuses, return to the Gate Switchboard building. This is the building with the floodgate control panel mentioned in the earlier note.
Restore Power at the Gate Switchboard
Enter the Gate Switchboard building and locate the electrical panel. You’ll see colored wires and a fuse slot. The puzzle is straightforward: insert the fuses you collected into the panel to restore power. Once power is restored, you’ll hear a mechanical sound indicating success. This opens access to the next area and allows you to progress toward the library’s Restricted Section.
After restoring power, navigate back toward the library. You may encounter more creatures during this transition; use cover and your weapon to dispatch them. Don’t linger in open areas.
Enter the Miskatonic Library and Descend to the Restricted Section
Return to the main library building and find the entrance to the lower levels. The library has a restricted section accessible only through sliding shelves that act as doors. These shelves lock you in temporarily as a security measure, but they’re safe to use. Move through them carefully—the game shows you when it’s safe to proceed to the next shelf.
As you descend deeper, you’ll encounter a flooded area with worms or eel-like creatures. Avoid touching these parasites; they’re dangerous. Use your flashlight to navigate the darkness. You may hear strange sounds and see disturbing imagery—it’s intentional and part of the game’s horror atmosphere.
Meet Gohonta in the Restricted Section
In the Restricted Section, you’ll encounter Gohonta, a scholar who’s undergone a horrific transformation. He’s grafted parasitic creatures called slithers into his eye sockets, which allow him to read and understand forbidden languages and texts. When you first meet him, he’ll be defensive and ask you to turn around slowly. Don’t shoot him; he’s an NPC and a key figure in your quest.
Gohonta explains that he can translate the resurrection ritual from the book you’re carrying, but he requires payment: he wants you to retrieve Lorelei, a performer who’s trapped at the Devil’s Reef Hotel. He’ll offer you his boat to reach the hotel. Accept this deal. Before leaving, note that Gohonta remains in the library—you’ll return here later with Lorelei.
Collect Gasoline from the Fire Station
Exit the library and return to your boat. Gohonta mentioned that you’ll need gasoline and a gear to repair a broken crane that’s blocking the route to Devil’s Reef Hotel. Head toward the fire station first. A note you’ll find directs you to check the fire station for supplies.
Locate the fire station building in the flooded city. Inside, search for gasoline containers. You’ll find them in storage areas or on shelves. The game highlights interactive items, so look carefully. Collect as much gasoline as you can carry—you’ll need it to fuel the crane’s generator.
Retrieve a Gear from the Printing House
Next, head to the printing house. Another note directs you to this location for mechanical parts. The printing house is accessible via the church graveyard route. Navigate there carefully, avoiding or dispatching any creatures you encounter. Inside the printing house, search for a gear or mechanical component. This will be a large, metallic part—the game makes it visually distinct.
Once you’ve got both the gasoline and the gear, return to your boat and head toward the crane location. The crane is blocking the waterway to Devil’s Reef Hotel, so you must repair and operate it to clear the path.
Repair and Operate the Crane
Approach the crane and interact with it. You’ll need to insert the gear and fuel it with gasoline. The game guides you through this process with on-screen prompts. Once the crane is operational, you’ll need to use it to lift a large object (likely a ship’s wheel or debris) that’s blocking the waterway. Position yourself at the crane controls and operate the machinery. The crane moves the obstruction, clearing your path to Devil’s Reef Hotel.
Navigate to Devil’s Reef Hotel
With the crane operated and the path cleared, return to your boat and proceed toward Devil’s Reef Hotel. As you approach, you’ll see the hotel is a large, deteriorating structure. Dock your boat at the entrance. Be cautious as you disembark; the hotel’s interior is dangerous and filled with hostile creatures.
Survive the Hotel’s Interior and Locate Lorelei
Enter the hotel and prepare for combat. The interior is filled with mutated creatures and poisonous gas in some areas. Your objective is to reach the basement, where Lorelei is performing in some kind of arena. As you navigate, you’ll encounter:
- Poisonous fog in certain rooms—avoid breathing it by moving quickly or finding alternate routes
- Hostile creatures that attack on sight—use your gun and healing items as needed
- Environmental hazards like broken floors or unstable structures
Move cautiously through the hotel. Use your flashlight to see in dark areas. Listen for audio cues—you may hear Lorelei singing or creatures moving nearby. When you reach the basement, you’ll find Lorelei in an arena-like performance space. She’s been forcing other trapped survivors to fight for her entertainment. Approach her carefully; she may be hostile or unpredictable.
Return Lorelei to Gohonta
Once you’ve secured Lorelei (whether through dialogue, combat, or persuasion), return to your boat and navigate back to Miskatonic Library. Dock at the library and escort Lorelei to the Restricted Section where Gohonta is waiting. Present her to Gohonta as promised.
Gohonta accepts Lorelei as payment and, in return, provides you with the translated resurrection ritual. This ritual contains the words and symbols needed to wake Fay from her coma. With the translation in hand, the Welcome to Arkham quest concludes, and the main story progresses to the next phase.
Boss/Set-Piece Strategy (Phase by Phase)
Creature Encounters in the Library and Hotel
The creatures you face in The Sinking City 2 aren’t traditional bosses with distinct phases, but rather multiple hostile enemies that attack in waves. They appear to be mutated humans or parasitic entities. Here’s how to handle them:
Trigger: Creatures become active when you enter certain rooms or get close to their corpses. They may also animate from dead bodies on the ground.
Combat Strategy: Keep distance between yourself and enemies. Use your handgun for steady damage and your shotgun for close-range bursts. Aim for the head when possible. If you’re facing multiple enemies, focus fire on one at a time to eliminate threats quickly. Use cover provided by furniture, walls, or architectural features to break line of sight and heal.
Healing and Ammunition: Prioritize healing when your health drops below 50%. Use ammunition conservatively; if you run low, search nearby areas for more supplies before engaging large groups. The game often provides ammunition in rooms before major combat encounters, so if you find a large cache, expect a fight.
Dodging: The game includes a dodge mechanic that lets you avoid incoming attacks. Press the dodge button (default varies by control scheme) at the moment an enemy attacks to avoid damage. This is especially useful against ranged attacks or when surrounded.
Environmental Hazards: Some creatures spit fire or poison. Avoid standing in one place for too long. Move laterally to evade projectile attacks. If you’re hit by poison or fire, use healing items immediately.
Builds & Loadouts
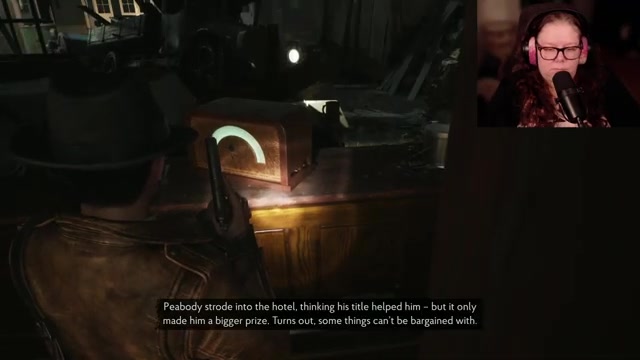
The game provides you with a handgun early on and a shotgun that you’ll find in the fire station. These are your primary weapons for the Welcome to Arkham quest.
Recommended Loadout:
- Handgun: Use for medium-range combat and precision shots. Conserve ammunition.
- Shotgun: Use for close-range encounters or when you need to deal high damage quickly. Ammunition is limited, so use sparingly.
- Healing Items: Carry as many as your inventory allows. These are essential for surviving prolonged encounters.
- Flashlight: Keep equipped at all times in dark areas.
If You’re Running Low on Ammunition: The game is designed to provide ammunition in locations before major combat encounters. If you’re consistently running out, consider reducing the difficulty setting or exploring more thoroughly before engaging enemies. Searching every room and building carefully yields additional supplies.
Troubleshooting & Common Mistakes
- Getting Lost in the Library: The sliding shelves in the Restricted Section can be confusing. Move through them one at a time and wait for the game to indicate it’s safe to proceed. If you’re locked in, wait a moment and interact with the shelf again.
- Running Out of Ammunition: Explore buildings thoroughly before major combat encounters. The fire station and printing house have supplies. If you’re still low, consider using melee attacks or dodging to conserve bullets.
- Taking Damage from Worms in the Water: Don’t touch the parasitic creatures in the flooded areas. Stay in your boat or move quickly through water-based sections. If you must wade, move in a straight line and avoid lingering.
- Getting Overwhelmed by Multiple Creatures: Use cover and focus fire on one enemy at a time. Don’t try to fight multiple creatures in open areas. Retreat to narrow corridors or rooms where you can control the battlefield.
- Missing the Crane Controls: The crane puzzle requires you to insert a gear and add fuel. Look for interactive prompts on the crane itself. If you can’t interact, you may be missing one of the required items. Return to the fire station or printing house to double-check.
- Poisonous Gas in the Hotel: Move quickly through gas-filled areas or find alternate routes. The game warns you with audio cues and visual effects. If you’re poisoned, use healing items immediately.
- Lorelei Won’t Interact: Approach her slowly and from the front. She may be hostile initially, but dialogue or proximity should trigger an interaction prompt. If nothing happens, ensure you’ve cleared all enemies from the area first.
- Gohonta Seems Hostile: When you first encounter Gohonta, he’ll ask you to turn around slowly. Don’t shoot him or approach aggressively. Simply comply with his instructions and dialogue options will appear. He’s an NPC, not an enemy.
Advanced Tips & Time Saves
Ammo Conservation Technique: The game rewards careful play. If you use your handgun for distant enemies and save your shotgun for close-range encounters, you’ll stretch your ammunition further. Headshots with the handgun are more efficient than body shots.
Creature Animation Mechanic: Dead bodies on the ground can animate into hostile creatures. This happens unpredictably, so always be alert when moving through areas with corpses. If you see a body twitch or hear a sound, prepare for combat immediately.
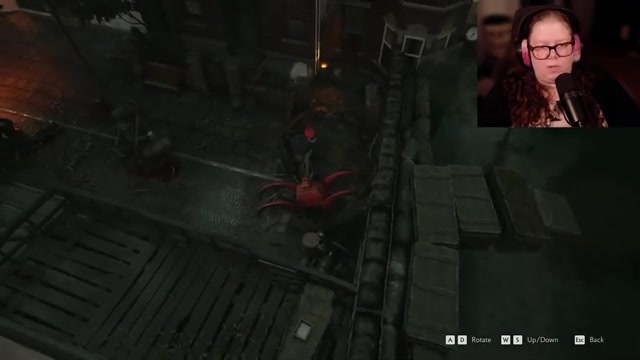
Boat Navigation: Your boat is slow but safe. Use it to move between major locations. The narrow waterways can be tricky to navigate, but the game provides clear visual guidance. Take your time and avoid hitting obstacles, as damage to the boat can be problematic.
Mirror Reflection Detail: The game includes a rare feature—your character’s actual reflection appears in mirrors. It’s a sign of Frogwares’ attention to detail. While not mechanically important, it’s a reminder that the game is well-crafted and worth exploring thoroughly.
Risky Strat—Speed Running Through Areas: If you’re low on ammunition and health, you can attempt to run past enemies rather than fight them. It’s risky but can save resources. Use dodging to avoid attacks and sprint toward your objective. Only attempt this if you’re confident in your reflexes.
FAQ
Where do I find the electrical fuses in The Sinking City 2?
The electrical fuses are located in the radio store building across the street from the Gate Switchboard. A note in the Gate Switchboard building directs you to the radio store specifically. Search the shelves and storage areas inside the radio store to find them.
How do I get past the sliding shelves in the Miskatonic Library Restricted Section?
The sliding shelves are automatic security doors that lock you in temporarily. Move through them one at a time and wait for the game to indicate it’s safe to proceed to the next shelf. They’re not dangerous—just be patient and follow the on-screen prompts.
What does Gohonta want in exchange for translating the resurrection ritual?
Gohonta wants you to retrieve Lorelei, a performer trapped at the Devil’s Reef Hotel. He’ll give you his boat to reach the hotel. Once you return with Lorelei, he’ll provide the translated ritual needed to wake Fay from her coma.
How do I repair the crane blocking the route to Devil’s Reef Hotel?
You need to collect gasoline from the fire station and a gear from the printing house. Return to the crane with both items and interact with it. The game guides you through inserting the gear and adding fuel. Once operational, use the crane controls to lift the obstruction blocking the waterway.
What should I do if I run out of ammunition during combat?
Search nearby buildings and rooms for additional supplies. The fire station and printing house have ammunition and healing items. If you’re still low, consider using melee attacks or the dodge mechanic to avoid damage. You can also reload a save and explore more thoroughly before re-engaging enemies.
Can I kill Gohonta or is he essential to the quest?
Gohonta is essential to the quest. He’s the only NPC who can translate the resurrection ritual. If you kill him, you’ll lock yourself out of progression. When you first meet him, comply with his instructions and use dialogue options to interact peacefully.
Checklist
0 of 16
Source & credit
This guide draws on the excellent video walkthrough by Aya’s Loft — watch it for the full visual run-through, and give the creator your view: