
30-Second Quick-Start (TL;DR)#
- Master claw combat by parrying ranged attacks and building rage through aggressive combos; you’ll heal passively during fights.
- Unlock upgrades at each level: prioritize Healing Strike (Level 3), Knee Breaker (Level 4), and Tornado Spin enhancements for offense.
- Collect XP by destroying portable batteries, mutant detectors, and completing combat encounters—all auto-save, so explore freely.
- Fight Omega Red in the opening by parrying his attacks to fill his stagger meter, then punish during openings; phase two triggers when his health drops further.
- Craft suits in the lab using materials found in the field; the Gold Standard suit is available early and increases max health as you unlock more variants.
- Follow the linear story through the jungle compound, then the prison facility, rescuing Essex while learning combat mechanics organically.
- After the opening mission, return to the team compound to rest, explore, collect whiskey bottle collectibles, and unlock the Nightmare Trial memory sequences for deeper lore.
- Prepare for Vancouver operations—the next major mission—by stocking materials and gearing up in the lab.
What This Guide Helps You Do#
This guide walks you through Marvel’s Wolverine’s opening story mission, combat systems, progression mechanics, and early-game exploration so you can understand how to fight like Logan, level efficiently, and unlock gear and abilities without missing key story beats or collectibles.
It’s best for PS5 players new to Marvel’s Wolverine who want a transcript-based walkthrough that explains why you’re doing each action, not just where to go.

Requirements & Prep#
Marvel’s Wolverine is exclusive to PlayStation 5. The game auto-saves frequently, so you don’t need to manually manage saves. You won’t need consumables before starting; the game feeds you tutorials and XP as you progress.
You’ll use the controller (DualSense features haptic feedback during claw attacks). Get familiar with the dodge button early—it’s essential for avoiding ranged fire and parrying heavy attacks.
Optional but Helpful: Adjust the difficulty setting before starting if you want a more forgiving experience. The game rewards aggressive play and healing during combat, so playing on normal difficulty teaches the rhythm better than a harder setting early on.
Route Overview#
The opening mission begins in a jungle with a helicopter extraction. You’ll fight through enemy soldiers and cyborg mercenaries (Reavers) while building your rage meter and learning core combat mechanics. After securing an anti-aircraft gun, you’ll move into a fake nuclear-test town where you’ll encounter mutant detectors and portable batteries—all of which grant XP when destroyed. The mission culminates in a linear push through a compound and prison facility, where you’ll rescue Essex and face Omega Red in your first major boss fight. After defeating him and extracting via helicopter, you’ll return to the team compound for a story sequence and exploration phase where you can collect whiskey bottles, upgrade gear, and unlock memory trials that reveal Logan’s past.

Step-by-Step Walkthrough#
Opening Jungle Sequence and Learning Dodge#
The game opens with Logan and Sabertooth approaching a military compound. You’ll immediately face enemy soldiers and a helicopter. Don’t panic about taking damage early—the game teaches you that when a ranged enemy’s weapon glows, dodge to avoid their attack. Practice dodging the helicopter’s fire while moving toward the anti-aircraft gun objective marked on your compass.
As you fight, you’ll notice that kills and successful combat actions build rage. Combo enders (the final hit in a sequence of attacks) are especially effective. The game will prompt you when you’ve filled a full segment of rage—this unlocks Rage Tier 2, which makes your combo enders significantly more powerful. Use this window to burst down tougher enemies.
Destroying the AA Gun and Pushing Forward#
Your first objective is to take out the anti-aircraft gun so your team’s helicopter can land. Fight through the soldiers guarding it, then interact with the gun to disable it. Once it’s clear, Sabertooth will radio that he’s drawing enemy fire, so continue pushing forward through the jungle to link up with the team.
Expect more ranged enemies here. Remember: dodge when their weapons glow. You’ll also start seeing Reavers—cyborg mercenaries with heavy armor. These enemies can perform combo attacks that require more than one parry before they’re staggered. Don’t try to interrupt them with a single parry; wait for the second attack in their combo, then parry to stagger them and create a punish window.
Entering the Compound and Learning Mutant Detectors#
After regrouping with the team, you’ll enter what appears to be an abandoned nuclear-test town. This area is packed with mutant detectors and portable batteries—both grant 5 to 35 XP when destroyed. These are free resources, so smash them whenever you see them. The game rewards you for exploration here, and there’s no penalty for taking time to collect everything.
As you move through the area, you’ll encounter guards and Reavers. The combat here is straightforward: dodge ranged attacks, parry melee combos, and use your rage meter for burst damage. You’ll also unlock Tornado Spin as a special technique—this recharges slowly after use and deals significant damage in an area around you. Use it when you’re surrounded or when you need to create space.
Reaching the Compound and Facing Sabertooth#
Once you’ve cleared the town, you’ll approach the main compound. A cutscene triggers where you encounter Sabertooth, who’s been sent by Trask to kill you. This is a one-on-one duel. Sabertooth is faster than regular enemies but follows the same rules: parry his attacks to fill his stagger meter, then punish during openings. He’ll taunt you mid-fight, but stay focused on the parry rhythm. When you stagger him, unleash your most powerful combos. After taking enough damage, he’ll retreat, and you’ll push into the compound.
Prison Facility: Stealth and Combat Mix#
Inside the compound, you’ll encounter a mix of stealth and direct combat. You can sneak past guards or engage them head-on. Destroying mutant detectors and batteries here is optional but recommended for XP. As you progress, you’ll reach the prison cells where Essex is being held.
Before you reach his cell, you’ll face a room full of Reavers and soldiers. This is a good opportunity to use your special techniques and rage meter. The game rewards aggressive play—you’re healing passively during combat, so lean into offense rather than playing defensively. Clear the room, then move to Essex’s cell to trigger the next sequence.
Essex’s Capture and Trask’s Appearance#
When you reach Essex, you discover he’s been captured by Trask, the head of Trask Industries. Trask activates an inhibitor field that suppresses your healing factor and drains your rage meter. This is a major mechanic change: without passive healing, you’re vulnerable. Trask leaves you to face waves of Reavers while he escapes with Essex. Focus on clearing enemies quickly to minimize damage taken. Once the inhibitor is disabled, your healing returns and you can push forward.
Pursuing Trask and Finding the Security Terminal#
After the inhibitor is disabled, you’ll pursue Trask deeper into the facility. You’ll encounter a security terminal that Mystique mentions—interact with it to find Trask’s location and learn about his plans. This also unlocks a cutscene where you see Trask’s full operation: he’s been hunting mutants and studying them like specimens.
Continue pushing through the compound, clearing enemies as you go. You’ll reach a section with multiple pods containing mutants that Trask has captured. Overloading the electrical grid here releases them and creates chaos that works in your favor. Keep moving toward the landing pad where the helicopter is waiting.
Boss/Set-Piece Strategy: Omega Red Fight#
Phase One: The Duel#
Trigger: After you extract Essex and reach the landing pad, Omega Red appears. He’s a massive mutant with red skin and metallic appendages. The fight begins as a one-on-one duel.
Combat Approach: Omega Red’s attacks are slower than regular enemies but deal heavy damage. Watch for his overhead strikes and grab attempts. Parry his attacks to fill his stagger meter—you’ll see a bar beneath his health bar that fills with each successful parry. Once the stagger meter is full, he’ll be momentarily stunned, giving you a 3-4 second window to unleash your most powerful combos. Use Rage Tier 2 or Rage Tier 3 (if unlocked) during these punish windows for maximum damage.
Omega Red will occasionally feint—he’ll start an attack animation and cancel it. Don’t panic; these are designed to bait your parry. If you parry a feint, you’ll still fill stagger slightly, but it’s better to learn the pattern and only parry genuine attacks. After a few parries, you’ll recognize his tells.
Healing During the Fight: You’re healing passively between hits, but Omega Red’s damage is high enough that you’ll still take chip damage. Don’t be afraid to back away and let your healing catch up if you’re below 50% health. The fight isn’t a timer; take your time and play methodically.
Phase Two: Omega Red Powered Up#
Trigger: When Omega Red’s health drops to roughly 50%, he’ll trigger a phase transition. He’ll power up with energy, and his attacks will become faster and more aggressive. His grab range also increases.
Combat Adjustment: The parry rhythm stays the same, but you need to be more reactive now. His combo strings are longer, so expect 2-3 attacks in a row before you get a parry opportunity. Don’t try to interrupt mid-combo; let him finish, parry the last hit, then punish. His stagger meter fills at the same rate, so the strategy doesn’t change—it just requires sharper timing.
Punish Windows: After a successful parry, you’ve got 3-4 seconds to deal damage. Use your strongest combos, special techniques like Tornado Spin, and your rage meter if available. If Omega Red is at low health and you’ve got full rage, use Rage Tier 3 for a guaranteed kill.
If You Get Caught: If Omega Red lands a grab or heavy combo, you’ll be knocked down. Roll away immediately to create distance, then wait for your health to regenerate before re-engaging. Don’t panic roll into his next attack; take a breath and reposition.
Phase Three: The Final Sequence#
Trigger: When Omega Red’s health is critically low, a cutscene begins. Sabertooth and the team arrive to help. This transitions the fight into a group battle where you’re fighting alongside your allies.
Group Combat: In this phase, focus on Omega Red while your team handles adds. The stagger meter mechanic remains the same. Parry his attacks, fill the stagger meter, and punish. The presence of allies means you’re taking less focused fire, so you can be more aggressive. Finish Omega Red with your strongest combo or rage ability to trigger the final cutscene.
Builds & Loadouts#
Early-Game Upgrade Priority (Levels 1-6)#
As you level up, you’ll earn skill points to spend on new abilities and enhancements. Here’s the recommended priority based on the opening mission:
- Level 3: Healing Strike — This ability heals you during combat when you land hits. It’s essential for survivability, especially against tough enemies. Pick this immediately.
- Level 3: Sprint Block — Allows you to block while sprinting, useful for repositioning defensively. Take this if you prefer a more cautious playstyle.
- Level 4: Knee Breaker — Interrupts all enemy attacks regardless of type. This is incredibly powerful for shutting down dangerous combos. Prioritize this.
- Level 4: Tornado Spin Enhancement — Makes your Tornado Spin deal more damage and cover more area. Good for crowd control.
- Level 6: Additional techniques — At level 6 and beyond, you’ll unlock new combat moves. Invest in techniques that match your playstyle (aggressive offense vs. defensive utility).
Good news: The game appears to use a skill tree system where you can respec, so don’t worry about “wasting” points early. Experiment and adjust as you learn the combat.
Suit Crafting and Gear#
After returning to the compound, Walter will give you access to suit crafting in the lab. Two suits are available early:
- Battle Reborn Suit — Includes bone claws and is nearly indestructible. Good for durability.
- Gold Standard Suit — The classic Wolverine look. Unlocking more suit variants increases your max health, so prioritize collecting materials in the field to craft new suits.
You’ll need 50 materials to craft the Gold Standard suit. Materials are found throughout the world as loot drops from enemies and destructible objects. Prioritize gathering these early to boost your health pool.
If you’re taking too much damage: Focus on collecting materials and crafting the Gold Standard suit to increase your max health. Combine this with the Healing Strike ability for better survivability. You can also farm XP by destroying mutant detectors and batteries in the compound area before pushing forward.
Farming Loop / Route Efficiency#
The opening compound area (the fake nuclear-test town) is excellent for farming XP early on. Here’s the loop:
- Mutant Detectors: Each grants 5 XP when destroyed. There are roughly 8-10 scattered around the area.
- Portable Batteries: Each grants 35 XP when destroyed. There are 4-6 in the area.
- Combat Encounters: Defeating enemy groups grants 20-50 XP depending on enemy count and type.
Expected Yield: One full loop of the compound area yields approximately 150-200 XP and materials for suit crafting. The loop takes 10-15 minutes if you’re thorough and engage all enemies.
Reset Cue: The area doesn’t reset during the opening mission, but once you progress to the next major mission (Vancouver), you can return to farm if needed. The game auto-saves frequently, so you can exit and re-enter areas without losing progress.
Optimization Tip: Destroy all mutant detectors and batteries first (they don’t fight back), then engage enemy groups. This guarantees the passive XP before combat, which can be unpredictable if you die.
Troubleshooting & Common Mistakes#
- Taking too much damage from ranged enemies: You’re not dodging in time. When you see a weapon glow, press dodge immediately. Practice the timing in the jungle section before moving forward.
- Staggering isn’t working on Reavers: Reavers require two parries before they stagger. Don’t try to interrupt their combo on the first hit; wait for the second attack and parry that instead.
- Omega Red is healing during the boss fight: He’s not healing; you’re just not dealing enough damage during punish windows. Make sure you’re using your full rage meter and strongest combos when he’s staggered. Also, ensure you’re parrying consistently to keep filling his stagger meter.
- Running out of health in the inhibitor field section: The inhibitor suppresses your healing, so you’re vulnerable. Clear enemies as fast as possible and don’t get greedy with combos. Dodge defensively and use hit-and-run tactics until the inhibitor is disabled.
- Missing collectibles and XP: The game doesn’t force you to collect everything, but mutant detectors and batteries are free XP. Destroy them when you see them; there’s no downside.
- Unsure if you’re progressing correctly: The game is linear with clear objectives marked on your compass. Follow the objective marker and you’ll stay on track. Exploration is optional but rewarded with XP.
- Not understanding rage tiers: Rage Tier 1 is the base. Tier 2 unlocks after you fill one rage segment and makes combo enders more powerful. Tier 3 unlocks after you fill more segments and is your ultimate burst window. Use Tier 3 when you need to finish a tough enemy quickly.
- Confused about special techniques: Tornado Spin and other special moves recharge slowly after use. You can’t spam them, but they’re powerful for crowd control. Use them when you’re surrounded or need to create space, not in one-on-one duels where parrying and combos are more efficient.

Advanced Tips & Time Saves#
Aggressive Play Pays Off#
The game is designed to reward hyperaggressive combat. You’re healing passively during fights, so don’t play defensively. Lean into offense, build rage quickly through combos, and use your burst windows to delete enemies. This playstyle is faster and more satisfying than cautious, hit-and-run tactics.
Parry Timing Is Learnable#
The parry system has a generous window. You don’t need frame-perfect timing. Practice in the jungle section where enemies are weaker, and you’ll develop muscle memory quickly. Once you understand the rhythm, boss fights become manageable.
Explore Before Progressing#
The compound area is designed for exploration. Destroy all mutant detectors and batteries before moving to the next area. This gives you a level or two advantage and makes later fights easier. The game auto-saves, so you can explore freely without risk.
Memory Trials and Lore#
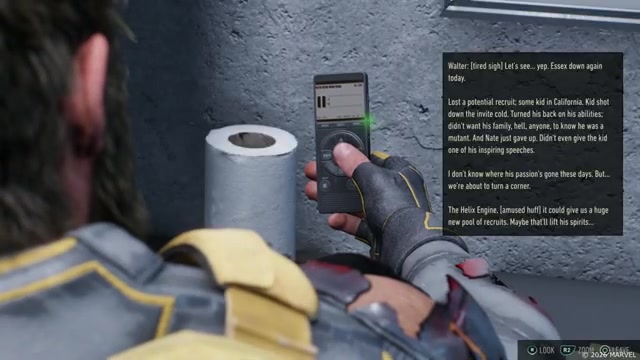
After returning to the compound, you can unlock Nightmare Trials by resting and talking to Essex. These memory sequences reveal Logan’s past and unlock adaptations (passive bonuses to combat). They’re not required to progress, but they deepen the story and provide mechanical benefits. Prioritize them if you want the full experience.
Collectible Whiskey Bottles#
Scattered throughout the compound are whiskey bottles that serve as collectibles. Finding them triggers memory sequences where Logan recalls his past. These are optional but add significant narrative depth. If you’re interested in the story, explore thoroughly and interact with every bottle you find.
FAQ#
How do I dodge ranged attacks in Marvel’s Wolverine?#
When an enemy’s ranged weapon glows, press the dodge button immediately. The game gives you a brief window to react, so watch for the glow and dodge in the direction away from the incoming fire. Practice in the opening jungle section until the timing feels natural.
What’s the best way to fight Omega Red in Marvel’s Wolverine?#
Parry his attacks to fill his stagger meter, then unleash your strongest combos and rage abilities during the stagger window. Repeat this cycle until he’s defeated. In phase two, his attacks are faster, so be more reactive and wait for the full combo before parrying. Don’t try to interrupt mid-combo on a single parry.
How do I unlock new combat abilities in Marvel’s Wolverine?#
You earn skill points by leveling up through combat and exploration. Spend these points in the abilities menu to unlock new moves and enhancements. Prioritize Healing Strike early for survivability, then Knee Breaker for crowd control. The game is linear, so you’ll unlock new abilities naturally as you progress.
Where do I find materials to craft suits in Marvel’s Wolverine?#
Materials drop from defeated enemies and destroyed objects like mutant detectors and batteries. Collect them as you explore the compound area. You’ll also find crates in the lab that contain Flex Nanotech, which auto-repairs your suit in the field. Prioritize gathering materials early to craft the Gold Standard suit and boost your max health.
Can I go back and explore areas I’ve already cleared in Marvel’s Wolverine?#
The opening mission is linear, so you can’t backtrack during the story. However, once you complete the mission and return to the compound, you can explore the team base freely. Collectibles like whiskey bottles are found in the compound, not in the mission areas. Future missions may have more open exploration, but the opening is story-focused.
What happens if I die during a boss fight in Marvel’s Wolverine?#
The game doesn’t explicitly state a death penalty in the transcript, but it auto-saves frequently. If you die, you’ll likely restart from the last checkpoint. The opening mission is forgiving, so don’t be afraid to experiment and learn from mistakes. The game is designed to teach you through failure.
Checklist#
- Complete the opening jungle sequence and learn to dodge ranged attacks by watching for weapon glows.
- Destroy the anti-aircraft gun to clear the landing zone for your helicopter.
- Enter the compound and destroy all mutant detectors and portable batteries for free XP.
- Defeat Sabertooth in the one-on-one duel by parrying his attacks and punishing during stagger windows.
- Push through the prison facility, clear enemy waves, and rescue Essex from his cell.
- Disable the inhibitor field and pursue Trask through the facility to the landing pad.
- Defeat Omega Red in the boss fight by parrying consistently, filling his stagger meter, and punishing with rage abilities.
- Return to the compound and talk to Essex to trigger the story sequence about Logan’s past.
- Explore the compound, collect whiskey bottle collectibles, and unlock memory sequences for lore and adaptations.
- Visit Walter in the lab and collect the two crates of supplies (one from Victor’s room) to craft your first suit.
- Craft the Gold Standard suit using materials found in the field to increase your max health.
- Level up to at least 3 and unlock Healing Strike, then Knee Breaker at level 4 for core survivability and crowd control.
- Prepare for the Vancouver mission by stocking materials and reviewing your equipped abilities in the gear menu.
Source & credit#
This guide draws on the excellent video walkthrough by theRadBrad — watch it for the full visual run-through, and give the creator your view:
https://www.youtube.com/watch?v=EVdp0NNVUoUFollowing Marvel’s Wolverine? Get an email when we publish a new guide — or update one after a patch.