- Medium
- Difficulty
- 12 min
- Read time
- 7
- Steps
- 1.0
- Checked on
30-Second Quick-Start (TL;DR)
You solve Order of the Sinking Star’s puzzles fastest by working backward from a clear goal and trusting that every mechanic behaves the same way everywhere.
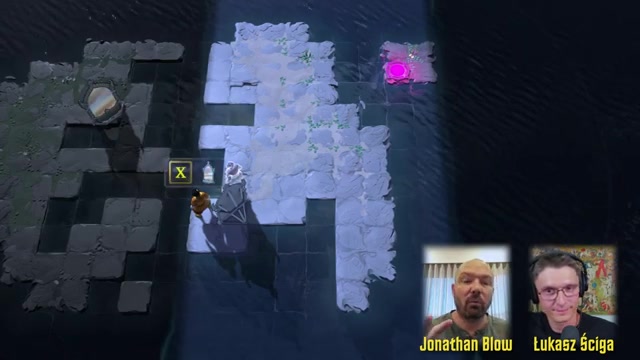
- Look at what the level is about first: the objects present (a purple beam plus crystals, a mirror plus screens) tell you which idea you’re meant to discover.
- Find the “lock” before the “key”: pick the target you must reach, then ask what has to be true to get there.
- Break a big problem into single steps. Fix one thing, then the next, with the goal always in view.
- Remember that the screen rule limits you: you can only use mirrors on your current screen.
- Treat every mechanic as a permanent tool. Beams, mirrors, crystals, and carts follow the same rules in the overworld as in levels.
- Test your idea cheaply. If a level is built well, you can check whether you’re on the right track without a long reset-and-redo.
- Stuck for 30 minutes? Leave. Use the overworld to find another unsolved (violet-colored) star and come back fresh.
What This Guide Helps You Do
This guide explains how Order of the Sinking Star’s puzzles are designed so you can read levels faster, recognize what each one is testing, and stop wasting time on dead-end ideas.
It’s best for players midway through the game who hit a wall, returning players deciding where to go next on the overworld, and anyone curious why the game’s mechanics feel so consistent. It avoids full solutions on purpose; the aim is to teach you how to think about the puzzles, not to hand over answers.
Requirements & Prep
You don’t need any special items or unlocks; what helps most is knowing the basic mechanics and how the overworld tracks your progress.
- Know your levels versus puzzles. The solve count you see counts levels. The game’s total puzzle count (around 1,500, a rough figure) also includes overworld puzzles that don’t appear in that number.
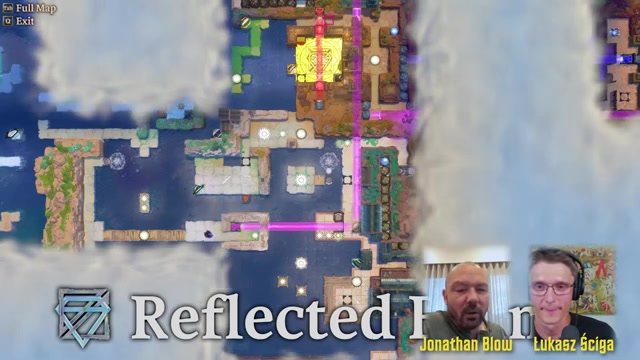
- Read the overworld stars. Violet-colored stars mark things you’ve seen but not solved. Seeing something isn’t solving it, so use them as a to-do list.
- Expect no target number. The game deliberately doesn’t tell you how many puzzles exist, so you explore at your own pace instead of grinding toward a quota.
- Know the pacing. Levels get harder and more sophisticated as you go, so your solve count climbs fastest early on. A player at 166 solved levels was estimated to be roughly an eighth of the way through, though getting to the ending takes less than playing everything.
Route Overview
The game is about bringing separate puzzle worlds together and watching what happens when their rules combine.
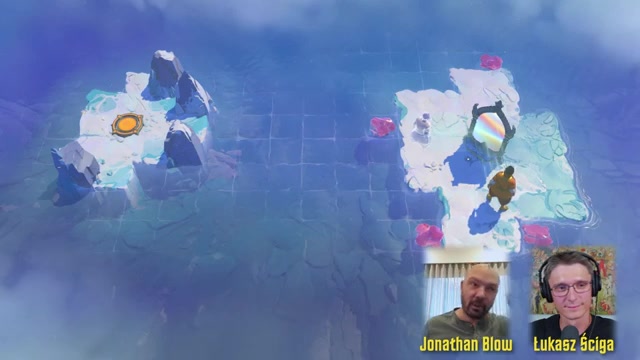
You move through the overworld, entering levels that each focus on one tightly defined idea. Early levels teach a mechanic in isolation, such as Mirror Isles with its single island and single mirror. Later levels combine mechanics from different worlds, such as the screen-by-screen rule (originally from the world called The Promise, now renamed to be mechanics-focused) layered onto Mirror Isles. The mechanics you learn carry forward, including into the overworld itself, where a beam you understood in a level travels across the whole map. The order of play is non-linear, so you can step away from a stuck level and progress elsewhere.
Step-by-Step Walkthrough
Read the level’s composition before touching anything
The objects in a level are a clue to its idea. A purple beam plus crystals plus a moving cart points toward a specific interaction, and levels are grouped by topic, so a hard level is usually a more complicated version of something you did a few levels earlier. Check nearby levels on the overworld for the setup that leads into it.
Identify the lock, then work backward
Games can show you the key first or the lock first, and the lock-first version is easier to reason about. Find the target you must reach or the position an object must end up in, then ask what has to happen to get there. Example logic from a Mirror Isles level: a mirror needs to reach a spot, but you can’t reach the mirror, though there’s a second mirror on the other side. That immediately gives you a plan, and as you work it you discover sub-problems you fix one at a time.
Apply the screen rule when mirrors are involved
You can only use mirrors that are on your current screen. In plain Mirror Isles everything sits on one screen, so you rarely notice this rule. In levels that bring screens together, using a mirror to cross to another island means you can’t use that same mirror to come back. You have to use the other mirror on the far side, so you’ll need to plan crossings in sequence: cross from a spot that helps you later.
Use mirror distance to your advantage
The distance your character travels west equals the distance the mirror sits south of you, and vice versa. Pushing a mirror farther north gives you more north-to-south distance, which carries you farther west. That’s why an extra opening on an island’s north side can matter: more mirror distance may let you land crystals where you need them.
Place crystals in water to build crossings
Crystals can be pushed into water and then stood on, which is how you cross gaps. In a crystal-heavy level you may have four crystals and a mirror, an unusually high object count for this game. The first two crystals tend to be used one way and the third and fourth another, so look for a repeating pattern in how you use them.
Handle beams, carts, and crystals together
Beams affect both you and crystals. When you step into a purple beam you teleport to its far end, and if that end runs off to infinity you can lose the level, so don’t walk into a beam you can’t recover from. Crystals are also affected by beams, so pushing one in carries it across a wall. The catch: once you push, the beam teleports you, so you can’t do the push yourself. The cart (a mechanic from The Promise) blocks beams and isn’t affected by them, so you can use it to block the beam while you push, or to push the crystal through. With the cart blocking the beam, you can also walk left safely.
Gap Note: The cart’s exact path and where to park it depend on the level layout; the mechanic itself is that it blocks beams and moves back and forth.
Chain your discoveries into a full solution
Some levels are two ideas in a row: first the Eureka moment (for example, using the cart to get a crystal across a wall), then a second step to actually reach the exit, which may sit behind a fence. Don’t assume the first discovery finishes the level.
Boss/Set-Piece Strategy (Phase by Phase)
This game’s set pieces are tightly designed levels rather than boss fights, so the useful strategy is how to read the larger multi-step levels.
- Trigger: A sprawling level has several objects (the developers mention levels with five movable things) and it’s easy to get lost in the branching possibilities.
- Cut the tree: Don’t search depth-first through every combination. Decide which single object or position is the real bottleneck (for example, “I need to get behind that mirror to push it south”) and focus only there.
- If you get stuck: A bottleneck question like “how do I get behind the mirror?” is unique to that level. Keep asking it, and if it leads nowhere, drop the idea and try the next one rather than resetting and redoing everything.
- Recovery: Walk away. Solutions often feel obvious after a break, a night’s sleep, or a good meal; difficulty varies by day, even for the same person.
Builds & Loadouts
There are no builds or loadouts in this topic; the “kit” you carry between levels is the knowledge of each mechanic.
The game treats understanding as a leveling system. Every mechanic you learn (how a light behaves, what a mirror does, how crystals move) is a tool you’ll reuse in harder levels, which is why practicing each one early pays off.

Farming Loop / Route Efficiency
There’s no farming in this game, but you can move through it efficiently by choosing where to go on the overworld.
- Use violet stars as your list of open items, and hop to a different area when one puzzle has you frustrated.
- Remember the game isn’t linear. In one example, a player discovered that heading left across the overworld reaches the far right edge, which opened up large new areas.
- The game is long and was trimmed on purpose; it isn’t trying to maximize level count, so you won’t find filler to grind through.
Troubleshooting & Common Mistakes
- Brute-forcing every combination → Narrow the problem to one bottleneck and think only about that.
- Resetting after every test → In well-built levels you can check an idea cheaply; if it’s taking 20 minutes to test one thought, your idea is probably wrong.
- Trusting a suspicious opening → An open square on an island’s edge can look like a hint but may be a distraction (the south opening on one Mirror Isles island is an example). Check whether the real connection point is elsewhere.
- Walking into a beam with no safe end → You can lose the level if you teleport off into infinity. Make sure you’ve got a way back first.
- Reusing a mirror to return → Under the screen rule, the mirror you used to cross isn’t available on the other side. Plan which mirror serves which crossing.
- Assuming the first trick ends the level → Some levels chain a second step, such as getting past a fence to the exit.
- Grinding one puzzle for an hour → Switch areas. Difficulty feels different on different days.

Advanced Tips & Time Saves
The biggest time save is recognizing which kind of difficulty a level is using, because only one kind is worth your effort.
- Bad difficulty: A cramped island where you have to Sokoban-push rocks around just to test your idea. The game’s designers removed most of this, so if a level feels tedious rather than clever, you’re likely overcomplicating it.
- Good difficulty: A level where you can see roughly what must happen but must work out how. That keeps you focused on the level’s actual idea.
- Consistency is a tool. The developers don’t add exceptions to mechanic rules to rescue a puzzle, so if you believe a rule works a certain way, it does, everywhere.
- A good puzzle gives back more than it asks. If a solution feels cool, you’re probably near the intended idea.
FAQ
How many puzzles are in Order of the Sinking Star?
There are roughly 1,500 puzzles in total, though the game deliberately doesn’t show you that number. The count you see on screen tracks levels, which is lower, because the total also includes overworld puzzles. The game hides the target so you explore for interest instead of grinding to a quota.
What do the violet stars on the Order of the Sinking Star overworld mean?
Violet (pink) stars mark things you’ve seen but haven’t solved. They work as a list of places you can go to make progress, which is handy when you want to step away from a puzzle that’s stumping you.
Do I have to play Order of the Sinking Star in a set order?
No, the overworld is non-linear and you can move around freely. You can work through several areas out of sequence, and you might discover that heading across the map reaches far edges you didn’t expect.
Why can’t I use the same mirror to come back in Order of the Sinking Star?
Because of the screen rule, you can only use mirrors on your current screen. When you cross to another island using one mirror, it’s no longer on your screen, so you need the mirror on the far side to return. Plan your crossings in sequence.
How do I get a crystal past a purple beam in Order of the Sinking Star?
Block the beam with the moving cart so you aren’t teleported while pushing the crystal through. Beams teleport you but also affect crystals, so you can’t push a crystal into one yourself. The cart isn’t affected by the beam and blocks it, which lets you move the crystal and walk safely.
Why do mechanics work the same in the overworld as in levels?
The designers keep the rules consistent and avoid adding special exceptions. A beam you learn in a level behaves identically in the overworld, so skills you build early stay useful all game.
Checklist
0 of 11
Source & credit
This guide draws on the excellent video walkthrough by Wookash Podcast — watch it for the full visual run-through, and give the creator your view: