30-Second Quick-Start (TL;DR)
- Speak to the despairing man to start “Trial After Trial”
- Head northwest to the field and trigger the first cutscene
- Run east down the hill to meet three NPCs and watch the second cutscene
- Follow the witness on horseback for several minutes to the final destination
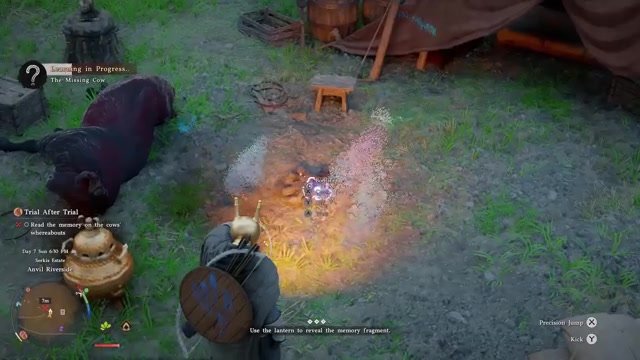
- Clear the enemies at the location, then interact with the bonfire to read the memory on the cow’s whereabouts
- Equip the Vizier helmet via armor menu (D-pad left → Armor → swap helmets if needed)
- Watch the memory cutscene (unskippable), then return to Bremer in town
- Speak to Bremer to complete the quest
What This Guide Helps You Do
Complete the main story quest “Trial After Trial” in Crimson Desert, which culminates in reading the memory on the cow’s whereabouts—a key story progression moment. You’ll find a walkthrough for every objective, from the initial NPC meeting to the final return to town, including the often-confusing memory interaction mechanic and helmet equipping requirement.
Requirements & Prep
- Quest Flag: “Trial After Trial” must be active in your quest log
- Horse: You’ll need to summon your horse multiple times; make sure you’ve got access to it
- Vizier Helmet: You must own this helmet—it’s required to complete the memory reading. If you don’t have it yet, the quest won’t progress
- Combat Readiness: You’ll face a group of enemies at the final location; stealth or direct combat both work
- Controller/M&K: The guide uses button names (X, Square, A, D-pad, RB, RT, LT) but the core actions are universal across platforms
Pro Tip: Summon your horse before you need to move. Call it early and it’ll be ready when you reach the next objective.

Route Overview
This quest is a linear story progression with four distinct locations. You begin by speaking to the despairing man, then travel northwest to a field for your first cutscene. From there, you run east down a hill to meet witnesses and trigger the second cutscene. The witness then leads you on a long horseback ride to the final destination—an area with enemies and a bonfire. After clearing enemies and reading the memory at the bonfire, you’ll equip a specific helmet, watch an unskippable cutscene, and return all the way back to town to speak with Bremer. There’s no optional branching here; it’s all story-driven.
Step-by-Step Walkthrough
Step 1: Speak with the Despairing Man
Head to the location marked on your map and find the despairing man. Target him and initiate dialogue to start the quest proper and trigger your first objective marker.
Step 2: Travel Northwest to the Field
After the initial dialogue, head northwest to a field location. You can either run or summon your horse—summoning is faster once the horse is close enough. Head in the northwest direction until you see an open field, then dismount and approach the NPC waiting there.
Step 3: Target and Talk to the NPC
Once you reach the field, target the NPC and press Square (PS5) or X (Xbox/other platforms) to interact. A long cutscene with dialogue will play. Don’t skip it—it’s story-critical and sets up the next phase.
Step 4: Run East Down the Hill
After the cutscene ends, head left (which is east on the map) and run down the hill. You’ll see three NPCs waiting at the bottom. Consider summoning your horse before you reach them—it’ll save a few seconds for the next phase.
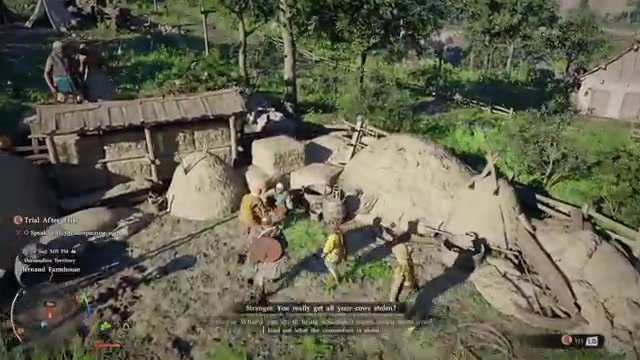
Step 5: Interact with the Three NPCs
Once you reach the group of three, target them and press Square or X to gather information. Another cutscene will play, and during it, one of the NPCs (the witness) will get on a horse and tell you he’s going to lead you to the next location.
Step 6: Mount Your Horse and Follow the Witness
Get on your horse (or summon it if you haven’t already) and begin following the witness. He’ll lead you on a long ride—several minutes of travel. Keep tapping X or A (or your interact key on mouse/keyboard) to stay close and follow him. The game will keep you on track; just keep pace and follow his path. This section is lengthy, so don’t worry if it feels like it’s taking a while.
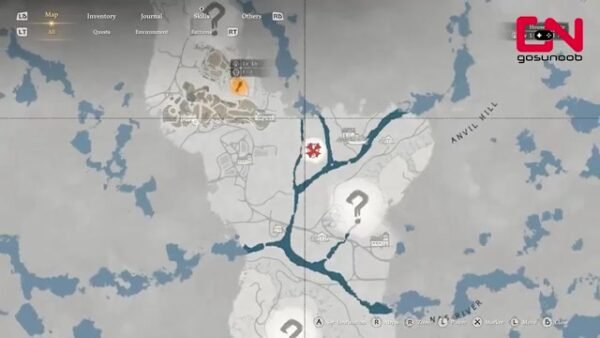
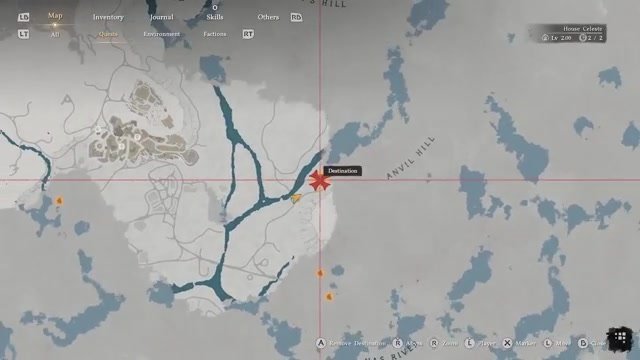
Step 7: Arrive at the Final Destination
Eventually, the witness will stop and tell you this is as far as he’s going. Your objective will update to “Read the memory on the cow’s whereabouts.” You’ve now reached the location where the memory interaction will take place. Dismount and prepare for combat.
Step 8: Clear the Enemies
There are multiple enemies in this area. You can use stealth to avoid them, or run in and fight directly—both work equally well. Clear the enemies until they run away or are defeated, then you can proceed to the bonfire.
Step 9: Interact with the Bonfire
Head to the center of the area where you’ll find a bonfire. This is the critical step. To read the memory, look at the bonfire and interact with it. Important: If you’re having trouble, try pulling out your bow first, then rolling, then pulling out your lantern. This sequence can sometimes help the interaction register. Once you successfully interact, you should see a prompt that says “Learning in progress: the missing cow.”
Watch For: The interaction can glitch or interrupt mid-learning. If you see the prompt cut off, you’ll need to repeat the bonfire interaction. Make sure you see the full “Learning in progress: the missing cow” message before moving on.
Step 10: Equip the Vizier Helmet
Now you need to equip the Vizier helmet. This is mandatory to progress. Open your menu and follow these steps:
- Press left on the D-pad
- Navigate to Armor
- Go up to the Vizier helmet in your list
- If it’s not already equipped, use LT and RT to swap through your available helmets until you find and select the Vizier
- Close the menu (press B or Circle) and reopen it to confirm the change
- Press A or X to play/equip the helmet
Once equipped, you should see the Vizier helmet on your character.
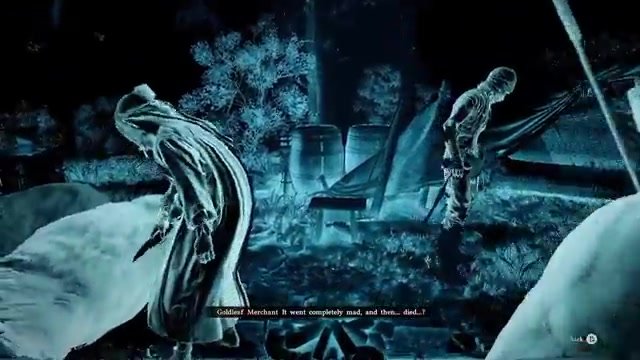
Step 11: Watch the Memory Cutscene
After equipping the Vizier helmet, a cutscene will begin. This cutscene is unskippable. You must watch it in full. During the cutscene, there’ll be a point where a “learning” prompt appears on screen—that’s your signal that you can leave when you’re ready. Don’t exit before this prompt appears, or you’ll have to watch the cutscene again.
Step 12: Exit and Return to Bremer
Once the learning prompt appears and the cutscene is winding down, press B or Circle to exit. Your objective will now update to “Return to Bremer.” Bremer is located back in town, quite a distance away. Summon your horse and make the journey back. You can skip ahead if you’d like—the ride is long but straightforward.
Step 13: Speak with Bremer and Complete the Quest
Once you arrive back in town, find Bremer and speak to him. This will trigger the final cutscene. After it concludes, the quest “Trial After Trial” is complete.
Troubleshooting & Common Mistakes
- Bonfire interaction won’t trigger: Try the bow-roll-lantern sequence described in Step 9. If it still won’t work, move slightly away and try again from a different angle.
- Memory learning prompt interrupts: You’ll see “Learning in progress” cut off mid-word. Go back to the bonfire and repeat the interaction. Don’t move away until you see the full prompt.
- Can’t equip the Vizier helmet: Make sure you own it. Check your armor menu to confirm it’s in your inventory. If it’s missing, you’ll need to obtain it before progressing.
- Cutscene won’t play after equipping helmet: Close your menu completely and wait a moment. The cutscene should trigger automatically.
- Getting stuck during the witness follow: Keep tapping your interact button (X or A) to stay in sync with the witness. If you fall too far behind, he may stop and reset.
- Enemies won’t clear: Some enemies may run away rather than be defeated. This is normal—once they flee, the area is clear enough to proceed to the bonfire.
- Exited the unskippable cutscene too early: You’ll have to watch it again. Wait for the learning prompt to appear before pressing B or Circle to exit.
Advanced Tips & Time Saves
- Summon your horse proactively: Before you need to move to the next objective, summon your horse. It’ll be ready instantly, shaving seconds off each transition.
- Skip the long witness ride: While you’re following the witness, you can hold the interact button rather than tapping it repeatedly. This is less fatiguing and keeps you locked to his path.
- Combat skip (risky): If you’re confident in stealth, you can avoid the enemy group entirely by sneaking around the perimeter of the final location. This saves time but requires careful positioning.
- Equip the Vizier helmet before the final location: If you know the quest is coming and you’ve got the helmet, equip it early. This won’t break anything and removes one menu step later.
FAQ
Q: How long is the witness ride?
A: Several minutes of continuous following. Just stay behind him and keep tapping your interact button.
Q: Do I have to fight the enemies at the final location?
A: No. Stealth is viable, and enemies may run away on their own. Fighting is the most straightforward approach, but you’ve got options.
Q: Why won’t the bonfire interaction work?
A: Try pulling out a bow, rolling, and then pulling out a lantern before the interaction registers. This sequence often helps if you’re stuck.
Q: Can I skip the unskippable cutscene?
A: No. You must watch it in full. However, you can exit once the learning prompt appears on screen.
Q: What if I don’t have the Vizier helmet?
A: You won’t be able to progress past the memory reading step. You need to obtain the Vizier helmet before you can complete this quest.
Q: Is there a way to make the return trip to Bremer faster?
A: Summoning your horse and riding directly to town is the fastest method.
Quick Reference Card (Screenshot This)
- Start: Speak to despairing man
- Objective 1: Head northwest to field, trigger cutscene
- Objective 2: Run east down hill, interact with three NPCs
- Objective 3: Follow witness on horseback for several minutes
- Objective 4: Clear enemies at final location
- Objective 5: Interact with bonfire (use bow-roll-lantern if stuck)
- Objective 6: Equip Vizier helmet via D-pad Left → Armor → swap helmets → close/reopen → A/X to play
- Objective 7: Watch unskippable cutscene, exit when learning prompt appears
- Objective 8: Return to town and speak with Bremer
- Quest Complete!
Final Note: This quest is entirely linear with no optional content. Focus on following the objectives in order, and don’t skip any cutscenes—they’re essential to the story. If you get stuck on the bonfire interaction, it’s usually because the prompt hasn’t fully registered; try the bow-roll-lantern sequence and interact again.