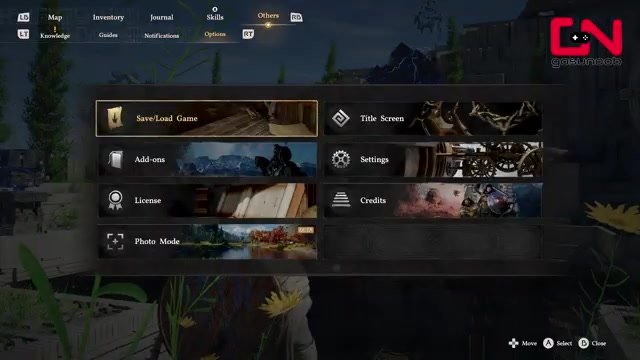
30-Second Quick-Start (TL;DR)
- Precision Jump: Sheath weapon (left D-pad), hold LB, press X/Square to jump to blue circle.
- Wall Removal: Use Axiom Force (push down left stick to aim, release to grapple) to move the cube into the light beam above the pedestal.
- Force Bomb Setup: Grapple the floating part with Axiom Force, position it where the tutorial showed, then charge Force Bomb (hold right stick down) and release to activate the circle.
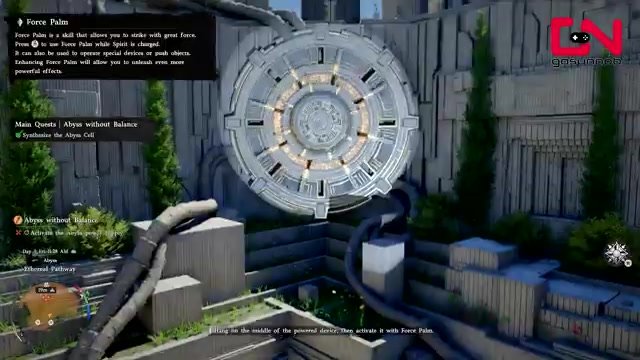
- Wall Climb & Finish: Climb the big circle, position yourself in the middle, charge Force Palm (right stick down), and release to complete the puzzle and quest.
- Reward: Unlock Abyss power supply and gain glide/flight ability.
What This Guide Helps You Do
This guide walks you through the First Abyss Puzzle in Crimson Desert’s main quest “Abyss Without Balance,” teaching you the game’s unique control mechanics (precision jumping, Axiom Force grappling, and Force skills) so you can navigate floating platforms, solve multi-step environmental puzzles, and unlock the glide/flight ability that makes exploration far more enjoyable.
Best for: Players who’ve just reached the Abyss section and are unfamiliar with Crimson Desert’s control scheme, or anyone stuck on the puzzle’s environmental challenges.
Requirements & Prep
- Quest Flag: You must have completed the main quest up to the point where Axiom Force was introduced. The game teaches this skill before the Abyss section begins.
- Controller Setup: This guide assumes an Xbox or PlayStation controller. The inputs are: D-pad (directional), LB (left bumper), left stick (push and hold), right stick (push and hold), X/Square (action button).
- No Combat Gear Needed: This is a puzzle and platforming section, not a combat encounter. You don’t need to prepare weapons or consumables.
Pro Tip: If you’re new to Crimson Desert’s controls, take a moment to familiarize yourself with holding down the left stick to aim and the right stick to charge abilities. This puzzle is as much about learning these inputs as it’s about solving the environmental challenge.
Route Overview
The First Abyss Puzzle is a three-stage environmental challenge. You’ll start by navigating across a series of floating platforms using precision jumps—a mechanic that requires your weapon to be sheathed. Once you’ve crossed the platforms, you’ll reach a blocked passage and must use the Axiom Force (a grappling skill) to move a cube into a beam of light, which removes the wall and reveals the next area. From there, you’ll use Axiom Force again to position a floating object, then deploy a Force Bomb to activate a large circular mechanism. Finally, you’ll climb that circle, plant yourself in the center, and use Force Palm to launch yourself upward, completing both the puzzle and the main quest.
Step-by-Step Walkthrough
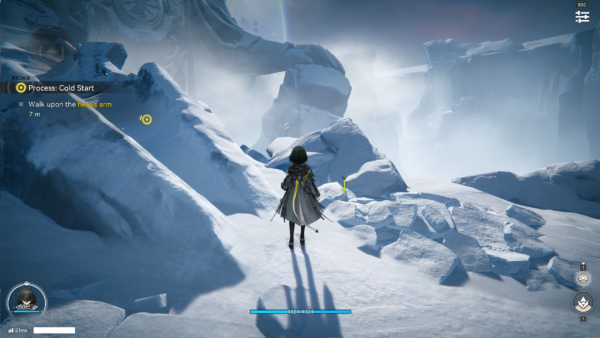
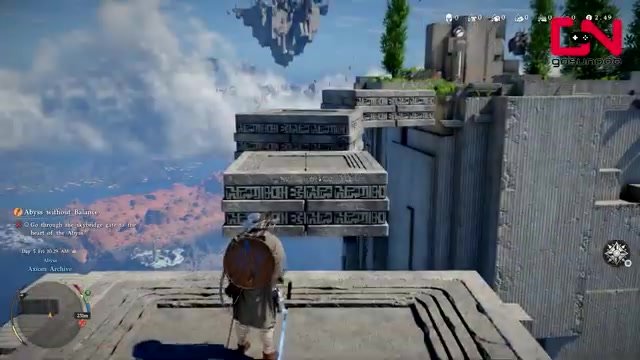
Stage 1: Master the Precision Jump Across Floating Platforms
The basic jump in Crimson Desert is short and unreliable for crossing large gaps. Running and jumping gives you more distance, but it’s still risky and imprecise. The game provides a better tool: precision jumping.
First, sheath your weapon by pressing left on your D-pad. You can’t use precision jumping while your weapon is equipped—this is non-negotiable. Once your sword is away, hold LB (left bumper) on your controller. This’ll bring up a prompt showing where you’ll land, marked by a blue circle on your target platform.
While still holding LB, press X on Xbox or Square on PlayStation. Your character jumps directly to the blue circle, landing precisely where you need. Repeat this across each floating platform until you’ve crossed the entire section. The blue circle always shows you the safe landing spot, so trust it and don’t second-guess your jumps.
Watch For: If you try to precision jump with your weapon equipped, the mechanic won’t activate. If you find yourself using the basic jump, double-check that your weapon is sheathed.
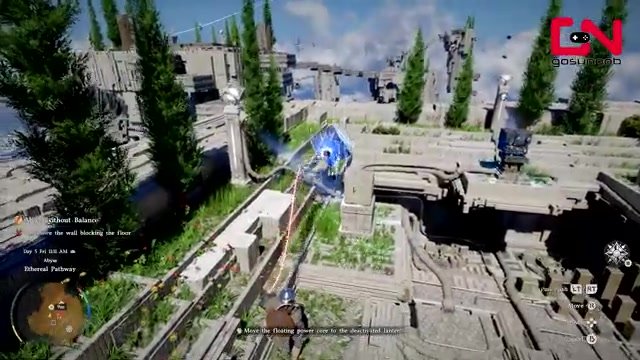
Stage 2: Use Axiom Force to Move the Cube Into the Light Beam
After crossing the platforms, you’ll reach an area with a wall blocking the floor. This is the core puzzle. You’ll see a cube nearby and a beam of light shining down from above, illuminating a pedestal-like area.
To move the cube, you’ll use the Axiom Force, a grappling ability taught earlier in the main quest. Push down on your left stick and hold it to aim at the cube. You’ll see your character targeting it. Once you’re locked on, release the left stick, and a grapple shoots out, giving you control of the cube.
Now you can manipulate the cube in several ways:
- Push or pull: Use your right stick to move the cube forward, backward, left, or right.
- Rotate: Use your D-pad to rotate the cube.
Your goal is to position the cube so it sits in the beam of light, directly over the solid block/pedestal below. When you place it correctly, you’ll see a change in the scenery—the environment shifts, signaling that you’ve unlocked the next phase. Release the cube and move forward.
Pro Tip: The light beam is your visual guide. Position the cube so it’s centered in that beam and resting on the pedestal. If the scenery doesn’t change, you’re not quite in the right spot—adjust the cube’s position slightly and try again.
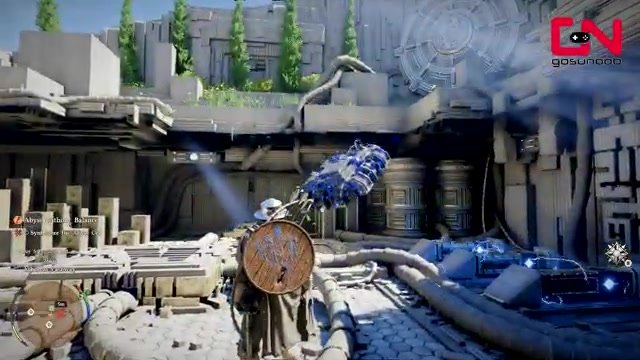
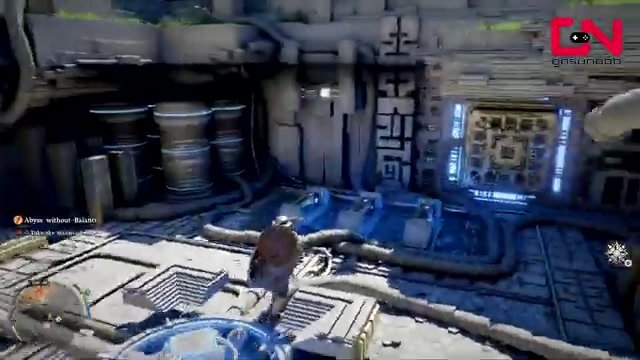
Stage 3: Synthesize the Abyss Cell Using Force Bomb
After the scenery changes, head downward. You’ll see an instructional animation showing you a new skill called Force Bomb. Pay attention to this—it shows you exactly what you need to do next.
You’ll now see another floating object that needs to be positioned. Use Axiom Force again: push down and hold your left stick to aim, then release to grapple the floating part. Move it into the position shown in the tutorial animation. Once it’s in place, hold it there and rotate it if needed using the D-pad until it matches the tutorial’s setup.
Now it’s time to use Force Bomb. While still holding the object with Axiom Force, press down on your right stick and hold it. This charges up the Force Bomb. You’ll see the charge building. Release the right stick to detonate the bomb. This locks the object in place and activates a large circular mechanism nearby.Watch For: Make sure the floating object is positioned exactly as shown in the tutorial before you charge and release the Force Bomb. If it’s misaligned, the bomb may not activate the circle properly.
Stage 4: Climb the Circle and Use Force Palm to Finish
The large circular mechanism is now active and ready to climb. Move to it and position yourself in the middle of the circle. You can use your skills while hanging off walls, which is key to the final step.
Press down on your right stick and hold it to charge up Force Palm, another special ability. While hanging in the middle of the circle, aim the charge and release the right stick. Force Palm launches you backward, propelling you upward and completing the puzzle.
This final action completes the main quest “Abyss Without Balance” and activates the Abyss power supply. A short cutscene plays, and you’ll unlock a special power that lets you glide and fly around—a game-changing mobility tool that transforms how you explore Crimson Desert.
Troubleshooting & Common Mistakes
- Precision jump won’t activate: Your weapon is still equipped. Press left D-pad to sheath it, then try again.
- Falling off platforms: You’re likely using the basic jump instead of precision jump. Always hold LB before jumping to see the blue circle target.
- Cube won’t move or grapple won’t connect: Make sure you’re aiming directly at the cube with your left stick before releasing. The aim must lock onto the object first.
- Scenery doesn’t change after placing the cube: The cube isn’t in the light beam or isn’t positioned on the pedestal. Grapple it again and adjust its position until it’s centered in the light.
- Force Bomb doesn’t activate the circle: The floating object isn’t positioned correctly. Reference the tutorial animation again and reposition using Axiom Force before charging the bomb.
- Force Palm doesn’t launch you: Make sure you’re in the middle of the circle and holding down the right stick long enough to fully charge before releasing.
- Stuck on a platform or in the environment: Try moving around the area or re-attempting the precision jump to a nearby platform. The game is forgiving with repositioning.
Advanced Tips & Time Saves
Minimize Grapple Repositioning: When using Axiom Force to move the cube or floating object, try to get the positioning right in as few adjustments as possible. Each rotation and movement takes time. Study the target position before you start moving to reduce trial-and-error.
Charge Force Abilities Fully: Don’t release Force Bomb or Force Palm early. Let the charge build completely before releasing to ensure the action registers properly and activates the mechanisms.
Precision Jump Rhythm: Once you’re comfortable with precision jumping, you can move quickly across platforms by holding LB, pressing X/Square, and immediately moving to the next platform without hesitation. Build a rhythm and trust the blue circle.
FAQ
Q: Do I need specific gear or weapons to complete the First Abyss Puzzle?
A: No. This is a puzzle and platforming section, not combat. Your gear doesn’t matter. Focus entirely on learning the control mechanics.
Q: What if I haven’t learned Axiom Force yet?
A: The main quest teaches Axiom Force before you reach the Abyss section. If you haven’t seen it, continue the main quest until it’s introduced. You can’t proceed without it.
Q: Can I use a keyboard and mouse instead of a controller?
A: This guide is controller-focused and provides no keyboard/mouse instructions. Crimson Desert’s control scheme is designed around controller input, so a controller is strongly recommended for this puzzle.
Q: What happens after I complete the puzzle?
A: You unlock the Abyss power supply, complete the main quest “Abyss Without Balance,” and gain a special power that lets you glide and fly around the world. This mobility tool significantly improves exploration and traversal throughout the game.
Q: I’m stuck on positioning the cube. How do I know if it’s in the right spot?
A: The cube needs to be centered in the light beam and resting on the solid block/pedestal below. When positioned correctly, the scenery will visibly change. If nothing changes, adjust the cube’s position slightly and try again.
Q: Can I redo the puzzle if I mess up?
A: Yes. You can grapple objects again using Axiom Force and reposition them. The puzzle is forgiving and allows you to correct mistakes without restarting.
Why This Puzzle Matters
The First Abyss Puzzle is more than a gating mechanism—it’s Crimson Desert’s way of teaching you the game’s unique control language. Precision jumping, Axiom Force grappling, and Force abilities form the foundation of how you’ll interact with the world going forward. Mastering these mechanics here makes the rest of the game feel intuitive. Plus, the glide and flight ability you unlock transforms exploration from grounded traversal into something genuinely magical.
Quick-Reference Card (Screenshot This)
- Precision Jump: Sheath weapon (L D-pad) → Hold LB → Press X/Square to land on blue circle.
- Axiom Force: Push down left stick to aim → Release to grapple → Use right stick to move, D-pad to rotate.
- Cube Placement: Grapple cube → Move it into the light beam above the pedestal → Wait for scenery change.
- Force Bomb: Grapple floating object → Position it as shown in tutorial → Hold right stick down to charge → Release to detonate and activate circle.
- Force Palm: Climb the circle → Position in middle → Hold right stick down to charge → Release to launch upward.
- Reward: Quest complete + Abyss power supply activated + Glide/flight ability unlocked.
- If stuck: Check weapon is sheathed, verify grapple lock-on before releasing, reposition objects if scenery doesn’t change.
- Controller required: All inputs are controller-based. Keyboard/mouse not recommended.
Source: