30-Second Quick-Start (TL;DR)
- Travel to Hernand Highlands, north of Thinker’s Meadow, and find the big hole with a mysterious door
- Push the stone slab to enter the Dragon Stone Chamber
- Study the mural on the chamber wall—it’s a rotated map showing three clue locations
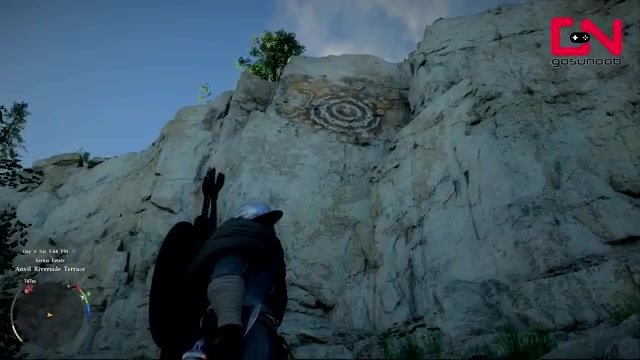
- Travel to the landscape below the Abyss fast-travel point to find the first stone wall with clue imagery
- Head northeast through Hernand East Gate to find the other two clues on another stone wall
- Rotate the three wheels in the basin to match the positions shown on the discovered clue images
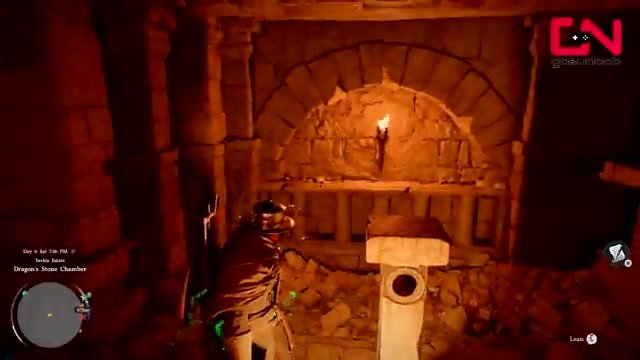
- The door opens; collect the Abyss Cassette and Memories of Abundance
What This Guide Helps You Do
Solve the Dragon Stone Chamber puzzle in Crimson Desert and unlock the chamber door to claim the Abyss Cassette (which grants a skill point) and the special item Memories of Abundance (which unlocks seven different knowledge pieces). If you’re stuck on this notoriously tricky environmental puzzle—whether it’s your first attempt or you’re returning after hours of trial and error—this guide will get you through it.
Requirements & Prep
- Location Access: You’ll need to reach Hernand Highlands in Crimson Desert. The Dragon Stone Chamber entrance is located north of Thinker’s Meadow.
- Optional Quest Flag: If you’ve completed the main quest at the watchtower, you can view a memory when approaching the chamber door. It’s not required to solve the puzzle, but it adds context.
- Fast Travel: The Abyss fast-travel point is useful for locating one of the three clue locations. You’ll need access to this fast-travel hub.
- Exploration Time: Budget 30–60 minutes for this puzzle. Finding all three clue locations requires travel across the map.
Pro Tip: Bring a notebook or use your phone to sketch the three wheel positions as you find them. The mural is rotated compared to your in-game map, so having a visual reference will save you frustration when you return to the basin.
Route Overview
The Dragon Stone Chamber puzzle unfolds in three stages. You’ll enter the chamber and spot three wheels in a basin and a locked door—but no obvious solution. The key is the mural painted on the chamber wall, which depicts a rotated, topographic map of the surrounding landscape. This mural shows three red check marks, each pointing to a location where you’ll find stone walls with clue imagery. You’ll travel to all three locations, photograph or memorize the wheel positions shown on those stone walls, then return to the basin and rotate the three wheels to match those positions. When all three are correct, the chamber door opens.
The puzzle’s difficulty comes from the mural’s rotation relative to your in-game map—a direct one-to-one comparison won’t work. You’ll need to mentally rotate the in-game map to match the mural’s perspective.
Step-by-Step Walkthrough
Enter the Dragon Stone Chamber
Travel to Hernand Highlands and head to the location north of Thinker’s Meadow. You’ll see a large hole in the ground with a mysterious door visible inside. Approach the door and push the stone slab. This opens the chamber entrance. Once inside, you’ll see a dragon statue, three wheels mounted in a circular basin, and a locked door at the back of the chamber. The three wheels are your primary interaction points—but you can’t solve this by guessing.
Study the Mural and Identify the Map
Look at the mural painted on the chamber wall. It might seem abstract at first, but it’s actually a topographic map of the Hernand Highlands region. The mural shows landscape features: structures (likely buildings or ruins), a river flowing downward to the south, and mountain ranges. Most importantly, there are three red check marks on this mural—these mark the locations where you’ll find the wheel position clues. Here’s the catch: this map is rotated compared to your in-game map, so you can’t use it directly without mentally rotating it.
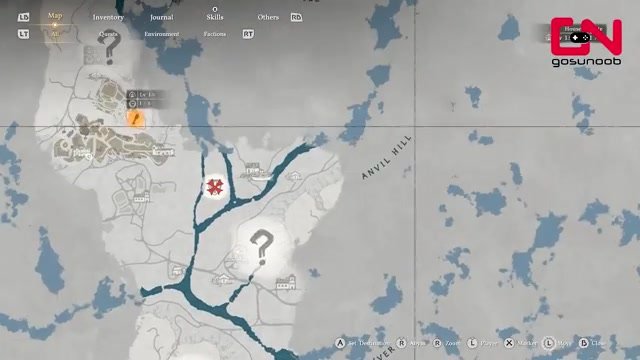
Locate the First Clue (Abyss Method)
Use the Abyss fast-travel point as your starting reference. From the Abyss, look down at the landscape below and jump down to ground level. The terrain you see—structures, river flow, and mountain positioning—should match the landscape depicted on the mural. Once you’ve oriented yourself, look for a stone wall in this area. On that stone wall, you’ll find the first clue image: a wheel position showing a sun symbol pointing up and an eye symbol also pointing up. This is the correct position for the first wheel in the basin. Note the exact position of this clue image on your mental map.
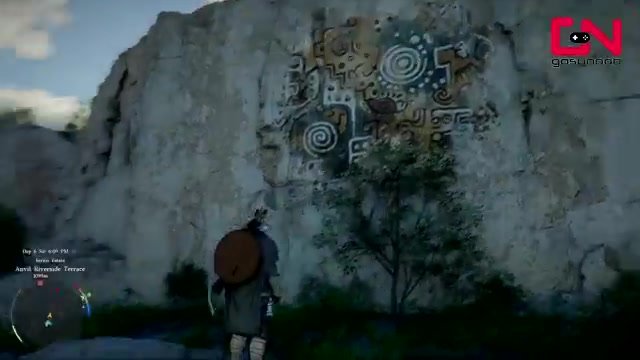
Locate the Second and Third Clues (Northeast Route)
From the first clue location, head northeast and pass through the Hernand East Gate. Keep going in this direction and you’ll find another stone wall. This wall holds two additional clue images. The second clue shows a wheel with a circle in the middle and a small pointer or indicator pointing upward—focus on that central pointer as the key alignment detail. A short distance to the south along the same stone wall, you’ll find the third clue image, which displays a wheel with a dark section positioned in one of the corners. Document or memorize all three positions clearly.
Watch For: The second and third clues are close together on the same stone wall. Don’t miss the upper clues if you’re scanning at eye level—look up and around the entire wall surface.
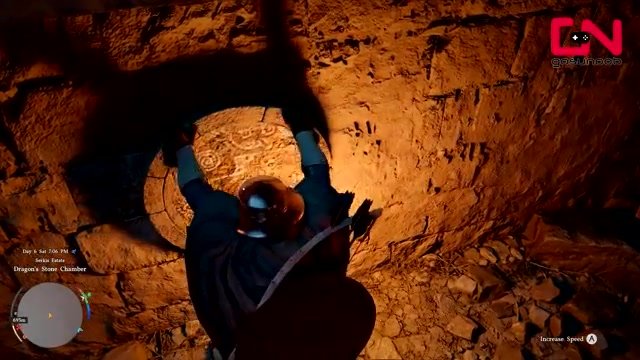
Return to the Basin and Rotate the Wheels
Head back to the Dragon Stone Chamber. At the basin, you’ll interact with each of the three wheels. Rotate them to match the positions you found on the stone walls:
- First wheel: Align it so the sun points up and the eye points up
- Second wheel: Position the circle in the middle with the pointer indicator facing upward
- Third wheel: Rotate it so the dark section sits in the corner as shown on the clue
As you set each wheel, you should feel or hear confirmation (typical of puzzle mechanics in Crimson Desert). Once all three wheels are in the correct positions, the locked door at the back of the chamber will open.
Troubleshooting & Common Mistakes
- Can’t find the first clue location: The landscape below the Abyss fast-travel point is your key. Jump down and compare the terrain features (structures, river, mountains) to the mural. If the landscape doesn’t match, you might be at the wrong Abyss point—try fast-traveling to a different one.
- Mural seems to have no check marks: The mural shows three red check marks, but they’re subtle. One is obvious in the center-lower area; the other two are on the upper portion of the mural. Scan the entire painted surface carefully.
- Wheels won’t turn or lock into position: Make sure you’re rotating each wheel fully to match the clue image. Partial alignment won’t trigger the door. Rotate deliberately and wait for feedback (visual or audio cue) before moving to the next wheel.
- Door still won’t open after rotating wheels: Double-check that all three wheels match their corresponding clue images. Even one wheel slightly off will prevent the door from opening. Return to the stone walls and verify each position.
- Spent hours searching and still can’t find clue locations: The puzzle’s difficulty is the rotated map perspective. Use the Abyss landscape as your anchor point, then work methodically northeast from there. The clues are on stone walls—not hidden in caves or underground.
- Can’t remember all three wheel positions: Take screenshots or write down detailed descriptions of each clue before returning to the chamber. The wheel positions are specific and must match exactly.
Advanced Tips & Time Saves
Map Rotation Insight: The mural on the chamber wall is deliberately rotated to match a topographic perspective rather than a standard compass view. If you’re struggling to find locations, rotate your in-game map 90 degrees mentally and try matching features again. This single insight can cut your search time in half.
Landmark Anchoring: Use the river shown on the mural as your primary navigation landmark. Rivers are distinctive and hard to miss. Once you’ve identified the river in the landscape, the other features (structures, mountains) fall into place more easily.
Rewards & What You Get
Solving the Dragon Stone Chamber grants two items:
- Abyss Cassette: Provides a skill point, allowing you to upgrade one of your character skills
- Memories of Abundance: A special item that unlocks seven different knowledge pieces when used, expanding your lore and character progression
These rewards make the puzzle effort worthwhile, particularly if you’re focused on skill progression and knowledge completion.
FAQ
Do I need to complete the watchtower quest to solve this puzzle?
No. The watchtower quest completion lets you view a memory at the chamber door, but it’s optional. You can solve the puzzle without ever touching that quest.
Can I solve this puzzle by just trying random wheel combinations?
Theoretically yes, but the creator spent roughly an hour trying this method without success. The puzzle is designed to guide you to the mural and then to the clue locations. Brute force isn’t practical.
What’s the hardest part of this puzzle?
The rotated mural is the biggest hurdle. It doesn’t match your in-game map one-to-one because it’s shown from a different perspective. Realizing this and mentally rotating the map is the key breakthrough.
How long does the entire puzzle take if I know where everything is?
If you’ve got all three clue locations marked, you can solve the puzzle in 10–15 minutes. The majority of time goes toward finding the three stone walls with clue imagery.
Do I have to find all three clues in a specific order?
No. You can find them in any order, as long as you return to the basin with all three positions memorized or documented.
What happens if I rotate a wheel incorrectly?
You can rotate it again. There’s no penalty for incorrect positioning. Just adjust each wheel until all three match their clue images and the door opens.
Quick-Reference Card (Screenshot-Friendly)
- Location: Hernand Highlands, north of Thinker’s Meadow
- Entrance: Push the stone slab at the mysterious door in the hole
- Puzzle Type: Environmental hunt + wheel alignment
- Key Insight: The mural is a rotated topographic map; use the Abyss landscape to orient yourself
- Clue Location 1: Stone wall below/near the Abyss fast-travel point; shows sun and eye symbols pointing up
- Clue Locations 2 & 3: Another stone wall northeast of Location 1, past Hernand East Gate; shows circle with upward pointer and dark corner section
- Solution: Rotate the three wheels in the basin to match the clue positions exactly
- Reward: Abyss Cassette (skill point) + Memories of Abundance (7 knowledge pieces)
- Estimated Time: 30–60 minutes total (most time spent finding clue locations)
- Difficulty: High (puzzle design), not combat-based
- Pro Tip: Bring a notebook or phone to document wheel positions before returning to the chamber
- Common Blocker: The rotated mural perspective—once you understand this, the puzzle becomes solvable
Source: