30-Second Quick-Start (TL;DR)
- Unlock it: Talk to the designated NPC inside the Djang after progressing the main game. Once unlocked, you can teleport to start exploration immediately.
- Core loop: Explore zones, collect materials, fight enemies, manage corruption timer. Exit when corrupted; re-enter as many times as needed—no penalties.
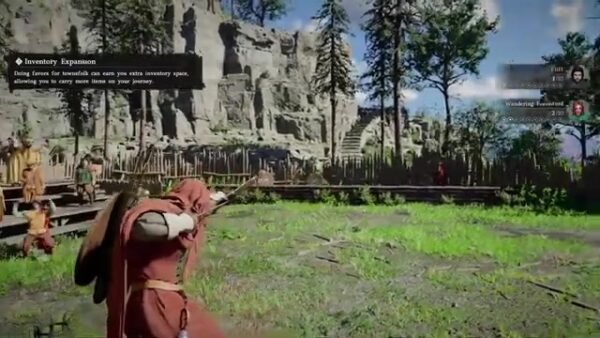
- Priority upgrades: Get Protocol Stabilizing Chip first (boosts corruption resistance), then Container Expansion Chip (increases inventory slots).
- Quest types: Main quests unlock new zones; secondary quests reward permanent buffs and currency. Focus Commissions give massive operation metrics—do them immediately when they appear.
- Material tracking: Click on quest items to see their exact source (green chests, safes, vending machines, bosses). Use this to plan your route.
- Combat: Use your normal team; no special restrictions. Grenades are unlocked via quests and help break special walls for extra loot.
- Progression: Operation metrics are permanent (not weekly). Completing zone quests unlocks faster travel methods, making repeat runs smoother.
What This Guide Helps You Do
Master Arknights: Endfield’s Etchspace Salvage—an extraction-based game mode where you explore corrupted zones, collect rare materials, and unlock permanent progression rewards. You’ll learn how to manage your corruption timer, prioritize quest upgrades, and farm operation metrics efficiently to unlock rewards like auto-barrel currency and standard banner permits.
Best for: Players new to Etchspace Salvage, those struggling with corruption management, and anyone wanting to optimize their material farming and quest completion order.
Requirements & Prep
Unlock Prerequisites
- Progress the main game story until you naturally unlock access to the Djang.
- Locate and talk to the specified NPC in the Djang to activate Etchspace Salvage.
- After activation, you can teleport to the zone and start exploration without returning to the NPC each time.
What You’ll Need Inside
- Your normal combat team: No special squad restrictions. Use your best operators.
- Inventory space: You start with 10 slots (separate from your main inventory). This fills fast with materials.
- Corruption resistance: You begin with ~300 max corruption. This is the timer—managing it’s your core challenge.
- Grenades (unlocked later): Acquired via secondary quests; essential for breaking special walls and accessing hidden loot.
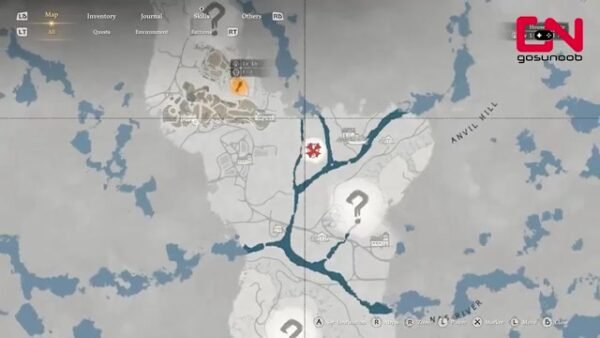
Route Overview
Etchspace Salvage is a zone-based extraction mode designed around exploration and resource management. You spawn in a safe zone within each level. From there, you venture into themed maps (loosely inspired by Arknights’ open-world locations like quarries) to hunt materials, defeat enemies, and unlock new areas. Each zone has a main quest (e.g., “Collect 8 Classified Aberant from green chests”) and optional secondary quests that reward permanent stat buffs. Your corruption meter rises constantly while exploring and spikes when engaging enemies or opening containers. When corruption fills, the NPC recalls you automatically. You then return to the safe zone, offload your materials (which count toward quests and convert to AUD crystals), and re-enter if needed. As you progress through zones and complete quests, you unlock faster travel methods and gain access to higher-tier areas, reducing backtracking and making longer runs viable.
Step-by-Step Walkthrough
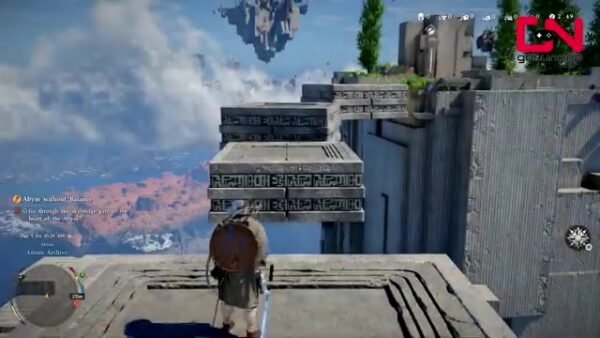
Step 1: Enter the Etchspace and Understand the Safe Zone
What to do: Teleport to Etchspace Salvage and observe the safe zone layout. You’ll see locked and unlocked zones marked on the map.
Why it matters: The safe zone is your home base. You start here each run, and it’s where you’ll return after being recalled. Familiarizing yourself with its layout and available exits prevents confusion later.
What you’ll see: Multiple themed areas branching from the safe zone. Some are accessible immediately (Level 1); others are locked behind progression gates. You must complete the zone’s main quest to unlock the next level.
Common mistake: Spending corruption points wandering to locked areas. Fix: Check the map first. Locked zones have a clear barrier. Focus on accessible areas until you complete the current zone’s main quest.
Step 2: Read Your Quest Log and Identify Material Sources
What to do: Open the main quest for your current zone. Click on each requested material to reveal where it drops.
Why it matters: Materials come from specific sources: green chests (Classified Aberant), safes (Gold Stats), vending machines (Specimen), and bosses (Original Breach). Knowing this upfront saves you from randomly searching.
Example from the game: A quest asks for “8 Classified Aberant, 4 Gold Stats, 2 Specimen.” Clicking each reveals:
- Classified Aberant → Aberant Zone 2 packages (green chests)
- Gold Stats → Aberant Zone 2 instrument safe (safes)
- Specimen → Aberant Zone 2 vendor (vending machines)
Common mistake: Ignoring the item tooltips and grinding randomly. Fix: Spend 30 seconds reading tooltips. It cuts your exploration time in half.
Step 3: Plan Your Route to Minimize Corruption Waste
What to do: Before moving, mentally map where each material source is located. Prioritize clustering: hit all green chests in one area, then move to safes, then vending machines.
Why it matters: Corruption rises constantly while exploring and spikes when opening containers. Backtracking burns extra corruption. A smart route collects everything in one sweep.
Common mistake: Running back and forth across the map. Fix: Use faster travel methods (unlocked as you progress zones) and plan a circuit that visits all sources in one direction.
Step 4: Engage Enemies and Collect Materials
What to do: Use your normal team to defeat enemies you encounter. Open all containers (chests, safes, vending machines) along your route. Break special rocks marked with visual indicators to access hidden loot.
Why it matters: Enemies and containers both corrupt you, but they’re unavoidable. Combat is straightforward—no special mechanics. Your corruption rises whether you fight or not, so clearing enemies doesn’t cost extra.
Corruption cost breakdown: Simply existing in the zone increases corruption. Opening containers (chests, safes) adds to this. Defeating enemies doesn’t add extra corruption beyond existing in the space, so engage freely if enemies block your path.
Common mistake: Avoiding enemies to save corruption. Fix: Fight if they’re in your way. The corruption cost is the same whether you engage or walk around. Defeating them may also drop materials.
Step 5: Monitor Your Corruption Meter and Plan Your Exit
What to do: Watch your corruption bar. When it fills, the NPC automatically recalls you. Before that happens, gather your materials and move toward the safe zone.
Why it matters: You can’t stay indefinitely. The timer forces you to make decisions: leave now with what you’ve got, or push deeper and risk losing progress if you exceed the limit.
What happens at max corruption: The NPC pulls you out automatically. You don’t lose materials—they’re converted to quest progress and AUD crystals.
Common mistake: Pushing too far and getting recalled with incomplete quests. Fix: Early on, make shorter runs (3–5 minutes) and re-enter often. As you upgrade your corruption resistance, you can stay longer.
Step 6: Return to Safe Zone and Submit Materials
What to do: When recalled or when you choose to exit, return to the safe zone. Your materials are automatically tallied against active quests. Completed quests reward operation metrics and permanent upgrades.
Why it matters: Materials only count toward progress when you exit the zone. Staying longer doesn’t help if you’re full on inventory—you need to offload and return.
What you receive: Operation metrics (permanent progression currency), AUD crystals (converted from materials), and occasional auto-barrel pulls or standard banner permits.
Common mistake: Holding materials past inventory cap. Fix: Exit when your inventory is nearly full. One quick run beats one long run where you can’t pick up the last few items.
Step 7: Prioritize Secondary Quest Upgrades
What to do: After completing your first main quest, secondary quests appear. These reward permanent buffs. Prioritize in this order:
- Protocol Stabilizing Chip (first priority) — Increases corruption resistance by 50–400 per upgrade. This is your timer extension.
- Container Expansion Chip (second priority) — Increases inventory slots (starting at 10). Lets you carry more materials per run.
- Tactical Tempo Chip (third) — Recover SP by defeating enemies. Quality of life for longer fights.
- Portable Explosives (fourth) — Unlocks grenades. Needed to break special walls and access hidden loot.
- Nodule Conversion (fifth) — Converts materials into more AUD crystals. Increases your currency yield.
Why this order: Corruption resistance and inventory are the bottlenecks early on. Without them, you’ll spend more time in and out than exploring. Grenades are nice but not essential until you want to optimize loot. Currency conversion is a late-game efficiency boost.
Common mistake: Spreading upgrades evenly. Fix: Focus on Stabilizing Chip until you’ve got 1,000+ resistance. Then max Container Expansion. This compounds your efficiency.
Step 8: Unlock Focus Commissions and Prioritize Them
What to do: As you progress, you’ll unlock Focus Commissions—special timed quests that reward massive operation metrics (5,000 per completion, up to 10 quests per reset).
Why it matters: Focus Commissions are the fastest way to farm operation metrics. A single commission might reward what 7–10 normal runs would give. They’re permanent, not weekly.
Example: A normal run nets ~500 operation metrics. A Focus Commission nets 5,000. Doing 10 Focus Commissions (50,000 total) is worth 100 normal runs.
How to use them: Complete them immediately when they spawn. They’re not on a weekly reset, so there’s no penalty for rushing them.
Common mistake: Ignoring Focus Commissions and grinding normally. Fix: These are your fast-track to end-game rewards. Prioritize them above all else.
Step 9: Progress to New Zones and Unlock Faster Travel
What to do: Complete each zone’s main quest to unlock the next level. As you progress, you’ll gain access to faster travel methods (e.g., shortcuts, teleports).
Why it matters: Early zones force you to walk everywhere. Later zones have shortcuts that cut travel time in half. This makes longer runs sustainable and less tedious.
Zone progression: Zone 1 → Zone 2 → Zone 3 → Zone 4 (beta cap). Each zone is a new map with higher-tier enemies and materials. The story quests guide you naturally.
Common mistake: Trying to farm Zone 1 forever. Fix: Push through zones quickly. Zone 2 and beyond have better loot-to-corruption ratios once you’ve got upgrades.
Builds & Loadouts
Etchspace Salvage doesn’t restrict your team composition. Use your strongest operators—there are no special mechanics or gimmicks. It’s straightforward PvE extraction.
Recommended Approach
- Your normal main team: Whatever squad you use for story content works here. No special builds needed.
- Grenade access (unlocked via quest): Once you unlock grenades, carry them. They break special walls that hide loot and can damage certain enemy types.
- SP recovery (Tactical Tempo Chip): Once you unlock this buff, longer fights become easier. You’ll regenerate SP by defeating enemies, allowing more skill uses.
If you’re under-geared: Make shorter runs and prioritize upgrading your corruption resistance and inventory space. You don’t need better operators—you need more time and space to explore. The mode scales with your upgrades, not your squad level.
Farming Loop / Route Efficiency
Early Game (Zones 1–2, Low Upgrades)
Expected yield per run: 300–500 operation metrics (varies by quest completion).
Loop time: 5–10 minutes per run (you’ll need to exit frequently due to low corruption resistance).
Optimization: Make multiple short runs instead of one long run. Early on, your corruption meter fills fast, so you’ll get recalled before filling your inventory anyway. Use each run to target one material type (all green chests, or all safes), then exit and re-enter.
Mid Game (Zones 2–3, Medium Upgrades)
Expected yield per run: 800–1,500 operation metrics.
Loop time: 10–15 minutes per run.
Optimization: You now have enough corruption resistance and inventory space to complete most quests in one run. Plan your route to hit all sources efficiently. Use faster travel methods (unlocked by zone progression) to reduce backtracking.
Late Game (Zones 3–4, Full Upgrades)
Expected yield per run: 2,000–3,000 operation metrics (excluding Focus Commissions).
Loop time: 15–25 minutes per run.
Optimization: Focus Commissions become your primary farm. Each Focus Commission nets 5,000 metrics. Complete 10 per reset, then do optional farming for remaining rewards. Use grenades to access all hidden loot.
Efficiency Tips
- Material tracking: Click items in your quest log to see exact sources. Plan a circuit that visits each source type in sequence.
- Inventory management: Exit when your inventory is 80% full. One full run beats one long run where you can’t pick up the last few items.
- Corruption timing: Early on, exit before your meter fills. You’ll get recalled anyway, so leave proactively and re-enter fresh. This prevents wasted time standing around waiting for the NPC.
- Upgrade priority: Every upgrade to corruption resistance and inventory space directly increases your farming efficiency. Prioritize these before grinding for loot.
- Focus Commissions: These are 10x more efficient than normal farming. Do them immediately when they appear. They’re permanent, not weekly, so there’s no downside to rushing them.
Troubleshooting & Common Mistakes
- Corruption meter fills too fast: You haven’t upgraded Protocol Stabilizing Chip enough. Make shorter runs (3–5 minutes) and prioritize this upgrade above all else. Even 50–100 points per upgrade helps.
- Inventory fills before completing quests: Upgrade Container Expansion Chip. Early on, you’ll need to make multiple runs per quest. This is normal—don’t fight it.
- Can’t find a specific material: Click the item in your quest log to see its exact source. If it says “Aberant Zone 2 packages,” it’s in green chests only. Check the correct zone and container type.
- Locked areas blocking my path: Locked zones unlock after you complete the current zone’s main quest. You can’t access them early. Focus on accessible areas first.
- Getting recalled with incomplete quests: This is normal early on. Make shorter runs, exit proactively, and re-enter. Each run counts toward the same quest, so multiple trips are expected.
- Grenades not helping much: Grenades break special walls that hide bonus loot. They’re not essential for farming main quest materials, but they’re worth using for 100% completion. Unlock them via secondary quests.
- Farming takes forever: You’re likely ignoring Focus Commissions. These reward 5,000 metrics per completion (vs. 500 for normal runs). Do them immediately when they appear. They’re 10x more efficient.
- Can’t hold enough materials for a quest: Your inventory is too small. Upgrade Container Expansion Chip. Quests asking for 8+ items require multiple runs or higher inventory caps.
Advanced Tips & Time Saves
- Pre-plan your route before entering: Spend 30 seconds reviewing the quest log and clicking items to see sources. A smart route saves 3–5 minutes per run.
- Use faster travel methods aggressively: Once unlocked, these shortcuts cut travel time in half. Don’t walk back to the safe zone—use them.
- Combine material collection with enemy farming: If a quest asks for items from bosses, plan your route to engage bosses last. This way, you’re not backtracking after combat.
- Grenade walls often hide bonus materials: If you see a cracked wall, bomb it. The loot inside often includes materials for secondary quests, which give permanent upgrades.
- Convert materials to AUD crystals efficiently: Materials you collect don’t just count for quests—they convert to AUD crystals automatically. The Nodule Conversion upgrade increases this conversion rate. This is a late-game optimization but worth noting.
- Don’t hoard upgrades—use them immediately: Some players save upgrades for “later.” This is a trap. Each upgrade you earn immediately increases your efficiency on the next run. Apply them right away.
FAQ
Q: Can I get locked out of Etchspace Salvage if I don’t complete a quest in time?
A: No. There’s no gatekeeping or locking. You can enter and exit as many times as you want. If you get recalled before finishing a quest, simply re-enter and continue where you left off. The quest progress carries over.
Q: Are operation metrics weekly or permanent?
A: Permanent. You accumulate operation metrics indefinitely. There’s no weekly reset. Focus Commissions are also permanent, though they may have their own reset cycle. Either way, there’s no urgency—you can complete them at your own pace.
Q: What happens if I exceed my inventory limit?
A: You can’t pick up items once your inventory is full. You’ll need to exit, offload your materials, and re-enter to continue collecting. This is why Container Expansion Chip is a priority upgrade.
Q: Do I lose materials if I get recalled by the NPC?
A: No. Materials are automatically converted to quest progress and AUD crystals when you exit. You never lose anything—it all counts.
Q: Are there new zones beyond Zone 4?
A: In the beta, Zone 4 was the cap. The game told players “to be continued” and blocked access to further zones. On the full release, there’ll likely be more zones, but we don’t know how many or when they’ll be available.
Q: Do I need a specific team composition to succeed?
A: No. Use your strongest operators—there are no gimmicks or special mechanics. It’s straightforward PvE. Your team’s power matters far less than your upgrades (corruption resistance and inventory space).
Quick Reference Card (Screenshot This)
1. Enter zone
2. Read quest log, click items to find sources
3. Collect materials from: green chests, safes, vending machines, bosses
4. Fight enemies (doesn’t cost extra corruption)
5. Exit when inventory is 80% full or corruption meter fills
6. Materials auto-convert to quest progress + AUD crystals
7. Re-enter and repeat UPGRADE PRIORITY:
1. Protocol Stabilizing Chip (corruption resistance) → target 1,000+
2. Container Expansion Chip (inventory slots) → target 35+
3. Tactical Tempo Chip (SP recovery from kills)
4. Portable Explosives (grenades for hidden loot)
5. Nodule Conversion (extra AUD crystals) FOCUS COMMISSIONS:
– Appear as you progress
– Reward 5,000 operation metrics each (vs. 500 for normal runs)
– Do them FIRST when they spawn
– Permanent, not weekly
– Max 10 per reset EFFICIENCY TIPS:
– Short runs (5–10 min) beat long runs early on
– Plan your route before entering (30 sec saves 3–5 min)
– Exit proactively; don’t wait for NPC recall
– Grenades unlock via secondary quests—use them on cracked walls
– Materials auto-count on exit; you never lose them ZONE PROGRESSION (Beta):
Zone 1 → Zone 2 → Zone 3 → Zone 4 (capped)
Each zone unlocks faster travel methods MATERIAL SOURCES:
– Green chests → Classified Aberant
– Safes → Gold Stats
– Vending machines → Specimen
– Bosses → Original Breach
(Click quest items to confirm sources) CORRUPTION METER:
– Starts ~300 max (low)
– Rises constantly while exploring
– Spikes when opening containers
– Combat doesn’t add extra cost
– Auto-recall when full (no penalty)
– Upgrade Stabilizing Chip to extend timer INVENTORY:
– Starts 10 slots
– Separate from main inventory
– Upgrade Container Expansion Chip to increase
– Exit when 80% full to avoid wasted space
Conclusion
Etchspace Salvage is a refreshing extraction mode that rewards exploration and smart planning over combat skill. The key to success is understanding that upgrades matter more than grinding. Prioritize corruption resistance and inventory space early, and the mode transforms from tedious to engaging. Focus Commissions are your fast-track to end-game rewards—do them immediately when they appear. Make shorter runs, plan your routes by clicking quest items, and don’t be afraid to re-enter multiple times. The mode is designed for repeat visits, not marathon sessions. As the creator noted, this could expand significantly at release and beyond, making it a worthwhile investment of your time now.